|
|
Post by Toothbrush on Nov 7, 2005 18:18:18 GMT -5
Encountered the first problem with my M14 today. The problem came from the bolt assembly. The part that connects the rotating bolt to the cocking level came apart. This part is actually two parts, a washer and circle "T" rod (see pic). 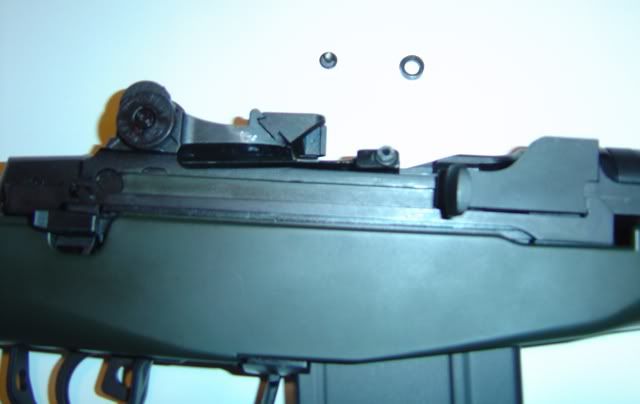 I was able to remedy the situation by applying some super glue to the bottom of the rod and inserting it (with the washer) back into the whole in the rotating bolt. 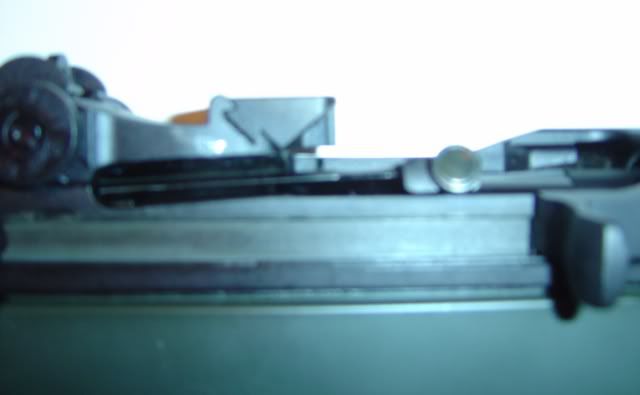 After that it is just a matter of realighning the rotating bolt and lever and ensuring everything is properly lined up. Overall the problem isn't huge however I am a bit disapointed that it happened. |
|
|
|
Post by MayhemXXXFrosty (AndrewMp5k) on Nov 7, 2005 18:45:19 GMT -5
Well, let me tell you. I was shot with Enkidu's M14 at yesterday's SEMIA game at Romulus. Boy did it smart! And I give major ups to Enkidu, the sneaky devil that he is, was hiding behind a bunker, and since I was running for my life, ran past him and jumped to a bunker right in front of him! Him, still bewildered that I did this, wasn't sure where I was. And then I had to poke my head around, see him, shocked, and get one shot off wit my M3 Shorty, before he ran around and shot me numerous (though on accident) times with his M14.
Very well played Enkidu. Great gun you have there.
|
|
|
|
Post by Enkidu on Nov 8, 2005 22:17:28 GMT -5
Yeah, you have to handle that bolt assembly a bit gingerly. Sure, it's all metal, but it's a thin zinc or aluminium alloy, so you can't just beat it all to shit. I've noticed that using a light coat of thicker (like 15 or 20 Wt.) silicone lube helps keep it moving smoothly. When grit gets in there, I can feel the slide-y bits jumping around in a most disconcerting manner. It's not cheap plastic, but it's not a strong as the real thing, either. Good to know you can fix it when it breaks! In other M14 news, I've begun my real wood stock project. Its a long way from being done, but I thought I'd update with some of the knowledge I've learned the hard way. Y'know, so anyone else who attempts this can learn from the mistakes I've already made, and thence to avoid them. Essentially, you need a Big Red M14 stock. The real-steel receiver is much thinner than the Tokyo Marui gearbox, so much of the modification work involves removing wood material from the inside of the wood stock. The second part is hollowing out the butt. Luckily, there's already holes in the butt for cleaning kit pieces and other storage, so this part is simpler. Here are other things you should know: - A Dremel tool is absolutely necessary. In fact, it could be the only tool you use. It's just slow. I've used a few different shapes of "high speed cutter" bits. You can remove wood from the side and the point of these bits, so they're best at hollowing stuff out. A flex-shaft attachment is necessary as well, or else you're never going to get the bit far enough into the stock.
- Chisel work may be useful. The septum in the butt separating the two storage holes is a pain in the ass to remove. A bit of chiseling can save a whole lot of Dremel work in a very tight, vision-limited space.
- A hammer drill with hole saw bit would be very useful. You'll need to make a hole for the motor through the hand-grip. Dremeling this much wood out is possible but very tedious. Save time by using a hole saw bit with a high-speed power drill. The motor and its mount are just about 1.5 inches wide, so use a 1.5 inch hole saw. It is absolutely critical you get the angle right, or else it won't fit. Also, it's better to drill just a tiny bit at a time, fitting the motor in each time to check for alignment before continuing.
- A small coping saw, or better yet, a wire saw might be useful. The small size of these tools lets you work with them in the small spaces of the stock.
- Do not use a regular wood saw. I made the terrible mistake of using a small toolbox saw to remove a large chunk of wood from the inside left of the receiver area of the stock. Damn, it was fast, but I did not remember the following tip and will have to put some repair compound on the stock before I'm done.
- Look at the TM stock constantly. Follow its design - every idiosyncratic cut and feature. Otherwise, the internals will never fit. Anticipate the consequences of every cut - you can't go back!
- Don't make the butt hole (oh, man...) any larger than necessary. Make it just slightly smaller than is needed for the wires and the battery you intend to put in there. Then finish enlarging the hole with a flat file and crescent file. If you don't do this, the battery will be too loose and rattle around in the butt annoyingly.
I'll keep updating this thread with my progress on the stock conversion process, and then sexy pics upon completion. I've spent $50 (not counting tool purchases investments) and three hours of work so far. I anticipate another six to eight hours of labor. Thankfully, that has no cost because my time is worthless. In any case, it's a whole lot less expensive than the alternative. |
|
|
|
Post by Enkidu on Nov 18, 2005 22:42:23 GMT -5
Enkidu's M14: Update Number 7!!If I may, I'd like to start this one off with some gratuitous imagery, Vietnam style:  I finally got the chance to pick up an M14 hi-cap. Originally, I planned to run with standards, but their total unavailability hampered those plans. As a stopgap until 70-rounders come back, I picked up a brand new Tokyo Marui hi-cap. Stated capacity is 440 rounds, and I believe it. The hi-cap mag is a fine piece of kit. The mag body is made of a painted aluminum alloy, same as the standards.  Winding wheel rotates to the front of the gun, holding perhaps 60 to 70 BBs per complete wind.  The best part would have to be the loading door.  There's a spring-loaded latch - push it to the right (in this pic) and it rotates open. There's a nice positive seal to it, and it should be easily accessible with gloves on.  ------------------------------------------------------------------------------------------ ------------------------------------------------------------------------------------------On a completely different topic, my real wood stock conversion is finished. Finished as in over. Progress was slow but steady until...well...see for yourself:  A wildly gyrating wood boring bit smashed through the side of the grip. There were other problems, like the Dremel slips you can see on the left side of the pic. Those were minor - a little stain would hide those. Worse was the situation in the grip, where the motor goes. I started the hole with a Dremel, and it was rough going. When test fittings showed the hole not large enough, I tended to over-enlarge. The grip hole got larger and sloppier, eventually leading to the penetration shown above.  In this shot you can see how the motor hole goes all the way through the butt/battery compartment, as well as the other areas where large amounts of wood needed to be removed. At the time I ruined my $50 stock, I was perhaps two or three hours from project completion, and well over nine hours of work in. Ah, well. Live and learn, right? Perhaps some others with more skills, better tools, and longer patience than I will complete a similar project. I do not feel up to spending another 50 bucks on a stock at this point, even though what I've learned so far would surely result in success after significantly less effort. Other projects await!
|
|
|
|
Post by Toothbrush on Nov 18, 2005 23:18:02 GMT -5
Nice pic, and nice info on the M14 hicap.
Sorry hear about your real stock conversion however.
|
|
|
|
Post by Jacko on Nov 19, 2005 0:42:57 GMT -5
enki, Snoopy has almost completed the wood stock I gave him. He's told me that all he has left is to finish the battery compartment as a large battery doesn't yet completely fit and futz around with the metal magwell bit. We're going to refinish the stock but I'll take pics before hand after the previously mentioned work is completed.
|
|
|
|
Post by Enkidu on Nov 19, 2005 3:02:45 GMT -5
Curse Snoopy's mad skills! Glad to see that it can be done. The biggest problems I ran into were related to the angle at which the grip hole was drilled. Any tips on how Snoopy solved this problem?
|
|
|
|
Post by Jacko on Nov 19, 2005 16:50:37 GMT -5
I believe he drilled a small pilot hole and then used a spade bit with an extension, but I couldn't say for sure.
|
|
|
|
Post by Livonia on Nov 21, 2005 16:16:59 GMT -5
enk, you should have tried a drill press  |
|
|
|
Post by Enkidu on Nov 21, 2005 17:06:07 GMT -5
I thought about using a drill press, even though I don't own one. The problem with that is that I'd be drilling down into the stock at an angle that would interfere with the press body. Plus, the ability of a hand drill to be positioned at any angle makes it much better for securing the stock while drilling. I can only imagine the goofy shit required to clamp down a meter-long chunk of wood at just the right angle for the drill press to drill directly down.
I'd chalk my failure at this task to inexperience with woodwork and impatience. I was so close to completion that my careful-but-slow techniques were tossed out as my desire to finish the damn thing grew.
|
|
|
|
Post by Toothbrush on Nov 22, 2005 21:28:58 GMT -5
Somewhat coping enkindu, this is "Toothbrush's 3rd Update" This update will cover the installation of a bipod adapter and bipod onto a TM M14. I recently received my King Arms M14 Bipod adapter. The adapter comes in two pieces, a mount for the bipod (with screw) and a nut that mounts inside the M14.  The first step in the installation is to detach the M14 stock from the receiver/barrel as outlined on pages 25 & 26 of the TM M14 manual.  Once the stock and receiver/barrel are separated, the installation of the nut is next; Tokyo Marui already has an adapter hole in it (to the front of the sling mount). Simply place the nut inside the hole on the inner portion of the stock. As you can see in the picture below, the nut is not perfectly circular. One edge is flat, this edge goes toward the front and mounts flush to the rib in the stock.  Next, screw the "bolt" part of the adapter up to the nut and tighten. Ensure that the holes in the adapter are perpendicular to the barrel so that you will be able to mount your bipod properly.  Finally, reassemble and mount your bipod of choice.   |
|
Kiowa
New Member
 Might Makes Right
Posts: 22
|
Post by Kiowa on Nov 24, 2005 4:50:59 GMT -5
Immensely enjoying this thread, please continue to keep us posted! This is a great little knowledge base yall are forming. Some very cool ideas.
|
|
|
|
Post by ajtriple2 on Nov 26, 2005 9:59:56 GMT -5
Has anyone tried upgrading a TM M14 yet? I know that the middle gear is much smaller, similar to the Thompson. I am curious to see how this holds up to 400+ fps upgrades.
|
|
|
|
Post by Livonia on Nov 26, 2005 12:37:12 GMT -5
My G&G M14 has now held up to 470'ish Fps and im just sending it to devil dog soon so he can throw some gears in it for me. Im glad i didnt get a lemon. ;D
|
|
|
|
Post by Jacko on Nov 26, 2005 13:13:58 GMT -5
Has anyone tried upgrading a TM M14 yet? I've got tentative plans to upgrade mine near 500 but I'll probably wait until Systema or HurricanE release an FTK. I don't believe anyone makes reinforced replacement parts for all the internals yet. |
|