fuzzywolly
New Member
 Vegetation is gold
Posts: 901
|
Post by fuzzywolly on Apr 16, 2011 13:45:31 GMT -5
Wrote this up over on the sniper forum, but thought this would benefit some people here as well. There has been a few questions about the UTG and being able to provide answers with this link would be beneficial. Hope this helps some people out. And sorry for the multiple posts in this thread...I exceeded the word limit multiple times.  A few months ago, I wrote a big thing about buying and upgrading an l96. Its intentions were to help a new person pick out what l96 they should buy, and how to upgrade it. Along the way, I hinted at the mk96 and its stock performance. However, I did not go into great detail on this. So I decided to do this right now  Please note that some of the stuff has been talked about in both of my threads, but this is for a detailed explanation of the mk96. This review will touch on the mk96 as a stock rifle, with no upgrades, mods, or any of that crazy stuff. In this review, there will be pictures on dissembly, along with pictures to describe each part. This will hopefully keep you from becoming bored of my long post So get, ready, here we go. UTG mk96 Review
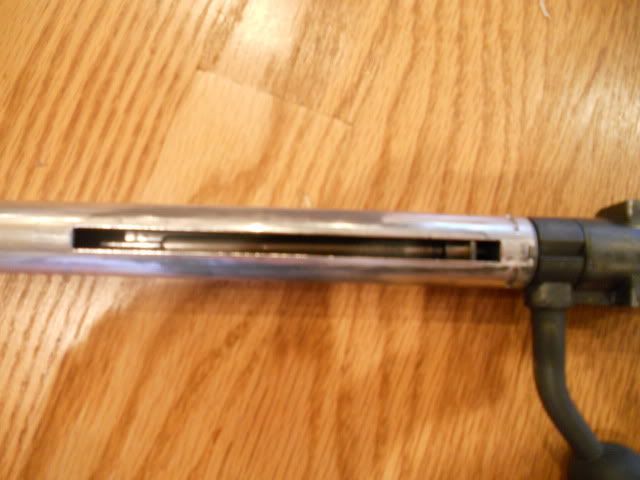
Out of the box performance and first impressionsThis is the most important part for those who are trying out the role and are unable to borrow someone's rifle to test if they like the bolt actions. The mk96 is affordable and solid as a stock rifle. The barrel is sturdy and is held in place without any fllimsyness. But the stock is made of a weak plastic, making the rifle feel like a toy. This is one of the cons of buying a clone rifle.  Often a scope package is included with two magazines and a cheap flimsy sling plus a handy speedloader. While not necessary, the speedloader makes loading the magazine easier. The rifle features a nice rail for attaching scopes and optics, but remember some rail rings are also necessary.  Pulling the rifle out of the box, I noticed it came in two pieces. The stock and the barrel assembly. It is pretty self explanatory and can be assembled with two screws that are located inside the stock by screwing them in with the included allen wrench. Once this is done, it is time to load her up and see how she shoots. After firing a few shots with .28 bbs, I noticed there was a major curve of the bb. Adjusting the hop up will not fix this, due to the fact that their is only one arm that can be adjusted, unlike the pdi hop up chamber, featuring two adjustable arms. Most likely, it was a problem with the hop up chamber, but the use of some madbull .4s helped straighten out the curve of the bb. By using the other allen wrench used to adjust the hop up, located in front of the magazine catch, my shots were dead on. Next, after figuring out how to get the shots shooting straight, I zeroed in the scope. I successfully was able to hit a small round target about 6inches by 6 inches 3/5 times from 120 feet away. After further shooting, I noticed hitting a torso sized target 150 feet away was no problem, but after that, shots began to stray away flying all over. Even occassionally, a flyer would occur, resulting in a very ugly shot. This disappointed me, but I concluded it was able to shoot more accurately than a stock aeg. However, the mk96 was unable to outrange any aeg. Thus, to use this rifle in the field would create a utter disadvantage. With only slightly better accuracy and no more range than an aeg, this rifle stock is not going to perform great on the field. Firepower would most likely win this battle, and usually results in the mk96 user, to drop the role of the sniper, and to go pick up a aeg of some sort. Yet, some stick with it, and find themselves able to practice their skills and to use camoflauge such as a ghillie to their advantage. They find themselves becoming more stealthy and understand the rifles limits. By being able to get in range unnoticed, this rifle is quiet and able to take accurate consistent shots to a certain point. The sniper realizes he enjoys and is quite good at the role. This is where upgrading the rifle will really help with performance of this clone. Overall rating: 6/10 Reason: Fliers here and there, and range is limited Externals and FeelThe Stock: This is probably the biggest con to purchasing the UTG mk96 over the higher end rifles. The stock is light and feels like a toy. Despite any internal upgrade and great performance, the user will always have that toy like feeling when they hold the rifle. Whether one can get used to it, its up to you. Personaly, I have overcome this feeling, and no longer think of the rifle as a toy. Its plastic stock might not be able to hold its own against a ten foot fall, but without a doubt, if you take care of your rifle, the occassional drop or slip in a game will prove no harm. The stock comes in a few different colors, including digital, od green, and black. But I recommend a paint job of some sort, to get rid of the shininess of the stock, which offers no camoflauge, and might in fact give you away. And if you are going digital, the chessyness of the pattern is far to bad to look at. See below...   The Front end: The Front end: At the front of the rifle, a mount is present, which gives the user the ability to attach a few accessories. Most only use it for mounting a bipod. Nothing special about the mount, it wobbles alittle but nothing to cry home about. 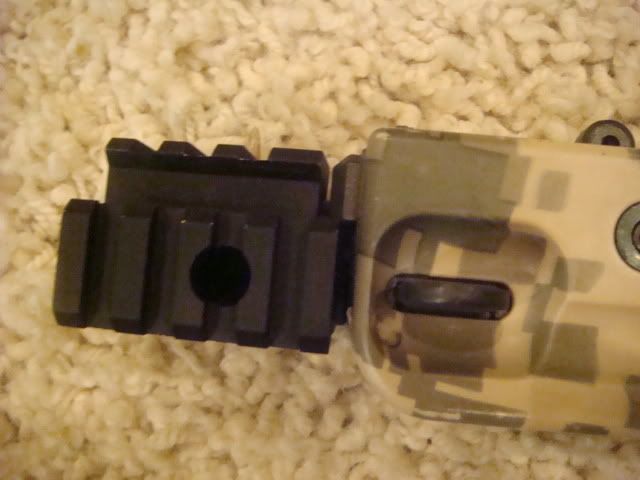 The outer barrel The outer barrelThe outer barrel has served me well, and I have concluded there is no need to replace this at all. Its durable enough to take a beaten, and only a few scratches that chipped the black paint are noticeable. The orange tip however, is a pain, but with a hair drier, you can melt the glue off, and simply pull. This will remove the orange cap, revealing a black metal cap, that is threaded to the outer barrel. 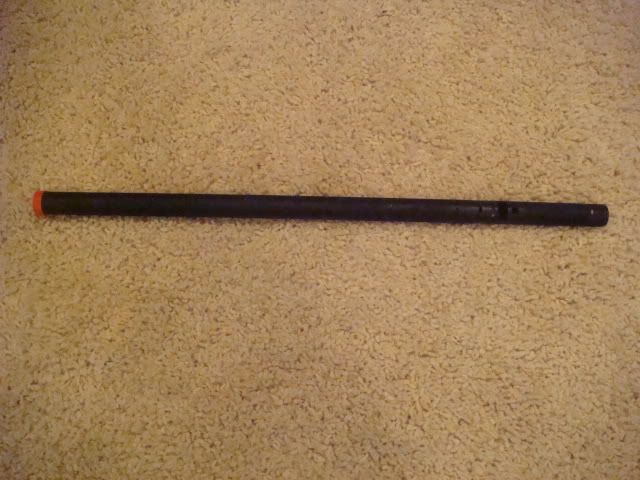 You will notice the outer barrel has a few holes towards the one end. This is for the attachment of the hop up chamber and inner barrel. A further explanation will be explained later.  Bolt handle Bolt handle
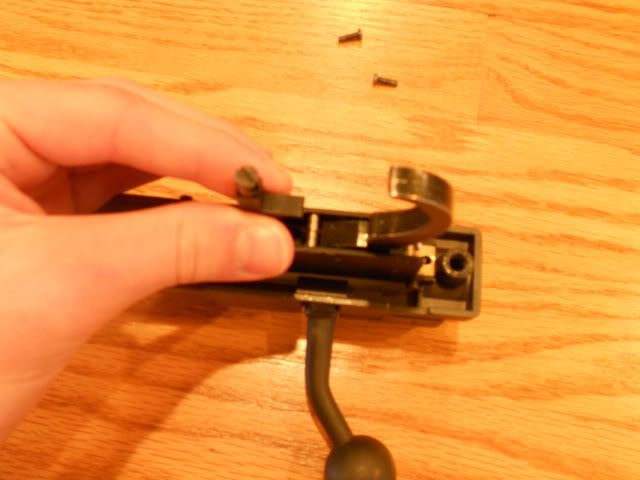
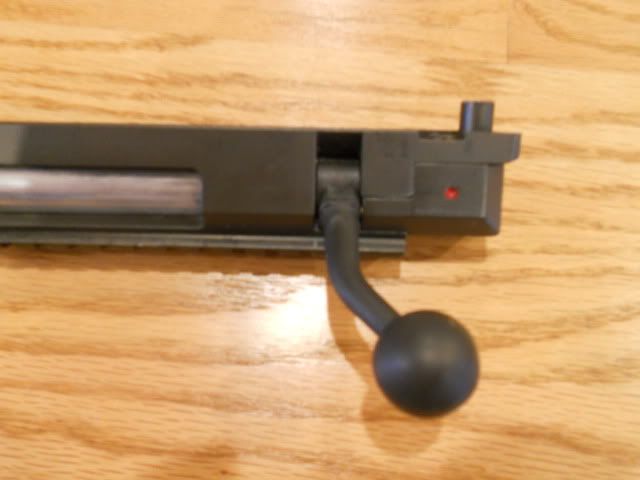
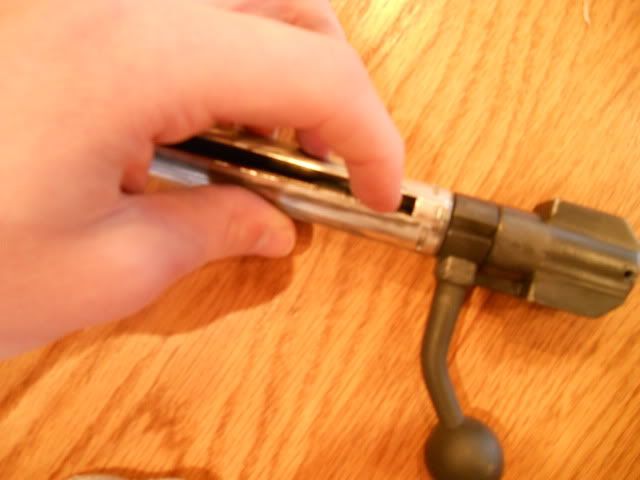
The bolt handle has been known to snap or break on people during its use, but so far, mine has held up exceptionally well. Only the black paint has chipped off of it, giving it that lovely worn look.  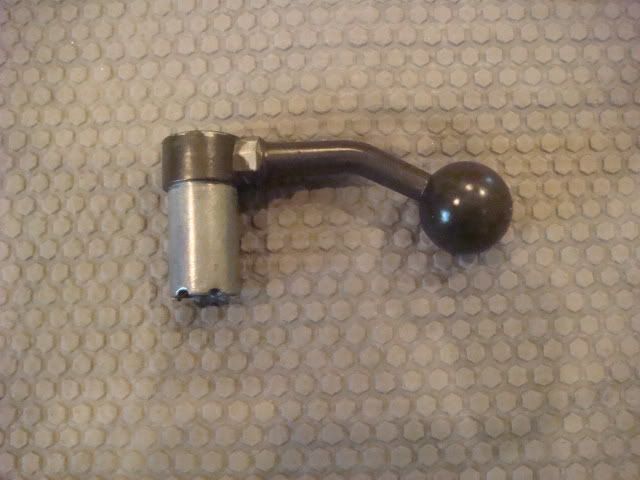 To attach the bolt handle to the cylinder, one must realize what needs to be done. There is a small metal piece that is often overlooked when disembling and reasembling the bolt handle. 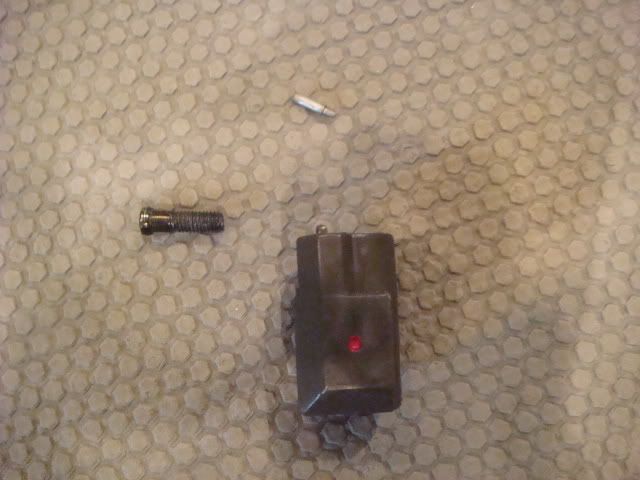 To start off, put the small metal thingy in the small hole of the bolt handle, keeping the fat end at the beginning point.  Next, take the metal piece with the red dot and line up the hole in the bolt handle (with the small metal piece) and stick it together.  Next, stick in the end screw.  Now you must realize that this is typically done while the rifle is together. This leaves you with only having to stick this onto the cylinder, and tightening the end screw clockwise. Now you are finished.
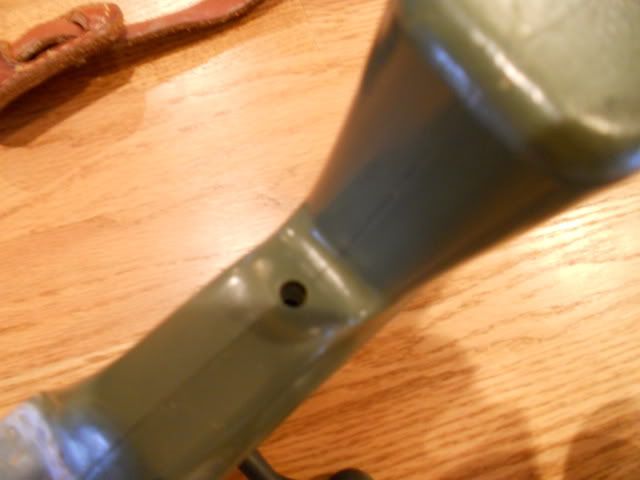
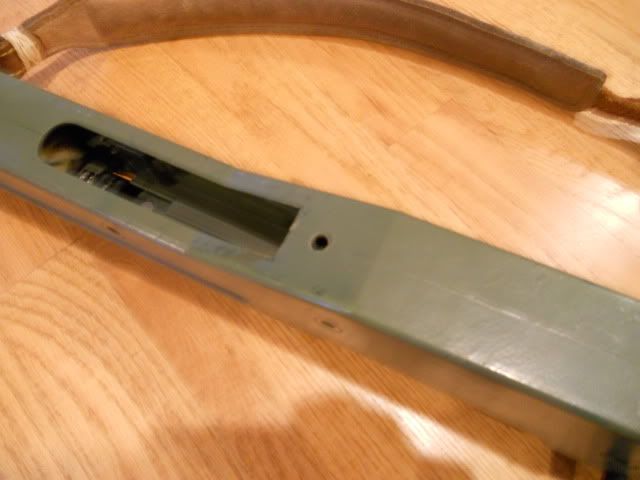
The cheek restNothing special, only thing is that I sanded it down, to get rid of the shine. Most people would paint the cheek rest, but I like the black and green look that I have on my rifle. Keep in mind, the digital camo stock is just an extra that I have The recieverA solid piece of metal, and only a small amount of wear has occurred. Not exactly something you would want to drop, but so far it has proved to be very durable. O, and ignore the scope rings...  Here is a picture of where the small hex screw goes, that keeps the outer barrel attached to the receiver. Remember to take this out before disembling...   Here is a picture of where the trigger box will go. 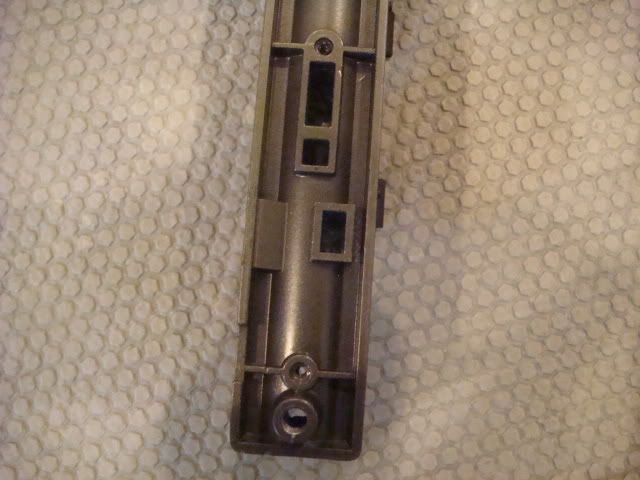 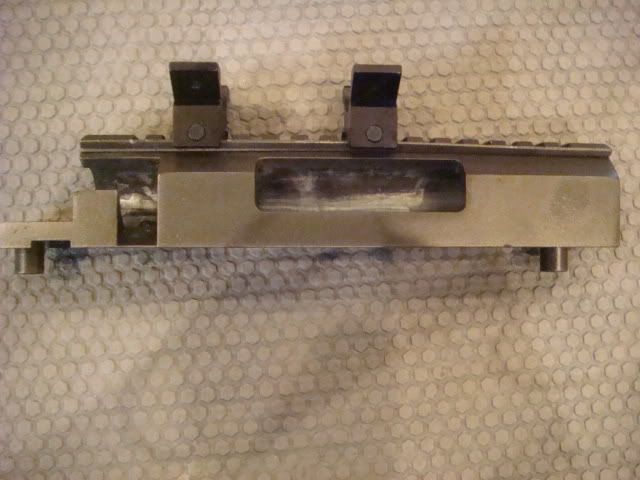
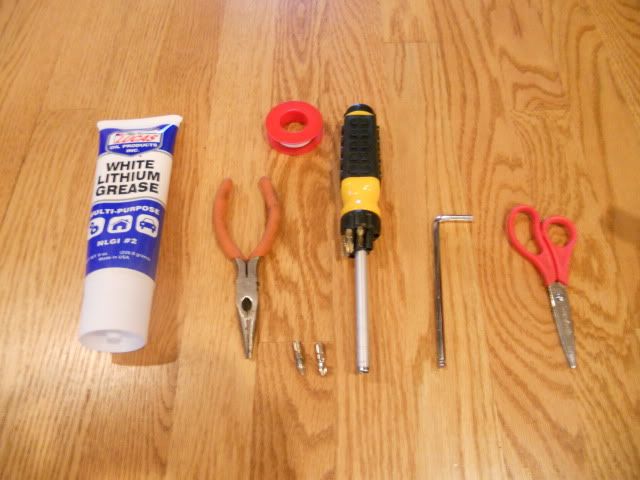
Others:Here is something that I would take out of the stock if I were you. 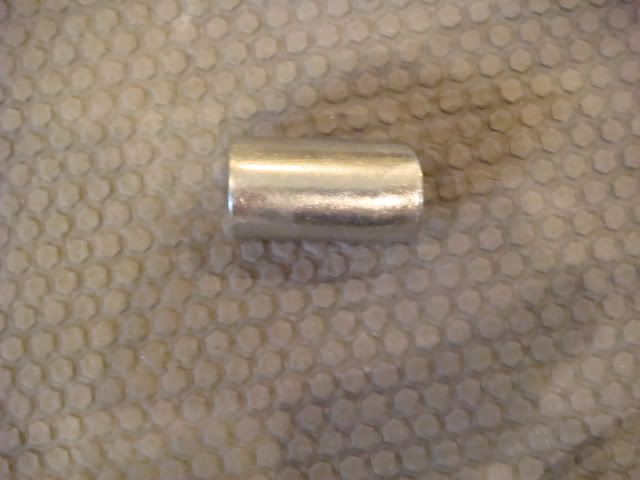 Tools for disembly 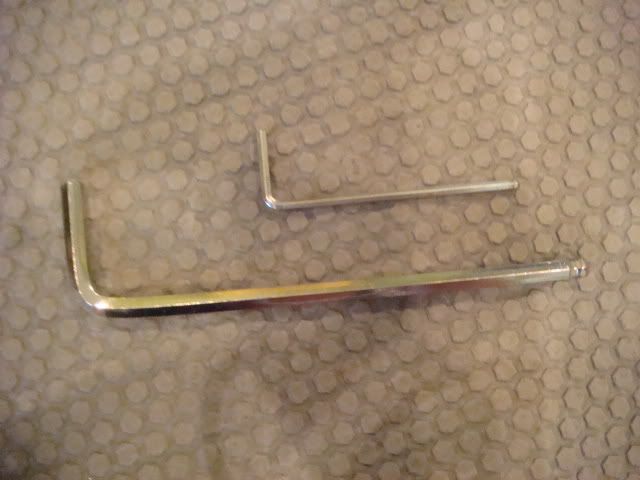
|
|
fuzzywolly
New Member
Vegetation is gold
Posts: 901
|
Post by fuzzywolly on Apr 16, 2011 13:45:50 GMT -5
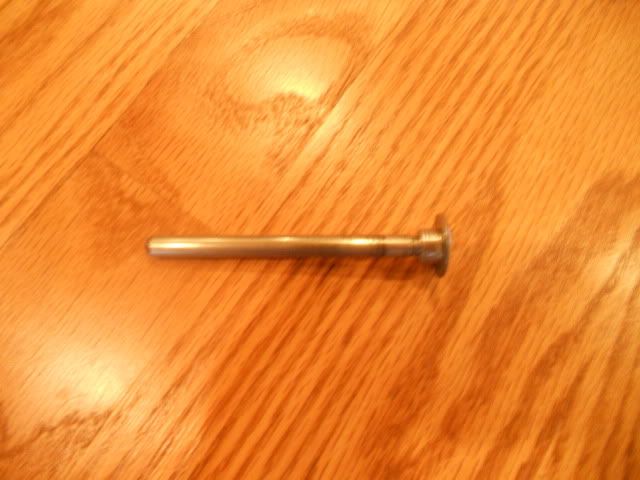
InternalsThe trigger boxThis is a major flaw. Two of my friends trigger boxes broke rather fast. I mean, they literally just snapped into pieces, resulting in a no longer useful trigger box. It was not the sears such as the trigger sear, piston sear, and spring guide stopper, but it was the plastic shell itself. It simply shattered. Lucky for me, mine has held out long, and has been reinforced with a pdi trigger sear, making pulling the trigger soooo easy. Pictures of broken trigger boxes 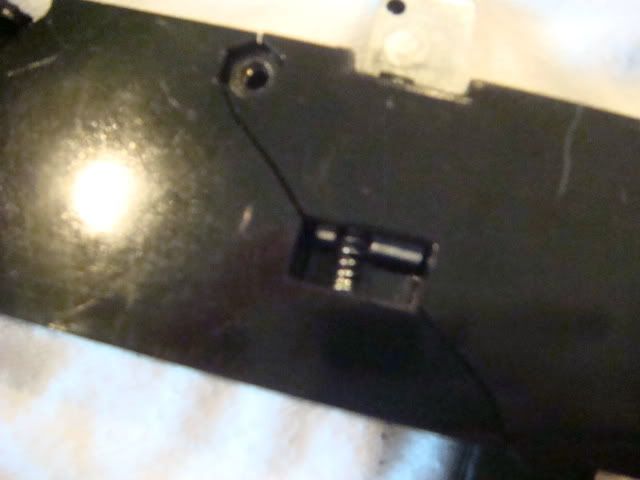 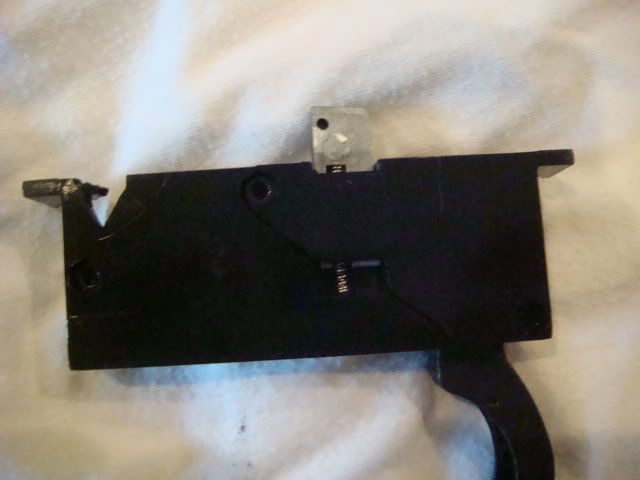 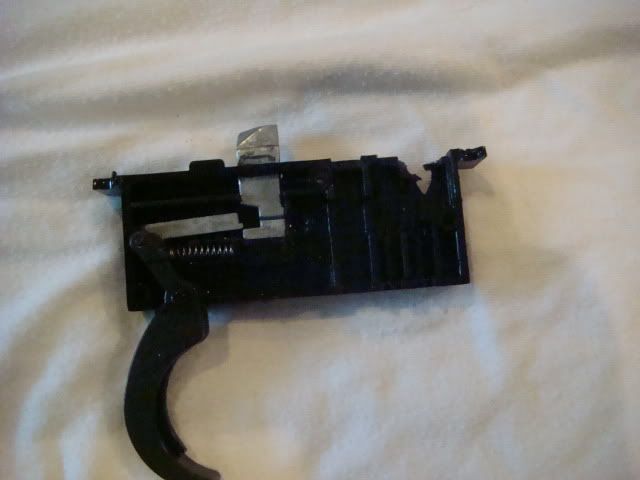 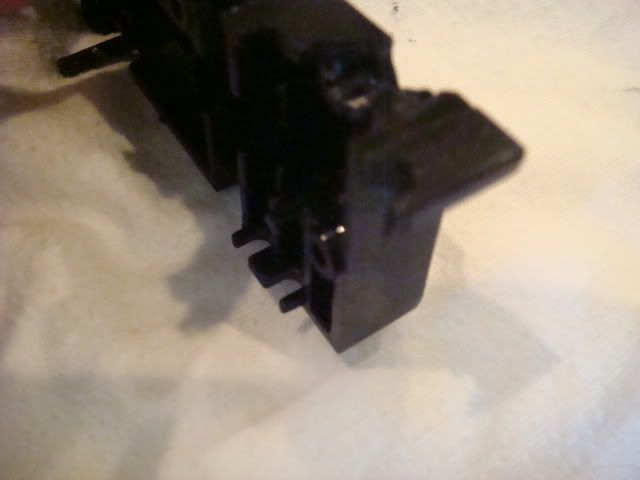 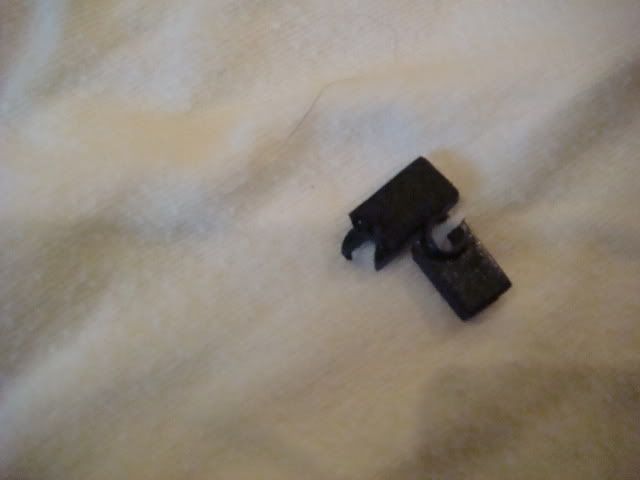 The cylinder The cylinderAfter two years of use, no damage has been done, and it has held up nicely. Typically, the cylinder is all greased up when you take it out of the box when you first get it. This creates somewhat a mess, but it keeps the motion of cocking the rifle nice and smooth. 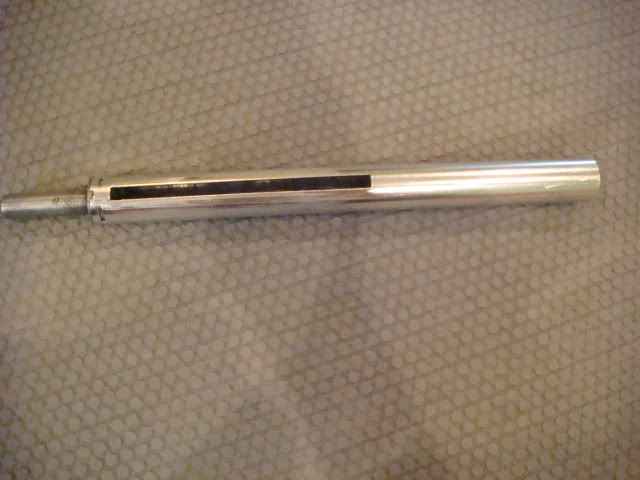 Not sure what this little thing is called, but all I know is that it goes through the spring guide and to the end where the bolt handle end screw is. Its important, so dont lose it. 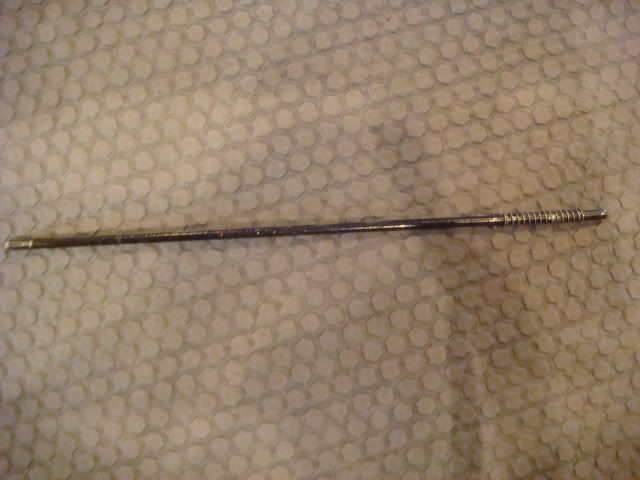
The spring guideIts plastic, just like you would expect. Could easily be snapped in half with no effort at all. No need to worry about it when you are handling it, as its not that crappy. But just make sure not to bash it around, as it is very very cheap plastic. 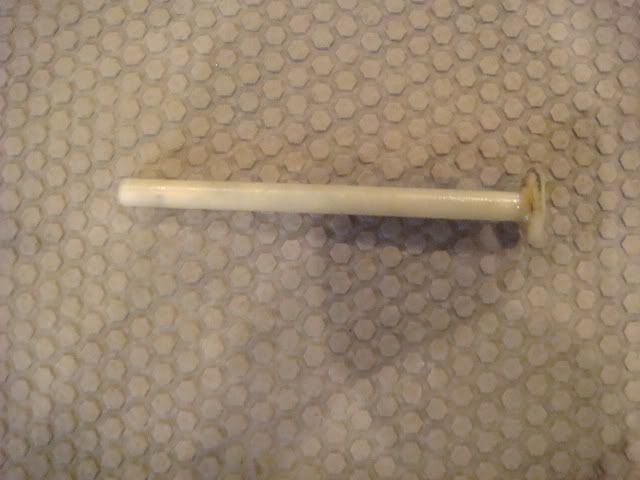 Piston PistonSame as the spring guide. From the looks, it seems like a lot of compression could be lost here. The o ring is flimsy and a lot of air could escape out of it. This is where the DIY mods come in handy. 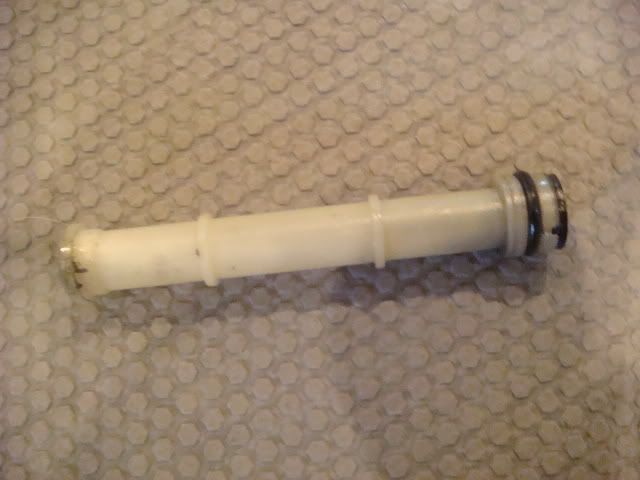
Cylinder headThis is one of my favorite parts of the rifles internals. The cylinder head is what I believe brass, and is strong and durable. If I did not have an upgraded cylinder head, I would have no doubt that this stock cylinder head could hold its own with a stronger spring. Only problem is that most of these cylinder heads come glued to the cylinder. Mine did not, but just make sure if yours is, to melt the glue and then twist it off with the appropriate tools. I will explain more later. 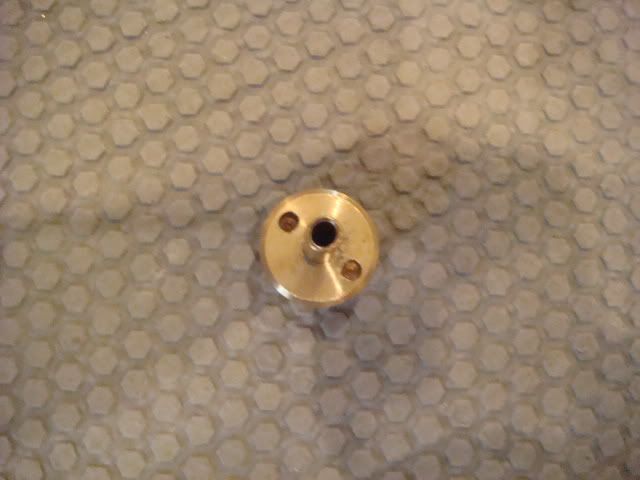 The spring The springThis is the downfall of the rifle. Sure it makes it shoot really hard, but I would rather have a 400 fps rifle that does not have as much wear on the internals, then have a 500 fps rifle that could break at any moment. Most look at fps as everything, but I just look at it as something ;D Like I love to say, when do you upgrade the spring??? LAST!!!!!! Also, it has been stated that this spring wears itself down fast, resulting in a lower fps output. This in my opinion, for a stock rifle, is a good thing.
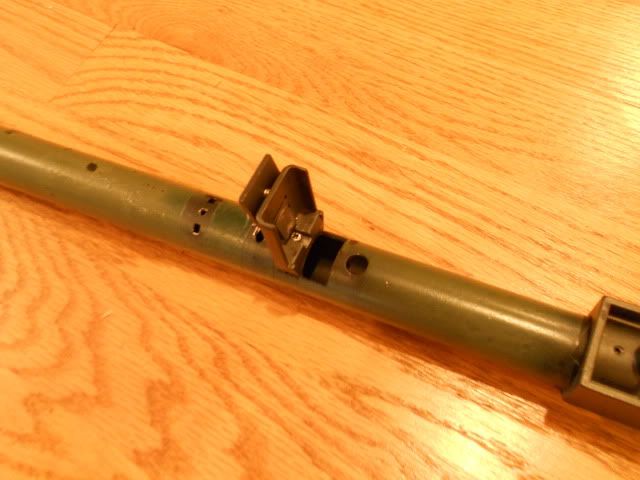
Installing the cylinder partsFirst, place the following inside the cylinder. Then take the spring guide and stick that right in there. 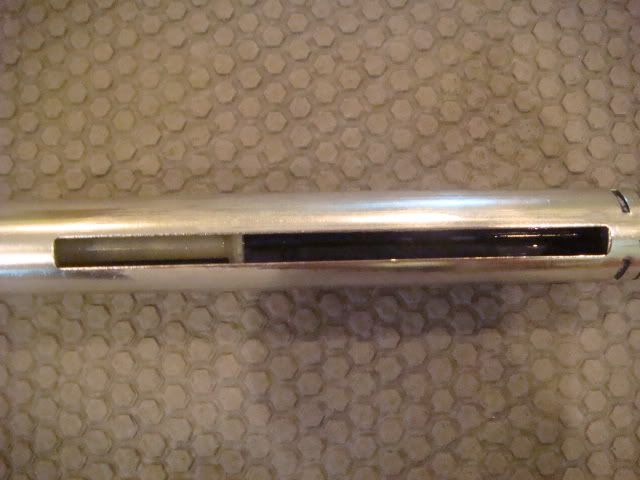 Just slide the spring guide down with your finger to the very end. Now stick in the spring. 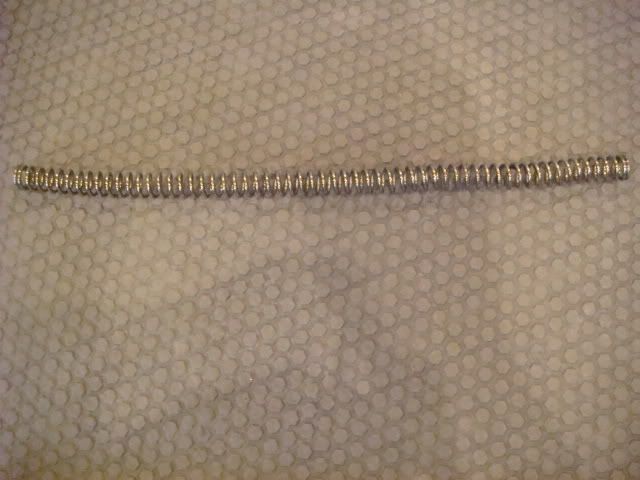 Now stick in the piston, with the o rings facing towards the outside. 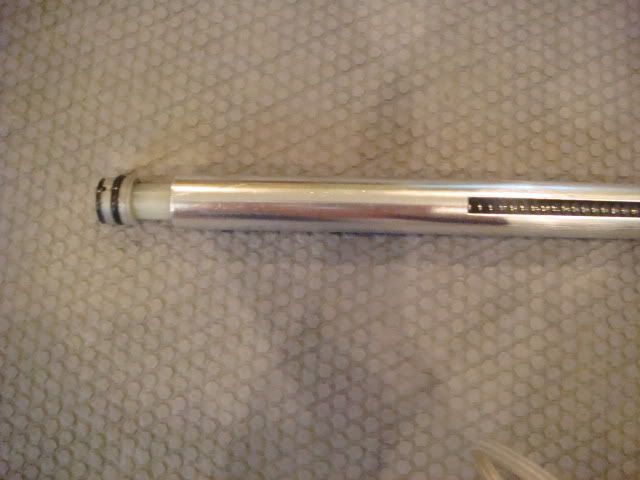 Take the cylinder head, and push it down overtop of the piston. Use some pressure, along with the plier things that you see in the following picture. 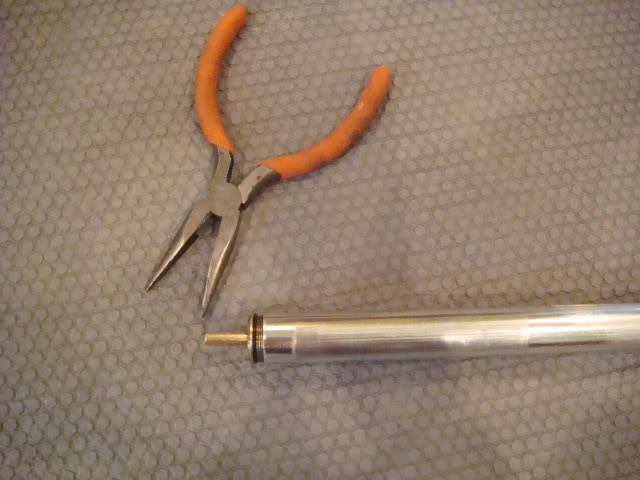 The hop up chamber and barrel The hop up chamber and barrelThis is one of the biggest pros to the mk96. The hop up chamber, while a pain to disemble, is very strong and can carry a .4g bb a pretty good distance. The hop up can be adjusted with an allen wrench, and can be used with anything from .28s to .4s accurately. Only one arm is used with this hop up. The only problem is that after some time, the bucking will wear down, and the only options are to replace it with a new one, but it is very very hard to find a spare. Or buy the pdi hop up chamber, but thats for another thread The barrel is 499mm, and is rather long. Here is a reference between the mk96 barrel and a m4 length barrel. Can you guess which is which 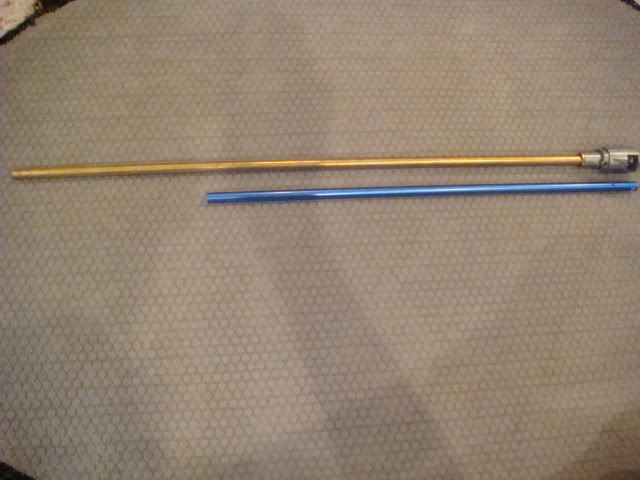 Mk96 hop up and barrel 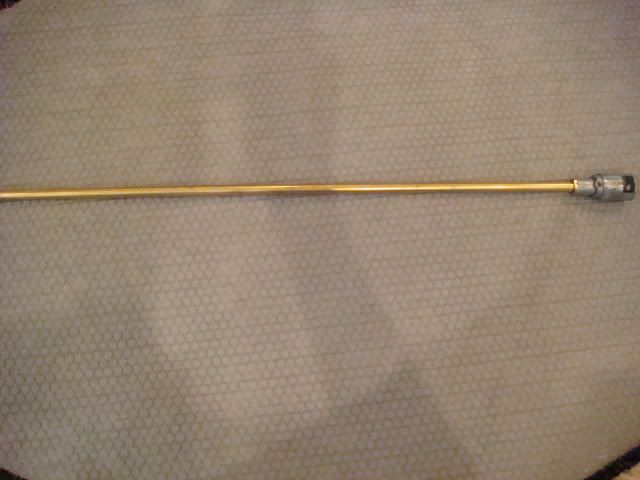 Hop up arm 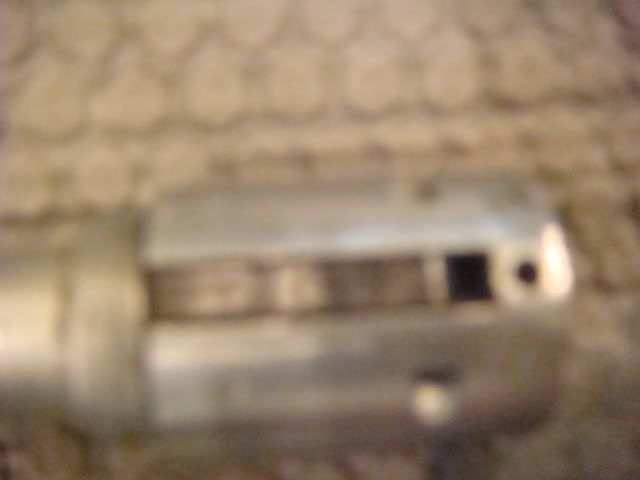 Assembling the hop up chamber and barrel to outer barrel Assembling the hop up chamber and barrel to outer barrel
 The hole to the left is the hole used to adjust the hop up. The gold hole to the right, is for holding the screw and magazine catch to keep the inner barrel in place inside the outer barrel. Magazine catch and screw 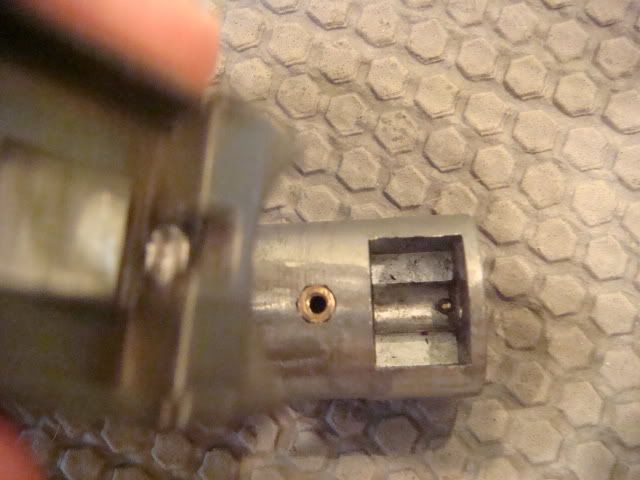 Notice that the screw is to be placed through the magazine catch and into the golden hole of the hop up chamber. BUT WAIT!! I am simply showing you where the magazine catch is to go. FIRST, place the inner barrel and hop up chamber into the outer barrel. Then take the magazine catch and place it over top of the barrel with the side of the holes. See below. Notice how the inner barrel and hop up SHOULD be inside. They just are not for this picture. Once the inner barrel and hop up are inside the hop up chamber, then take the magazine catch and tighten the screw to keep the barrel in place. Make sure the screw is in their tight, or else your magazine catch will be lose, and the mags wont fit inside correctly. PerformanceCopied and pasted for easy reference. Stock UTG mk96 stats and weather conditions -.36g -no mods or upgrades -slight to no wind -Around 85-90 degrees 75 feet -7/10 shots hit the target. -A couple flyers were way off -shots hit various parts of the chest region with a few on the arms -Overall: Very disappointed in consistency 100 feet -4/5 shots hit the target -All in the chest region but not very tight groupings -Overall: Little better than at 75 feet. It can be concluded that consistency is a major issue with the stock rifle. 125 feet -4/5 shots hit the target -Two shots hit the hand area (very close to missing) -Other two hit chest area -Overall: Lucky shots, could have easily been 2/5. 150 feet: Slight hill-have to shoot up alittle against the force of gravity -3/10 shots hit the target. -Two of these shots hit the hands again! -Overall: More lucky shots that almost missed. From this distance accuracy is a major problem as well as consistency. However, the rifle had enough power to get to this distance very easily. Complete analysis: Power is not a problem with the stock rifle. Easily could have gone further but unfortunately very few would have hit the target. Accuracy and consistency were the two flaws even at close range. No shot hit the same place twice. Reduces the shooters confidence in game, because he will not know where it will go. 175 feet -.36 gram bbs -hit 6/10 times -Wild shots all over the place -Curved into the target -Most likely lucky shots but successful none the less. -Overall: Stock rifle can hit the longshot, but not very often. Hop up was all the way up, and a few shots fell short. Looked like this would be its longest distance without adjusting the crosshairs (aiming up to compensate for distance) 200 feet -still .36 gram bbs as this is the heaviest weight the hop up can handle at this distance while not being agitated by the slight wind. -Hit the target 1/10 times -Really had to aim up to compensate for the inability to shoot the .36s. However, if I would have used .28s, the curve would have been too much, creating even more innaccurate shots than what already was taking place. -A few shots dead on, but fell short. Others were not even close. -Overall: Hop up just could not handle the heavy weight .36s at the 200 foot distance. Consistency was not there, and accuracy was lacking. However, at 200 feet with a completely stock rifle, what do you expect Other pictures: My rifle 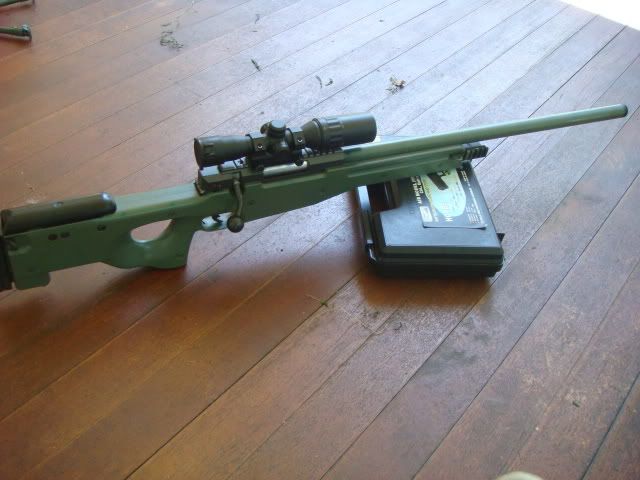 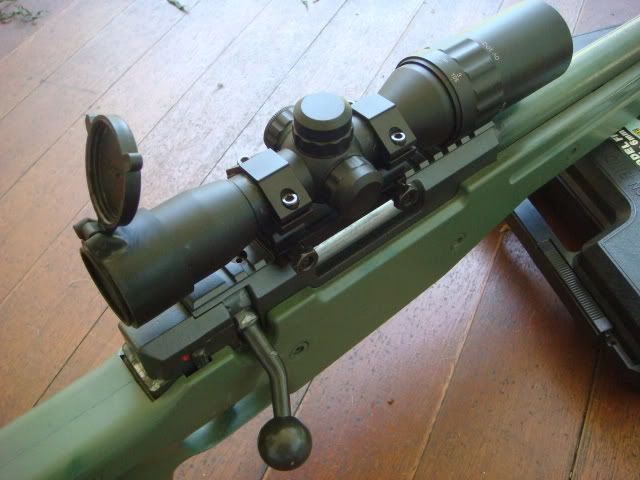 Important links: airsoftsniper.proboards.com/index.cgi?board=maruzenrifles&action=display&thread=1020airsoftsniper.proboards.com/index.cgi?board=haveauniquerifle&action=display&thread=1624 |
|
fuzzywolly
New Member
Vegetation is gold
Posts: 901
|
Post by fuzzywolly on Apr 16, 2011 13:47:41 GMT -5
UPDATE: A few new additions to the reviewIt has been quite some time since I wrote the review above, and as time goes by, new things happen, parts wear down, and things break. The following will touch on what I have experienced over the past few months, problems that have occurred, new things I have learned, etc. Hopefully this will help fellow l96 users out, and make the time they have this rifle much less painless then it was with me. Not that it was painful... So get ready, here we go...Round 2. I am going to start out by going over each "stock" part in comparison to the upgraded part that I have purchased. This will include details about each one, how they held up, and how each part compares to its "competitor".
Cylinder UnitSTOCK CYLINDER HEAD: Nothing can really go extremely wrong with the cylinder head. Out of all the stock parts in this rifle, this is the most durable. The only real bad thing that can happen is that the tip of the head gets "burrs" and can scratch the bb when loading each round into the chamber. However, this can be fixed by sanding the burrs down, but I never had the need to do so. The stock cylinder head can be used with laylax parts. If you find yourself replacing the piston, spring guide, etc. so that you have a decked out cylinder unit, but do not have the money for it all, the cylinder head (which is the cheapest), is something you can stay stock with. The only thing I recommend doing is teflon taping the cylinder head, which will give you slightly better air seal. I wish I had a chrono to test the results and see how much it affects the FPS output, but unfortunately I spend my money on other things. Overall, cylinder held up just fine until I replaced it. With teflon tape, and sanding down any present burrs, this gets a 10/10. LAYLAX CYLINDER HEAD: When I first opened the package to this piece, I was rather impressed. A nice shiny/silver coating made this part look much "cleaner" than the stock head. The bottom of the head had a nice black rubber base, which appeared to be thicker than the stock head. This made me believe that when the piston slammed up against it, that it would produce a quieter sound, more of a thud, rather than a "slap". (Did I really just say slap...  ) When feeling the tip of the head, I noticed no burrs, and this piece was obviously manufactured well. After dishing out $25 for something not totally necessary, I felt that I had made a worthwhile decision. With money in my pocket (it least at the time), I decided to get the head along with the other cylinder parts, and have not looked back. Overall, no problems with this head either, and it gets a 10/10. Overall, overall, both heads are 10/10. There is no reason to buy a new cylinder head unless your stock one somehow got dented or something like that. So if you are tight on money, skip upgrading to a new head, and look into something else that is much more vital. Not sure what..? Keep reading and let us find out.  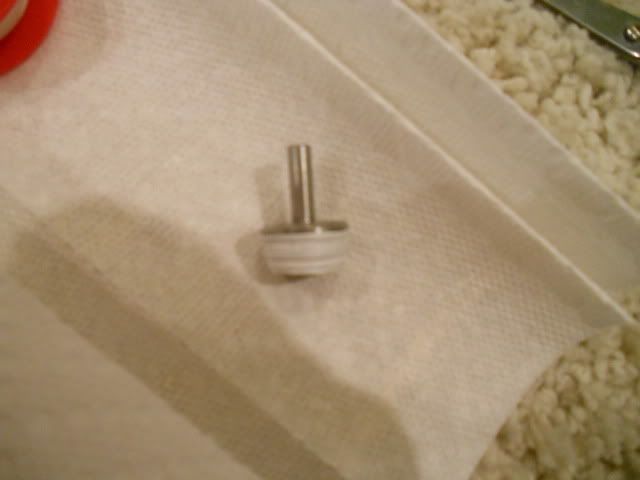 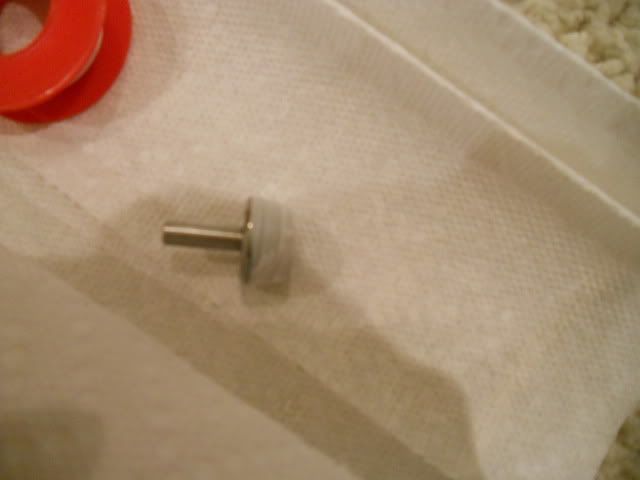 STOCK PISTON: I was rather worried about this breaking in my rifle, especially after I first dissembled this bad boy and put this in my hand. As you can read above in the first post, this thing has numerous problems. Feel free to scroll back up and read them again, chances are you forgot. I replaced this rather quickly before anything could seriously go wrong. However, this piston held up for around a year of some pretty heavy use. I have since rid of all my stock pistons, and they have found some use for other airsoft bolt action users. The piston, while I had it, held up, never broke down (surprisingly), and was pretty durable. But when compared to a laylax piston, it is far inferior. The fact that there is an accuracy cup on the laylax piston provides it with much better compression. Makes the stock piston look like crap, as the o rings are extremely flimsy. Comparison between the two pistons: STOCK PISTON (PICTURE): LAYLAX PISTON AND ACCURACY CUP (PICTURE):  Overall, the stock piston held up while I needed it to. But with compression being one of the weak points, I give this a 6/10. All bolt action users should look into a new piston. This is not like the cylinder head where it is "optional". It will crap out on you eventually, just like most other parts, especially in a clone rifle. LAYLAX PISTON AND ACCURACY CUP: Unlike the stock piston, this baby is purple, with a whitish head. The accuracy cup is a dark red, and is basically a "cap" that is made out of rubber. Very easy to put ontop of the piston, and only slightly difficult to take off. (See dissembly guide #2 for more details). The piston is made out of a sturdy metal (not sure what kind), and is not plastic. This piston means business, and is something I have no doubt, will hold up for a long long period of time. The accuracy cup, which costs quite the bit despite its small size is a worth piece to buy. If you do not buy it, you might as well throw your laylax piston away. This piece of rubber is required in order to use the piston. The cup is what slams into the cylinder head. Remember how the cylinder head had some rubber on the bottom of it? (Gosh darn't I hope you remember!) Well, with the rubber on the top of the piston, this creates a much quieter noise than with the stock parts. While it is not super silent deadly awesome quiet, it does make a slight difference. And everything counts when on the field. Overall, the piston and cup have held up for almost a year now. No damage has been done to either part. I was slightly worried about the accuracy cup, being it was rubber, and I half expected it to rip during installation. However, it has held up fine, and as long as you are not throwing this across the room into fire pits, you should be fine. Therefore, 9/10 for the both combined. The only reason a point was deducted was because when putting the cup on the piston, you will notice a slightly small slit around the cup and on top of the piston. A little lithium grease helps clog it up, preventing little air particles from sneaking out and running away.  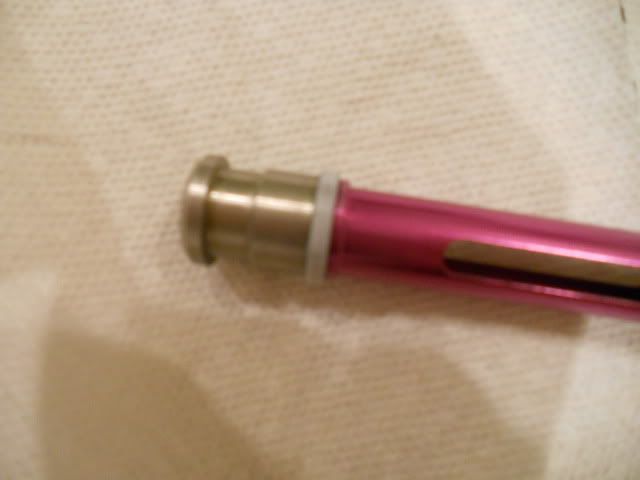 STOCK SPRING GUIDE: This is by far, the weakest area of the cylinder unit, and perhaps the whole rifle. It is similar to the piston in that it is a yellow piece of plastic, but the spring guide is extremely flimsy. When handling this piece, I was scared I would sneeze, causing the pressure from the air to blow, and snap the spring guide in half. Ok, it's not that bad. You should be fine when handling it. But once again, do not throw it around like a ball of yarn. It will break. There is nothing special about this spring guide. Somehow, someway, this part did not snap or break on me in the time that I used it. However, be careful when handling this part, and make sure that you buy a new spring guide in the future. Overall, 3/10. The only reason this gets 3 points is because it did not break on me in the time that it was being used. Otherwise, I would give it a 0/10 for pure crapiness. PICTURE OF STOCK SPRING GUIDE: LAYLAX SPRING GUIDE: I bought the 7mm and 9mm spring guide package. For only a few bucks more than the 7mm spring guide alone was, I thought it was worth it. The reason for there being a 7mm and 9mm spring guide is due to the fact that some springs are thicker than others. The stronger the spring, as in higher FPS output, the thicker it will be. This is where the 9mm spring guide comes in handy. Since interchanging springs will be something that you will do once and awhile, get yourself the 7mm and 9mm spring guides. That way, you avoid having to dish out more money just to get the other spring guide because your spring is too thick/not thick enough. 7mm spring Guide: Solid piece of metal, will not break unless you ran it over with your car. I feel safe knowing I replaced the ol' crappy one for this spring guide. Only problem is that the bearings come loose and wiggle around while in the cylinder unit. However, it is no serious problem, as the rifle functions just fine. I am sure there is a way to keep these bearings tight, but I have found no need to dish out the extra effort to research it. 9mm Spring Guide: A big ol' hunk of metal. Very thick, and solid. I would sleep well in night knowing this was in my rifle. Ain't no spring going to destroy this bad boy. Unless you made some custom nonsense super power 1337 leet spring. Overall, no problems (besides small issue), and gets a 9/10. Highly recommended to pick this baby up and get rid of that gosh darn awful stock spring guide. LAYLAX SPRING GUIDE PICTURE (7mm): 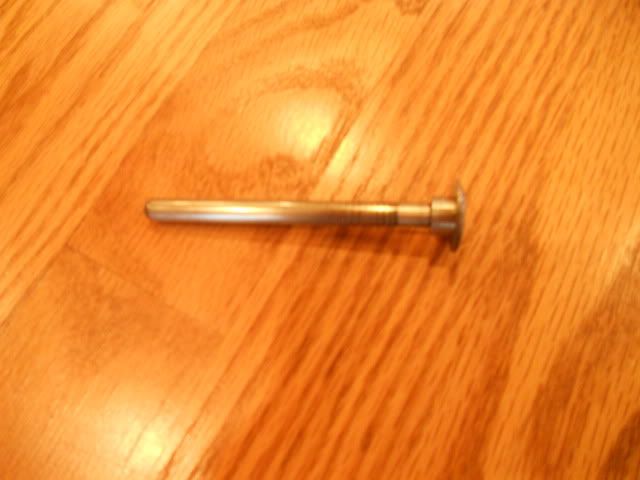 STOCK CYLINDER: I have not yet bought a new laylax cylinder, as I have had no need to yet. After over two years of use, this piece has held up just fine. I have an extra in my room just in case, but have not had the need to replace it. Since I am rolling in at around 400 fps, the bolt pull is easy, and a teflon cylinder is not required. Add some lithium grease (see below for more details), and this puppy will slide nice and smooth. I like to clean this after a dirty game, where sand and other particles could sneak into the cylinder unit. It is very easy to do. Dissembling is a snap, and takes only a few seconds...(ok, a few minutes). Overall, the fact that after over two years this cylinder is still up and running means it deserves a solid 8/10. It might be metal, but its cheap metal. I would be worried about sticking with this cylinder with a set up putting you over 500 fps. I just do not think it could take the pressure for too long. However, I hope them cylinders out there can prove me wrong. 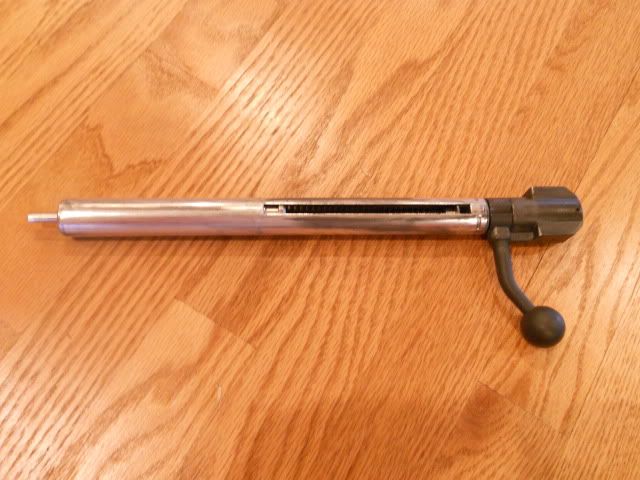 LAYLAX CYLINDER: Not purchased yet, so if I wrote anything here, it would be a load of horse poo. STOCK SPRING: Obviously, over time, this spring lost tension and lost a good amount of fps. It settled around 400 fps or so, which I think is a positive thing. If the spring would have held a steady 500 fps, the internals would have cracked, snapped, bent, split, and..you get the point. Overall, 1/10. For a spring to lose tension like it did, is screaming inconsistent FPS output. While it was a good thing for it to lose tension to keep the internals alive, it still is a pretty crappy spring. LAYLAX SP130 SPRING: Nothing special, just a spring. Airsoft GI said this spring would put you at around 430 fps, but I have found that it sticks to around 390-400 fps. With .4s, my rifle is shooting 280 fps. While this seems extremely low, keep in mind this is with .4s. I have my fps set up for around 400 with .2s as I have no need for anything greater. Depending on where you play, your fps limits, etc. you might want to get a heavier, more powerful spring. Has held up good so far. Curious as to how this spring holds up, and what it will have my rifle shooting at 6 months from now. Therefore, updates to come. As of right now, 8/10. Pretty consistent fps output, curious as to what it was out of the box. Not sure if it dropped a few or not, but as of now it is a steady 400 and I am happy. 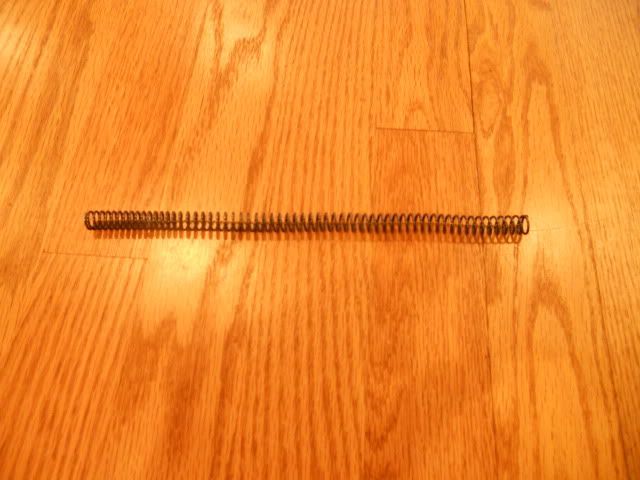
|
|
fuzzywolly
New Member
Vegetation is gold
Posts: 901
|
Post by fuzzywolly on Apr 16, 2011 13:48:44 GMT -5
UPDATE: A few new additions to the reviewIt has been quite some time since I wrote the review above, and as time goes by, new things happen, parts wear down, and things break. The following will touch on what I have experienced over the past few months, problems that have occurred, new things I have learned, etc. Hopefully this will help fellow l96 users out, and make the time they have this rifle much less painless then it was with me. Not that it was painful... So get ready, here we go...Round 2. I am going to start out by going over each "stock" part in comparison to the upgraded part that I have purchased. This will include details about each one, how they held up, and how each part compares to its "competitor".
Cylinder UnitSTOCK CYLINDER HEAD: Nothing can really go extremely wrong with the cylinder head. Out of all the stock parts in this rifle, this is the most durable. The only real bad thing that can happen is that the tip of the head gets "burrs" and can scratch the bb when loading each round into the chamber. However, this can be fixed by sanding the burrs down, but I never had the need to do so. The stock cylinder head can be used with laylax parts. If you find yourself replacing the piston, spring guide, etc. so that you have a decked out cylinder unit, but do not have the money for it all, the cylinder head (which is the cheapest), is something you can stay stock with. The only thing I recommend doing is teflon taping the cylinder head, which will give you slightly better air seal. I wish I had a chrono to test the results and see how much it affects the FPS output, but unfortunately I spend my money on other things. Overall, cylinder held up just fine until I replaced it. With teflon tape, and sanding down any present burrs, this gets a 10/10. LAYLAX CYLINDER HEAD: When I first opened the package to this piece, I was rather impressed. A nice shiny/silver coating made this part look much "cleaner" than the stock head. The bottom of the head had a nice black rubber base, which appeared to be thicker than the stock head. This made me believe that when the piston slammed up against it, that it would produce a quieter sound, more of a thud, rather than a "slap". (Did I really just say slap... ) When feeling the tip of the head, I noticed no burrs, and this piece was obviously manufactured well. After dishing out $25 for something not totally necessary, I felt that I had made a worthwhile decision. With money in my pocket (it least at the time), I decided to get the head along with the other cylinder parts, and have not looked back. Overall, no problems with this head either, and it gets a 10/10. Overall, overall, both heads are 10/10. There is no reason to buy a new cylinder head unless your stock one somehow got dented or something like that. So if you are tight on money, skip upgrading to a new head, and look into something else that is much more vital. Not sure what..? Keep reading and let us find out. STOCK PISTON: I was rather worried about this breaking in my rifle, especially after I first dissembled this bad boy and put this in my hand. As you can read above in the first post, this thing has numerous problems. Feel free to scroll back up and read them again, chances are you forgot. I replaced this rather quickly before anything could seriously go wrong. However, this piston held up for around a year of some pretty heavy use. I have since rid of all my stock pistons, and they have found some use for other airsoft bolt action users. The piston, while I had it, held up, never broke down (surprisingly), and was pretty durable. But when compared to a laylax piston, it is far inferior. The fact that there is an accuracy cup on the laylax piston provides it with much better compression. Makes the stock piston look like crap, as the o rings are extremely flimsy. Comparison between the two pistons: STOCK PISTON (PICTURE): LAYLAX PISTON AND ACCURACY CUP (PICTURE): Overall, the stock piston held up while I needed it to. But with compression being one of the weak points, I give this a 6/10. All bolt action users should look into a new piston. This is not like the cylinder head where it is "optional". It will crap out on you eventually, just like most other parts, especially in a clone rifle. LAYLAX PISTON AND ACCURACY CUP: Unlike the stock piston, this baby is purple, with a whitish head. The accuracy cup is a dark red, and is basically a "cap" that is made out of rubber. Very easy to put ontop of the piston, and only slightly difficult to take off. (See dissembly guide #2 for more details). The piston is made out of a sturdy metal (not sure what kind), and is not plastic. This piston means business, and is something I have no doubt, will hold up for a long long period of time. The accuracy cup, which costs quite the bit despite its small size is a worth piece to buy. If you do not buy it, you might as well throw your laylax piston away. This piece of rubber is required in order to use the piston. The cup is what slams into the cylinder head. Remember how the cylinder head had some rubber on the bottom of it? (Gosh darn't I hope you remember!) Well, with the rubber on the top of the piston, this creates a much quieter noise than with the stock parts. While it is not super silent deadly awesome quiet, it does make a slight difference. And everything counts when on the field. Overall, the piston and cup have held up for almost a year now. No damage has been done to either part. I was slightly worried about the accuracy cup, being it was rubber, and I half expected it to rip during installation. However, it has held up fine, and as long as you are not throwing this across the room into fire pits, you should be fine. Therefore, 9/10 for the both combined. The only reason a point was deducted was because when putting the cup on the piston, you will notice a slightly small slit around the cup and on top of the piston. A little lithium grease helps clog it up, preventing little air particles from sneaking out and running away. STOCK SPRING GUIDE: This is by far, the weakest area of the cylinder unit, and perhaps the whole rifle. It is similar to the piston in that it is a yellow piece of plastic, but the spring guide is extremely flimsy. When handling this piece, I was scared I would sneeze, causing the pressure from the air to blow, and snap the spring guide in half. Ok, it's not that bad. You should be fine when handling it. But once again, do not throw it around like a ball of yarn. It will break. There is nothing special about this spring guide. Somehow, someway, this part did not snap or break on me in the time that I used it. However, be careful when handling this part, and make sure that you buy a new spring guide in the future. Overall, 3/10. The only reason this gets 3 points is because it did not break on me in the time that it was being used. Otherwise, I would give it a 0/10 for pure crapiness. PICTURE OF STOCK SPRING GUIDE: LAYLAX SPRING GUIDE: I bought the 7mm and 9mm spring guide package. For only a few bucks more than the 7mm spring guide alone was, I thought it was worth it. The reason for there being a 7mm and 9mm spring guide is due to the fact that some springs are thicker than others. The stronger the spring, as in higher FPS output, the thicker it will be. This is where the 9mm spring guide comes in handy. Since interchanging springs will be something that you will do once and awhile, get yourself the 7mm and 9mm spring guides. That way, you avoid having to dish out more money just to get the other spring guide because your spring is too thick/not thick enough. 7mm spring Guide: Solid piece of metal, will not break unless you ran it over with your car. I feel safe knowing I replaced the ol' crappy one for this spring guide. Only problem is that the bearings come loose and wiggle around while in the cylinder unit. However, it is no serious problem, as the rifle functions just fine. I am sure there is a way to keep these bearings tight, but I have found no need to dish out the extra effort to research it. 9mm Spring Guide: A big ol' hunk of metal. Very thick, and solid. I would sleep well in night knowing this was in my rifle. Ain't no spring going to destroy this bad boy. Unless you made some custom nonsense super power 1337 leet spring. Overall, no problems (besides small issue), and gets a 9/10. Highly recommended to pick this baby up and get rid of that gosh darn awful stock spring guide. LAYLAX SPRING GUIDE PICTURE (7mm): STOCK CYLINDER: I have not yet bought a new laylax cylinder, as I have had no need to yet. After over two years of use, this piece has held up just fine. I have an extra in my room just in case, but have not had the need to replace it. Since I am rolling in at around 400 fps, the bolt pull is easy, and a teflon cylinder is not required. Add some lithium grease (see below for more details), and this puppy will slide nice and smooth. I like to clean this after a dirty game, where sand and other particles could sneak into the cylinder unit. It is very easy to do. Dissembling is a snap, and takes only a few seconds...(ok, a few minutes). Overall, the fact that after over two years this cylinder is still up and running means it deserves a solid 8/10. It might be metal, but its cheap metal. I would be worried about sticking with this cylinder with a set up putting you over 500 fps. I just do not think it could take the pressure for too long. However, I hope them cylinders out there can prove me wrong. LAYLAX CYLINDER: Not purchased yet, so if I wrote anything here, it would be a load of horse poo. STOCK SPRING: Obviously, over time, this spring lost tension and lost a good amount of fps. It settled around 400 fps or so, which I think is a positive thing. If the spring would have held a steady 500 fps, the internals would have cracked, snapped, bent, split, and..you get the point. Overall, 1/10. For a spring to lose tension like it did, is screaming inconsistent FPS output. While it was a good thing for it to lose tension to keep the internals alive, it still is a pretty crappy spring. LAYLAX SP130 SPRING: Nothing special, just a spring. Airsoft GI said this spring would put you at around 430 fps, but I have found that it sticks to around 390-400 fps. With .4s, my rifle is shooting 280 fps. While this seems extremely low, keep in mind this is with .4s. I have my fps set up for around 400 with .2s as I have no need for anything greater. Depending on where you play, your fps limits, etc. you might want to get a heavier, more powerful spring. Has held up good so far. Curious as to how this spring holds up, and what it will have my rifle shooting at 6 months from now. Therefore, updates to come. As of right now, 8/10. Pretty consistent fps output, curious as to what it was out of the box. Not sure if it dropped a few or not, but as of now it is a steady 400 and I am happy.
|
|
fuzzywolly
New Member
Vegetation is gold
Posts: 901
|
Post by fuzzywolly on Apr 16, 2011 13:49:29 GMT -5
Trigger BoxSTOCK TRIGGER BOX: In it's time of use, it did its job, but barely made it through a year's use. I consider myself a lucky man, in that, numerous rifles of my friends had trigger boxes snap and break after minimal use. After around 6-8 months with a completely stock trigger box, I decided to upgrade and get a new trigger sear. You will notice that when pulling the trigger with the stock sears inside the box, it will have a somewhat heavy pull. When you put the PDI trigger sear in, it makes a world of difference. Trigger pull becomes very very easy. A light tap of the trigger would fire the rifle. I believe that even if you were to upgrade all three sears: Piston, trigger and spring guide sear, the box would still fail. And it eventually did with mine. The outer shell, being made of plastic, easily cracks. Typically doing so near the piston sear. Mine had a long crack go down the sides of the box, and seemed like it was ready to snap in half any second. However, the box actually failed near the screws on the side (ones that hold the trigger box in place on cylinder). This renders the box almost useless. Why the box did not have metal to reinforce this area is beyond me. It is extremely cheap plastic, and can easily break, whether constantly dissembling the rifle, or just from heavy use. Overall, I give the box a 2/10. I have seen numerous boxes fail within two weeks after only 200-500 shots. Mine was able to last a little longer, but I consider myself lucky. There are options out there when deciding to spend some cash on a new box. They are as follows: 1. Buy a replacement 2. Buy a semi-more decent box, made from UTG/WELL. It costs around $35, and will hold up for a little while, but depending on your fps output, it might break sooner than you wish. 3. Buy a zero trigger from laylax: There are some in the states selling for around $115. This is a huge price reduction from the norm, $200. Get yours while you can. Link: airsoftsniper.proboards.com/index.cgi?board=general&action=display&thread=2432LAYLAX ZERO TRIGGER: I was able to get a deal and snagged one of these used for a great price. There is only one problem that I have had with this. The spring guide stopper is loose, and sometimes wobbles itself down to the point where it sticks out of this small whole in the rifle. Eventually it will become so lose that the spring guide will become detached (not fall out). Simply press it back in, and you should be fine. However, if you fail to notice this until after you pull the bolt back, it will cause the piston sear to block the cylinder from sliding back in. Now you have to go and dissemble your rifle and detach the trigger unit, and move the cylinder unit back in. I have found that placing some tape on the bottom of the hole will prevent the spring guide stopper from sneaking out. Easy mod, easy fix. Overall, the laylax trigger is metal all around. It is metal where the screws go in to attach the unit to the receiver, and should hold up for a long time to come. I have had it for over 6 months, and no major problems have occurred. 9/10. 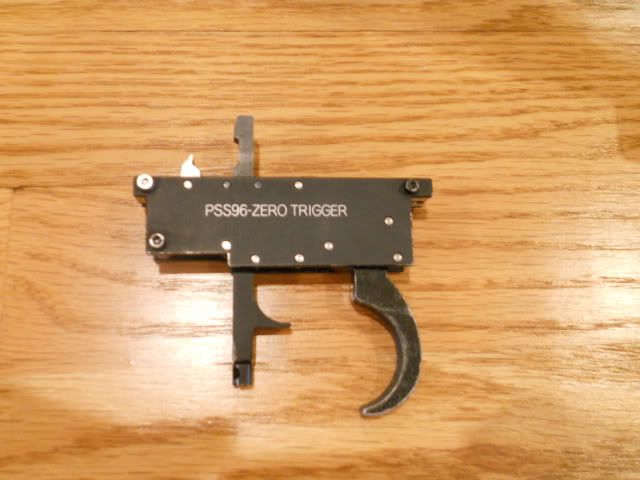 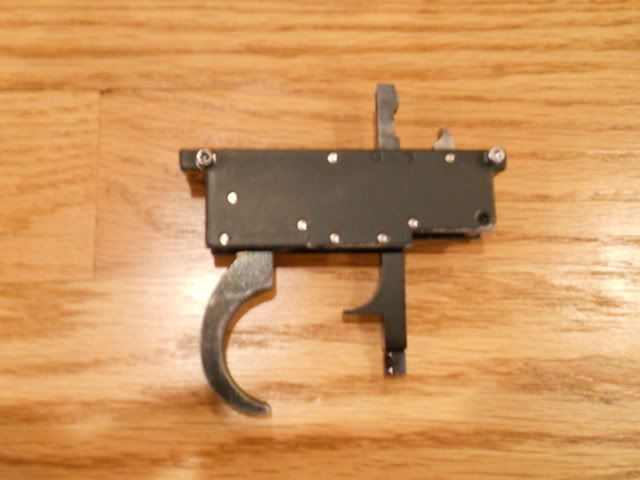 Hop Up Area Hop Up AreaSTOCK HOP UP CHAMBER: I have actually found that this chamber has been pretty well designed. I have not seen many clone rifles in stock form carry a .4 bb as far and consistently as the UTG MK96 chamber has. Utilizing one arm, and an oddly shaped plastic nubbin, this chamber is semi-decent. I found that with .28s, the bbs would curve all over the place. Some .4s solved the problem, and I was able to wield much more consistent shots. The chamber is made of metal, and serves to be quite durable. I have dropped it a few time and no damage has been done. Although, I do not recommend dropping it. The barrel is relatively decent as well. Unlike most clone rifles, this one comes with a tightbore, or itleast very close to it. See link below for details: airsoftsniper.proboards.com/index.cgi?board=maruzenrifles&action=display&thread=2539 Overall, I was able to use this stock chamber and barrel for quite some time before having to replace it. I did not decide to do so, until the bucking tore itself inside the chamber. Did not happen until a year's use. I would say that is pretty darn good. Rather than attempting to find a stock chamber bucking, I elected to buy a whole new chamber, the PDI version. However, here is a site with some valuable replacement parts: www.airarmsports.com/AIRSOFT-GUNS/Airsoft-Accessories/Replacement-Parts/Type-96-L96-Airsoft/Overall, while the bucking was still intact, the chamber and barrel combo performed fairly well. I give this chamber a 8.5/10 for reasons stated above. Its ability to carry heavier bbs, and provide accurate and consistent shots over a distance of 150-175 was impressive. Keep in mind, this is a stock hop up chamber. You cannot expect to be hitting out to 300 feet consistently with it. So yes, an 8.5 for this chamber, as it had served me well. PDI HOP UP CHAMBER: I have had many problems with this chamber, especially recently. Therefore, I neglect to write about it here, as I feel my response would be biased. HP HOP UP CHAMBER: It is on its way. Updates to come. That does it for the internals, now it is time to go over the externals.
ExternalsSTOCK BOLT HANDLE: Never snapped or broke on me, but I heard from a few people that there bolt handles gave out on them. The only thing that ever wore down on the bolt handle was the paint, which chipped off in a few places. See this thread for some details: airsoftsniper.proboards.com/index.cgi?board=reviews&action=display&thread=1774Overall, 8/10 for durability, but only a 4/10 for looks. The handle was extremely shiny, and since I like my scope/rails/handles black, it was really noticeable. Unlike the guarder version, you can tell that this bolt handle belongs on a toy. GUARDER BOLT HANDLE: This is one hefty piece of steel. It feels good to the touch, and is extremely durable. I feel confident pulling the bolt up and back, and know that it will not snap on me. The appearance is something else that I am very happy with. Gives the rifle a crisp look, and makes this "toy" appear to be somewhat real. Overall, 10/10 for durability and 10/10 for looks. Very happy with this purchase and am glad I tossed out the $46 for it. See link for more details: airsoftsniper.proboards.com/index.cgi?board=reviews&action=display&thread=1774Comparison between the two: 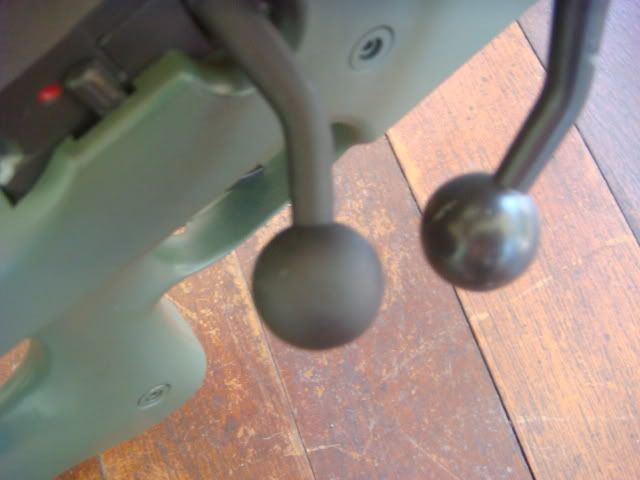 MAGAZINE CATCH AND SCREW (STOCK FORM): I had one of these break on me a few months back, and it was partially my fault. While putting the rifle back together, I got the magazine catch caught on the side of the inner area of stock, and it snapped off the spring and a piece of plastic bent and rendered the catch useless. So be careful with this piece. There are replacement parts available but no one wants to have to dish out $15 because they were not careful. When I am being careful, this magazine catch does the job. I have not had the other one break on me yet, and the only sign of wear is the screw that comes with it. This screw strips extremely easy. However, I have managed to be able to use it for some time now, just really have to use force when tightening and loosening. Hoggie, a fellow member found the screw available at Ace Hardware. I had been looking for one for some time too. Overall, the magazine catch gets a 7/10, only because it breaks somewhat easy, but again, that was partially my fault. The screw that come with it gets a 2/10 because it strips faster than the girls at the strip club... wow that was just a stupid stupid joke....  STOCK STOCK : This right here is why many people choose to go with a maruzen l96, rather than the UTG mk96. The UTG stock feels like a toy, looks like a toy, and breaks like a toy. However, with some care, you can help keep your stock in good shape for many years to come. WARNING: DO NOT THROW STOCK ACROSS THE ROOM. DO NOT BANG STOCK AGAINST A WALL, AND ESPECIALLY DO NOT SWING A BASEBALL BAT AT IT....IT WILL BREAK. With a few mods, such as filling the stock with foam, you can help keep your stock from breaking as easily. The foam helps absorb the blows if you were to drop it or bang it against a tree, and also helps reduce the noise of the rifle when shooting. Overall, 4/10 for looks and feel. 8.5/10 for durability. So far mine has held up for over 2 years, and I expect it to hold up even longer than that. Therefore, how can you not be happy with that. 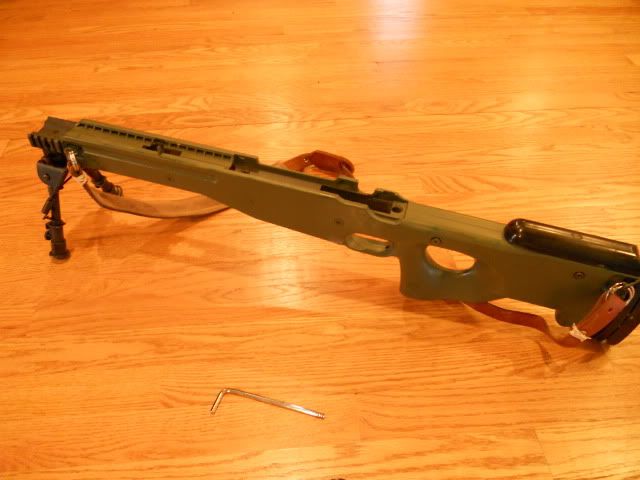 RIS RAIL (STOCK FORM): Not much to say, other than its a piece of metal that allows you to attach your bipod or light ( ) onto the rails. Mine wiggles a little, but I believe it is supposed to. Overall, 8/10. It gets the job done, and has not caused me any problems before. Easy to take off and easy to put back on. Mods that can be done to the rifle are below: Check out some of the useful links that are included under some of the mods in the list:
MODS: Inthetallgrass wrote an amazing one: airsoftsniper.proboards.com/index.cgi?board=haveauniquerifle&action=display&thread=2558&page=1List of mods: 1. Barrel Spacers: Very easy to do, and can help reduce barrel vibrations, resulting in more accurate and consistent shots. I typically use four of them spread out on my barrel. I custom make mine, and use electric tape/scotch tape. I also use the stock barrel spacers as well. With a little tape on each side, it can make these spacers worth using. 2. Foam in stock (see link above) 3. Quiet Rifle (see link above) 4. Paint your rifle: airsoftsniper.proboards.com/index.cgi?action=display&board=general&thread=1328&page=1#102245. Wash your bbs: airsoftsniper.proboards.com/index.cgi?board=general&action=display&thread=14886. Polish Barrel: airsoftsniper.proboards.com/index.cgi?board=general&action=display&thread=1972 |
|
fuzzywolly
New Member
Vegetation is gold
Posts: 901
|
Post by fuzzywolly on Apr 16, 2011 13:50:47 GMT -5
Problems--Question and Answer[/i] My Outer Barrel Wobbles, what do I do?One of the problems I have seen happen was outer barrel wobble. The small hex screw that is inside of the receiver would loosen, and the outer barrel, which has threads (attaches to receiver), would start to wiggle around. This is something that I have never experienced, as my small hex screw has stayed in nice and tight. Some loctite on the hex screw will keep it from loosening, and prevent further wobble. 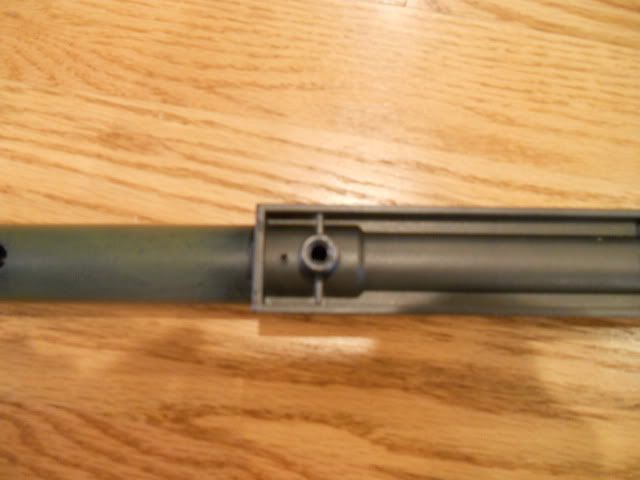 My Magazine Catch Wobbles, what should I do? My Magazine Catch Wobbles, what should I do?Given the fact that the magazine catch screw strips so easily, it becomes harder and harder to fully tighten the screw down into the magazine catch and into the hop up chamber. With some effort I can get the screw all the way in, but for some, the screw is too stripped for it to be turned in all the way. A couple solutions: 1. Get a new screw, like said above, from Ace Hardware 2. Use tap on the magazine catch You may ask why I would need to make sure that the magazine catch does not wiggle, even a tiny little bit. The reason being, this wiggle can lead to problems with accuracy and consistency when shooting. As the magazine catch wiggles, the hop up chamber, which is connected to it, will wiggle as well. As the chamber wiggles, the inner barrel will wiggle. (see the chain reaction effect?) Therefore, solving this problem is something that deserves your attention. I used ordinary ol' tape found in any office store. I have seen people use duct tape but found this to be messy and unnecessary. Just take the tape, and put small layers on the side of the magazine catch. Do this while your stock has been dissembled from your outer barrel unit. Layer the tape across the sides and back of the magazine catch. See pictures below. 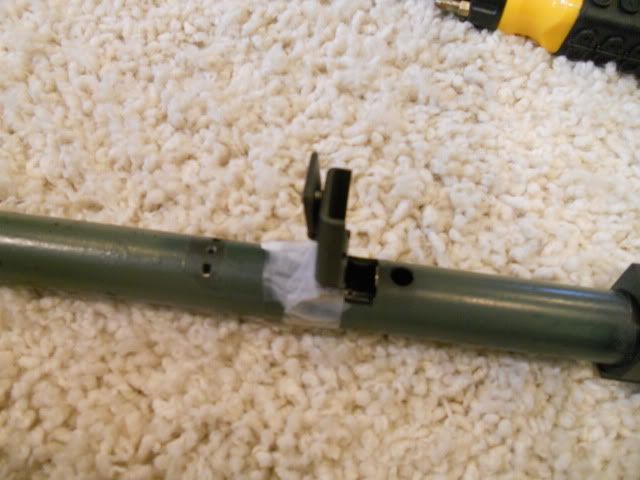 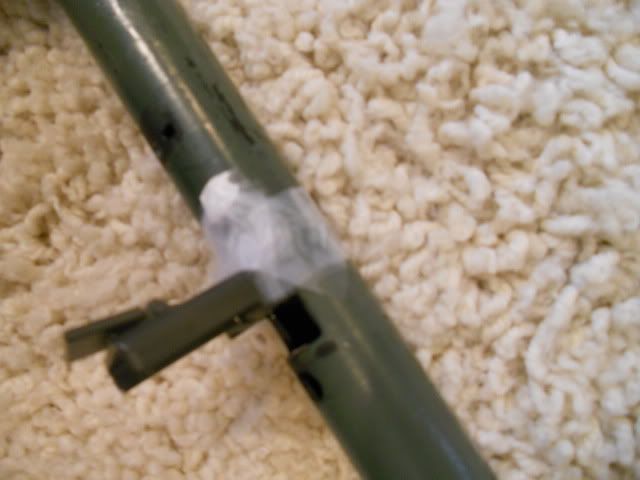 When placing back into the outer barrel, you will notice that the tape can be seen when the rifle is assembled again. I could care less what other people would say about that. As long as I have my rifle functioning, I do not care if I get laughed at for a little tape. You shouldn't either. 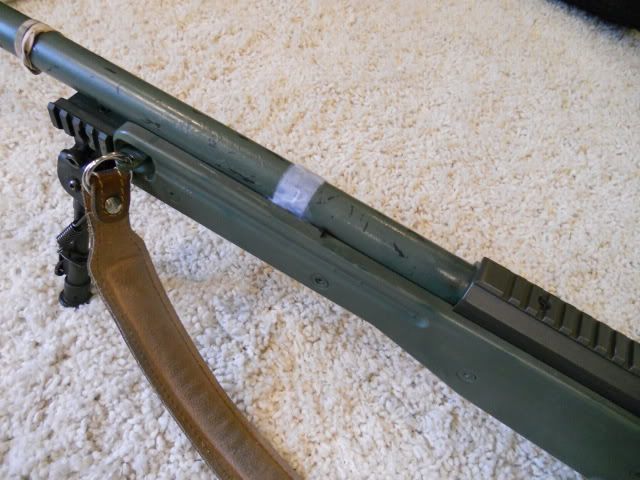 Does the job, and fixes the wiggle problem. Stock Barrel Spacer Issue, how to fix?The MK96 in stock form comes with two barrel spacers. Not only do I feel this is not enough, but they do not really do their job. When you first get your rifle, you should dissemble the rifle, and fix the barrel spacer issue. Your results will be much better after the issue is fixed. What is the issue? The spacers slide up and down the barrel, and sometimes slide next to eachother. This does no good, as now both of your barrel spacers are at the one end of your barrel. Major barrel vibrations will lead to very innaccurate results. To fix this, simply put a little tape on each side of the barrel spacer. Get up nice and tight to it, as this prevents the spacer from slouching on its side, rather than staying straight up. 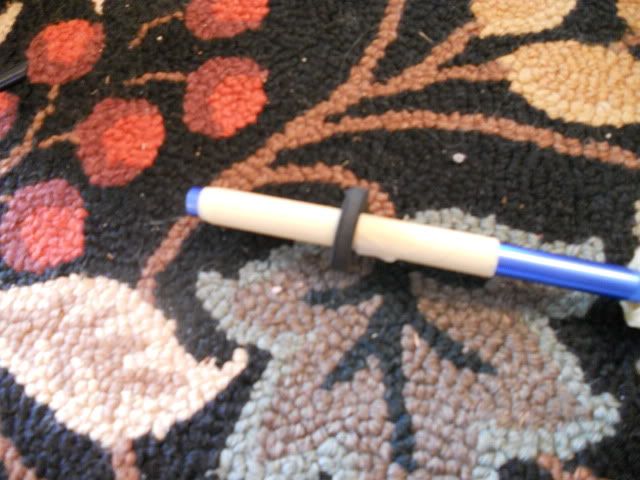 Now make a custom barrel spacer or two and you should be good to go. It takes five minutes, and is totally worth it. Out of all the mods, this is the easiest to do, and you can really benefit from this. 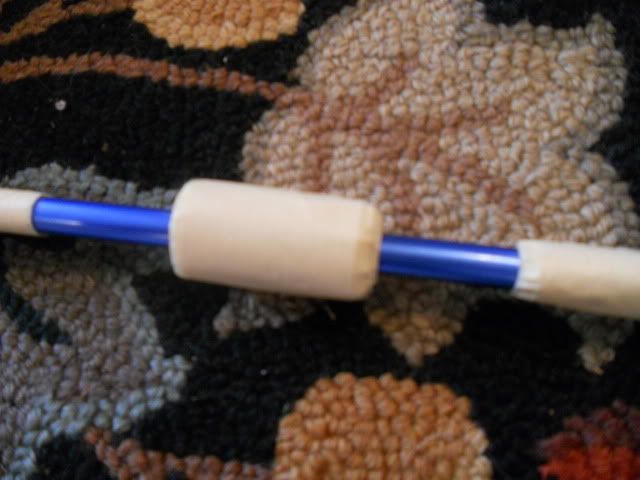
Magazine wiggles inside the magazine catch, how do I fix this?If you remember, the magazine catch sometimes wobbles. Not only will the chamber and barrel now wiggle, but the magazine itself will wiggle and sometimes come partially out to the point where your bbs will not feed. To fix this, either tighten the magazine catch screw, or use the tap method explained above. Nobody wants to have to worry about their magazines popping out and not feeding during games. So fix this, it is easy and will only take up a second of your time. My shots are curving all over the place, what is wrong with my rifle??You were either stupid enough to use .12s or you have a problem with your hop up unit. If you are using .27s or higher, and still have this problem, I would bet it is the bucking. After mine ripped, I had some major curving problems, and needed to get a fresh one. However, I skipped playing with the stock chamber and upgraded right away. Depending on your financial situation, buying a new bucking may be the better option. This is for the people using .12s....DO NOT USE .12s! Also, be weary of what advice you take over the internet: For example... I used .4s with the stock hop up, and was fairly happy. Madbulls got the job done, and have never looked back. Now I know everyone is not super experienced with this rifle, and if you are reading this you are either bored or new with the rifle. I thought it would be funny to include some quotes from things I have heard, and how it makes the person look extremely stupid. Hopefully, by reading this guide, you will not be one of these people ever again.
|
|
|
|
Swishy
New Member
Caught up in the game
Posts: 155
|
Post by Swishy on Apr 20, 2011 16:31:12 GMT -5
Very well written and detailed review, it must have taken you days to do this.
|
|
fuzzywolly
New Member
Vegetation is gold
Posts: 901
|
Post by fuzzywolly on Apr 20, 2011 16:50:10 GMT -5
Very well written and detailed review, it must have taken you days to do this. Thank you. The first two posts were written a few months back, but the rest was over a 24 hour span. I had some free time, the weather was bad, and thought I would update my review. |
|
|
|
Post by triggs on Apr 20, 2011 21:05:57 GMT -5
And yet people still argue with you about L96's *sigh*
Great review fuzzy.
|
|
fuzzywolly
New Member
Vegetation is gold
Posts: 901
|
Post by fuzzywolly on Apr 20, 2011 21:16:00 GMT -5
And yet people still argue with you about L96's *sigh* Great review fuzzy. Haha, I guess some things just never change. |
|
sgttom
New Member
move out
Posts: 519
|
Post by sgttom on Apr 20, 2011 22:07:20 GMT -5
Great review! Thank you for taking the time to write it all out. Although the plastic trigger box is disappointing I still plan on getting one of these soon.
|
|
fuzzywolly
New Member
Vegetation is gold
Posts: 901
|
Post by fuzzywolly on Apr 21, 2011 15:15:39 GMT -5
Great review! Thank you for taking the time to write it all out. Although the plastic trigger box is disappointing I still plan on getting one of these soon. There is a chance that you could get lucky and have a box that lasts as long as mine did. Like in the review, it states how several boxes have broken down after minimal use, while mine lasted a long time. Just be delicate with the screws that tighten the box to the receiver. That was the first thing to go on mine. And just for your information, there are laylax trigger boxes going for $100 now. Way cheaper than they used to be. |
|
sgttom
New Member
move out
Posts: 519
|
Post by sgttom on Apr 21, 2011 15:36:22 GMT -5
Where have you seen them for $100? I'll reinforce mine the best I can and hope for the best.
|
|
fuzzywolly
New Member
Vegetation is gold
Posts: 901
|
Post by fuzzywolly on Apr 21, 2011 18:27:07 GMT -5
|
|


 Please note that some of the stuff has been talked about in both of my threads, but this is for a detailed explanation of the mk96.
 Often a scope package is included with two magazines and a cheap flimsy sling plus a handy speedloader. While not necessary, the speedloader makes loading the magazine easier. The rifle features a nice rail for attaching scopes and optics, but remember some rail rings are also necessary.


 )
)