Post by MayhemXXXFrosty (AndrewMp5k) on Mar 11, 2013 19:47:37 GMT -5
KWA MP9(R): Hammer Replacement Guide
Author: AndrewMp5k (Frosty Subxero)
*Currently under construction, will update with (better) pictures when I get a sunny day out*
I've been trying to find some sort of a guide on how to remove the rear assembly out of my KWA MP9 (I have both the MP9 and the MP9R for future reference) to no avail. So, after I bought a KWA MP9 with a broken hammer, I decided I would dive into it myself and create a guide.
**Please do note, I didn't have my good camera on hand, so the current pictures will be fillers for now**
I assume that you are decently familiar with how to disassemble your KWA MP9 to clean it (aka take the top receiver off). Since there are multiple other guides on how to do this, my guide will skip the initial removal of the upper receiver and focus mainly on how to get the hammer area out.
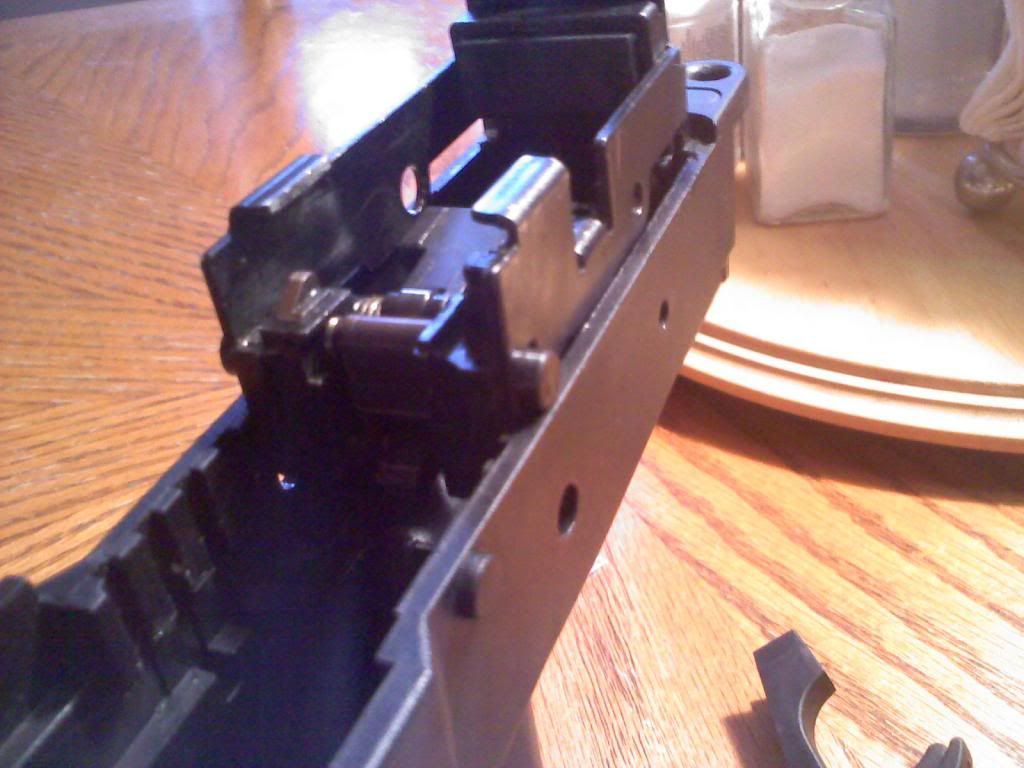
The first step, after removing the upper receiver, is to remove the screws inside the body. The first screw is located in the front (*red area*), which holds the trigger. The second screw is located on the rear assembly which holds that portion in the body.
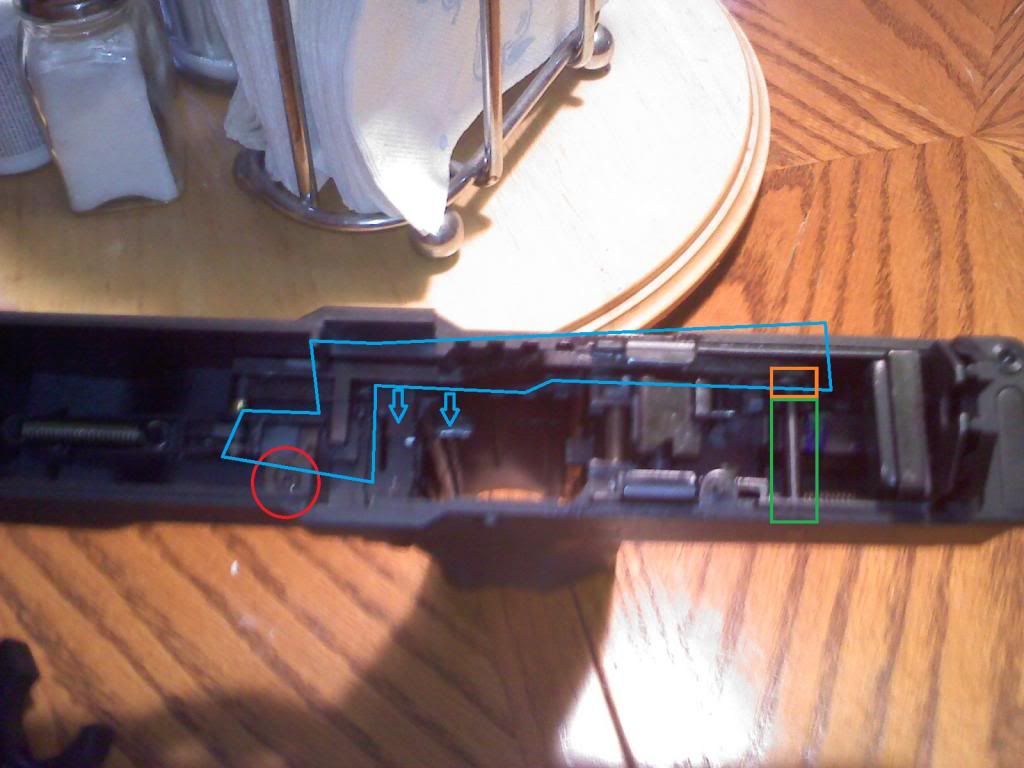
Now you must remove the C-clip (*orange area*) that holds the rear pin (*green area*) inside the back of the body. After the C-clip is removed, punch the pin that the C-clip was holding out towards the side the trigger assembly is (you won't be able to do it the other way, but just in case someone tries doing it wrong).
Once the rear pins are out, there are two screws. Unscrew them both and then remove the trigger screw piece (*red area*) which the front screw was holding in. Now you should be able to pull the trigger assembly (*blue area*) away from the outside of the body walls (push it towards the inside of the body). You will need to do this to clear the guides that hold it into the body, and pull the entire trigger assembly out. I believe I pulled the trigger, as if I was shooting it, fully back in order for it to clear the guides and come out like butter.
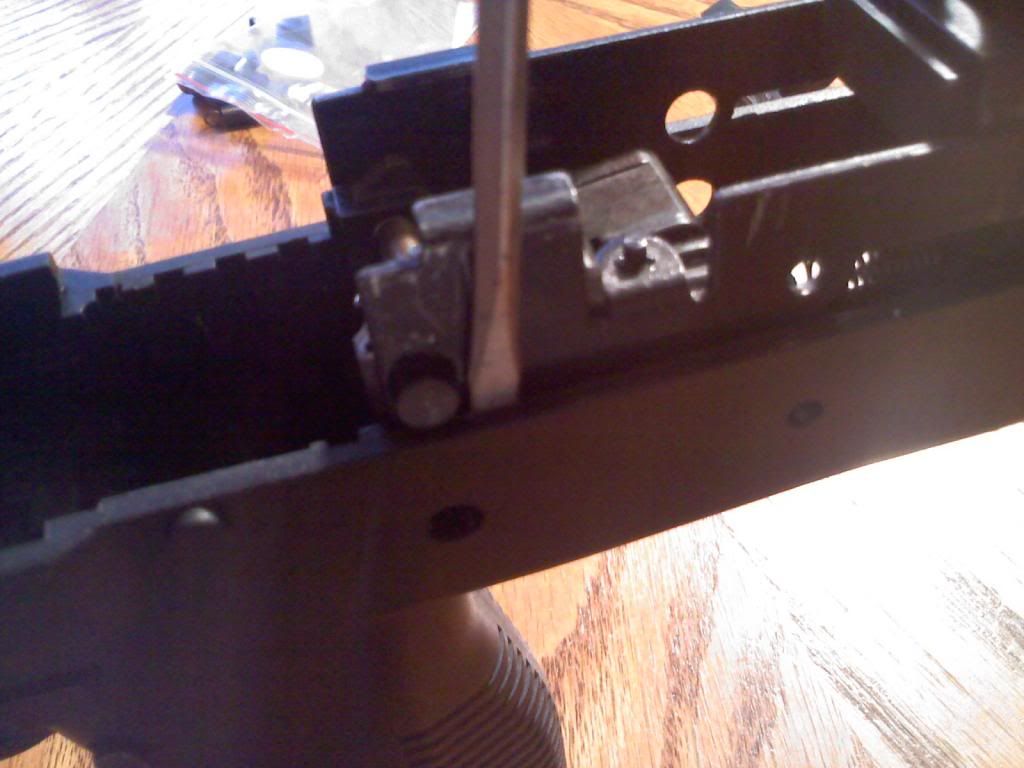
Once the trigger assembly and the rear pin is out, you can now remove the rear housing assembly. I tried tapping what seemed to be the body pins, but they are not through the assembly, they are just basically body guides that hold it flat in the body. So I just went at it, so I don't know if you can somehow remove the assembly pins, but I couldn't remove them even after I removed the housing from the lower (I imagine removing the allen wrench screws may be the culprits, but I've never heard of anyone removing them so I didn't). Now take a small flathead screwdriver and push the body away from the rear housing so you can clear the pins of the body holes on both sides and pull the housing upwards, thus removing it. Be careful at this step, I felt as if I was going to break the body if I flexed the rear assembly out of the body too much.

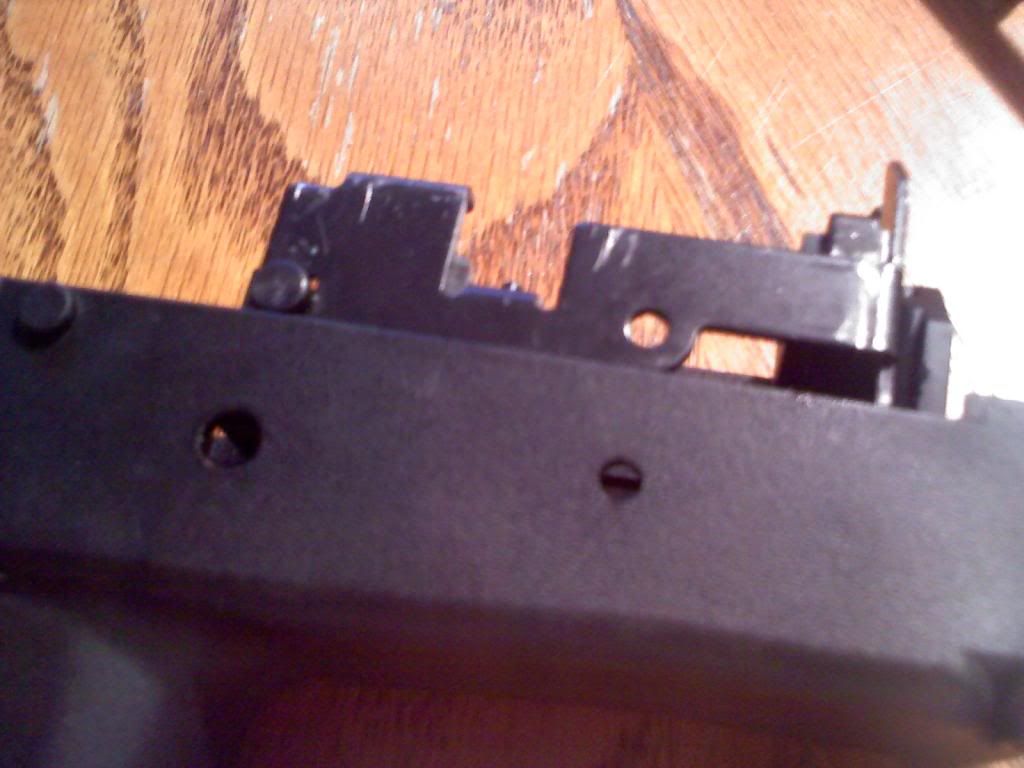
Now you should obviously be able to remove the hammer with ease. My new hammer direct from KWA didn't have a lower roller on it, so I had to remove my stock roller and install it on the new one. The roller has a punch pin, so make sure you tap it out the right way (since one way will be a hell of a lot easier than the other and won't ruin it).
Author: AndrewMp5k (Frosty Subxero)
*Currently under construction, will update with (better) pictures when I get a sunny day out*
I've been trying to find some sort of a guide on how to remove the rear assembly out of my KWA MP9 (I have both the MP9 and the MP9R for future reference) to no avail. So, after I bought a KWA MP9 with a broken hammer, I decided I would dive into it myself and create a guide.
**Please do note, I didn't have my good camera on hand, so the current pictures will be fillers for now**
I assume that you are decently familiar with how to disassemble your KWA MP9 to clean it (aka take the top receiver off). Since there are multiple other guides on how to do this, my guide will skip the initial removal of the upper receiver and focus mainly on how to get the hammer area out.
The first step, after removing the upper receiver, is to remove the screws inside the body. The first screw is located in the front (*red area*), which holds the trigger. The second screw is located on the rear assembly which holds that portion in the body.
Now you must remove the C-clip (*orange area*) that holds the rear pin (*green area*) inside the back of the body. After the C-clip is removed, punch the pin that the C-clip was holding out towards the side the trigger assembly is (you won't be able to do it the other way, but just in case someone tries doing it wrong).
Once the rear pins are out, there are two screws. Unscrew them both and then remove the trigger screw piece (*red area*) which the front screw was holding in. Now you should be able to pull the trigger assembly (*blue area*) away from the outside of the body walls (push it towards the inside of the body). You will need to do this to clear the guides that hold it into the body, and pull the entire trigger assembly out. I believe I pulled the trigger, as if I was shooting it, fully back in order for it to clear the guides and come out like butter.
Once the trigger assembly and the rear pin is out, you can now remove the rear housing assembly. I tried tapping what seemed to be the body pins, but they are not through the assembly, they are just basically body guides that hold it flat in the body. So I just went at it, so I don't know if you can somehow remove the assembly pins, but I couldn't remove them even after I removed the housing from the lower (I imagine removing the allen wrench screws may be the culprits, but I've never heard of anyone removing them so I didn't). Now take a small flathead screwdriver and push the body away from the rear housing so you can clear the pins of the body holes on both sides and pull the housing upwards, thus removing it. Be careful at this step, I felt as if I was going to break the body if I flexed the rear assembly out of the body too much.
Now you should obviously be able to remove the hammer with ease. My new hammer direct from KWA didn't have a lower roller on it, so I had to remove my stock roller and install it on the new one. The roller has a punch pin, so make sure you tap it out the right way (since one way will be a hell of a lot easier than the other and won't ruin it).