

Post by Lucky on Sept 1, 2006 15:40:04 GMT -5
I saw Toothbrushes DIY flashbang thread yesterday. I had made one about 2 weeks prior after picking up real flashbang spoons and fuses we used (from our CQB school). I wanted to make a dumby one for bbs and my first design used a spraypaint can. It worked, but not to my satisfaction. I polished off a can of cheeze wiz ;D prior to comming across Toothbrushes thread and I began to think how nice the can would work as a flashbang. So I began to construct another.
First things first:
I pulled the nozzle off of the top (not the smartest way of releasing compressed air). Luckily there was little compression left in the can and I got a friendly burst of cheezy air.
Making the nozzle hole large enough for a flashbang fuse was rather simple. I just dremeled away for about 2 minutes and threaded the fuse in.
After that, to make sure the fuse wouldnt move around, I mixed up some 6 minute epoxy. Within a couple hours, the fuse was solid as a rock.
Then I cut the bottom off and sized it to my liking with a hack-saw.
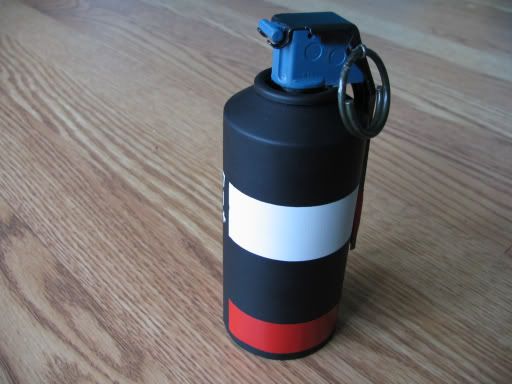
After washing it out thuroughly, I began to sand the cheezy logos (Hehe, PUN!) and nutritional facts, overall getting a nice brushed aluminum finish.
I started painting with Rustoleums great lineup of protective paints. First things first I applied the bare metal protective coat (white). I applied ~3-4 coats in under the instructed hour.
A couple hours later, I taped off my desired markings and began to paint with rustoleums protective flat enamel. I applied a couple more coats throughout the night. Today I removed the painters tape and...well, it was done.
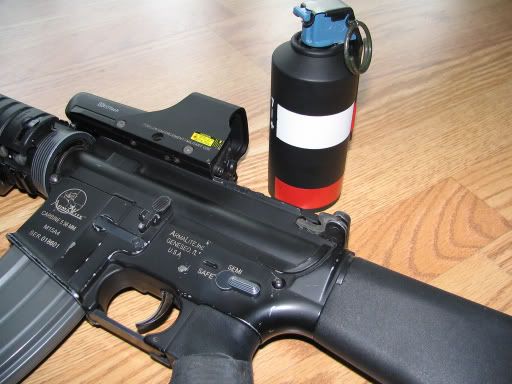
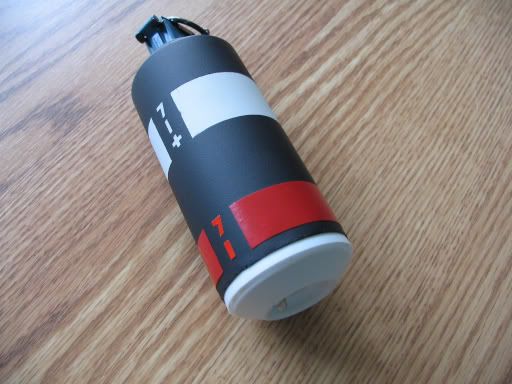
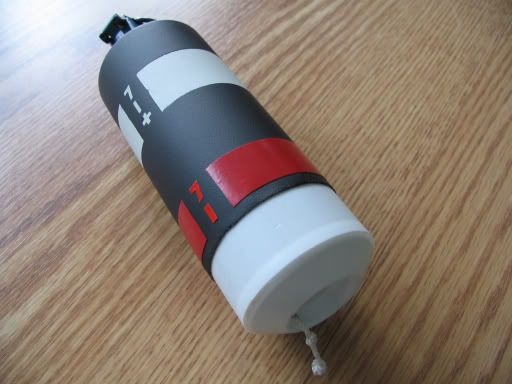
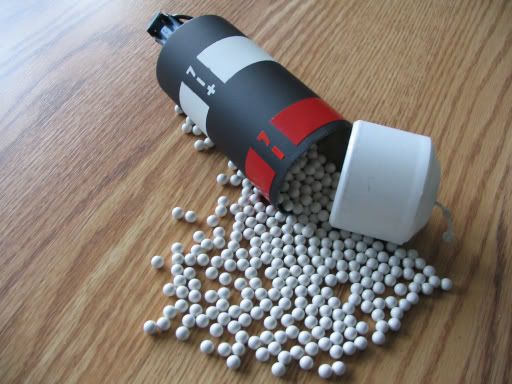
Heres some pictures...


First things first:
I pulled the nozzle off of the top (not the smartest way of releasing compressed air). Luckily there was little compression left in the can and I got a friendly burst of cheezy air.
Making the nozzle hole large enough for a flashbang fuse was rather simple. I just dremeled away for about 2 minutes and threaded the fuse in.
After that, to make sure the fuse wouldnt move around, I mixed up some 6 minute epoxy. Within a couple hours, the fuse was solid as a rock.
Then I cut the bottom off and sized it to my liking with a hack-saw.
After washing it out thuroughly, I began to sand the cheezy logos (Hehe, PUN!) and nutritional facts, overall getting a nice brushed aluminum finish.
I started painting with Rustoleums great lineup of protective paints. First things first I applied the bare metal protective coat (white). I applied ~3-4 coats in under the instructed hour.
A couple hours later, I taped off my desired markings and began to paint with rustoleums protective flat enamel. I applied a couple more coats throughout the night. Today I removed the painters tape and...well, it was done.
Heres some pictures...


 .
.