Post by fuzzywolly on Nov 10, 2010 18:55:43 GMT -5
Updated June 11th
This seemed to be the appropriate section for this. Mods, sorry if it is not, feel free to move.
I have had a few people ask me how I made my ghillie from various forums. While I made mine a certain way, that does not mean there are not other ways to make a ghillie. In fact, there are so many options and different styles of ghillies out there. Which brings me to my first section.
Remember: As you read along, make sure to think about these questions and apply it to your situation. Mine is just an example!
Deciding what ghillie to make: The Layout/Planning Period
When I was deciding how to make my ghillie, I thought about the area I played in, and my style of play. For me, I play in PA, with lush green vegetation in the warmer months, and brown dead stuff in the colder months. I wanted to be able to use my ghillie all year round, so I needed to take into account, how I would be able to do so, without having to make drastic changes each season. In order to do so, I had to think about a few important things.
Color
1) You can easily make your ghillie darker by adding vegetation. But a ghillie that is dark in colors, makes things more difficult, for making it lighter, is not as easy. Therefore, my base color should not be any dark greens. Remember, I need to be able to use it in both the summer and winter. Having a green base would cause me to stick out during the colder season. That would defeat the purpose of a ghillie This lead me to the conclusion that my base color would be tan. This is very easy to darken up by adding some vegetation. It also blends in fairly well with the earth, and dry leaves when cold season hits.
2) What other colors to add? Realizing that I have a tan base, going with some green would help blend in with the surrounding vegetation. But be careful, too much will result in you having to remove it during the winter months. This is something I did not want to have to do, so I had to use green sparingly. For you, it might be different.
With that said, my plan was to add green randomly onto the netting. I was cautious in tying the jute on. After all, its easier to go back and put more on, then to take it off, which is kind of a pain (repetitive).
Now its time to think about any other colors you want to add. For me, I wanted some brown, but not a lot of it. Reason being, I like my ghillie dirty as hell. The tan jute gets covered in mud, to break it in. But I typically leave some of it on, rather than washing it off. After all, "no one likes a clean ghillie " Therefore, a lot of brown is not necessary. My plan involved keeping the base color tan, and thats exactly what I did.
Type of ghillie
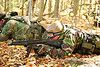
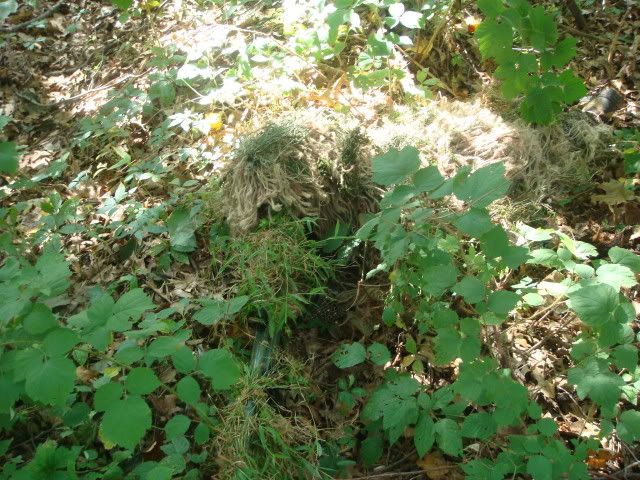
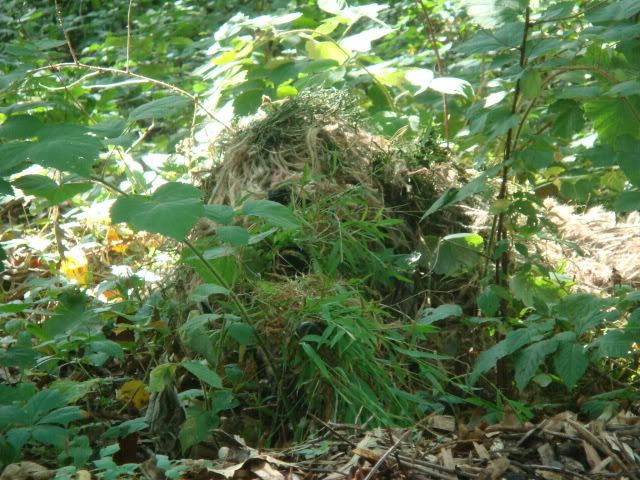
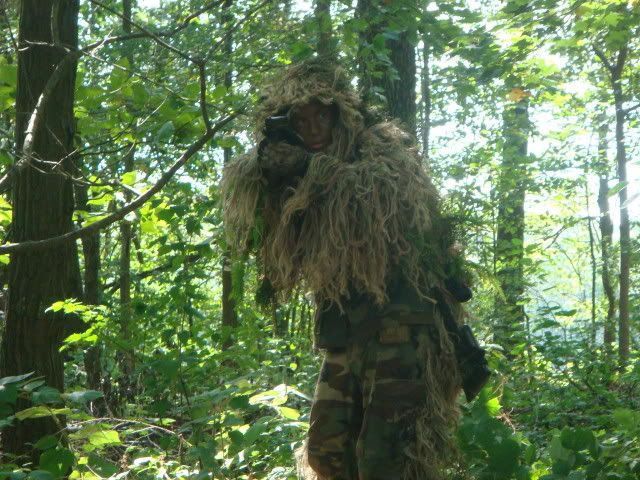
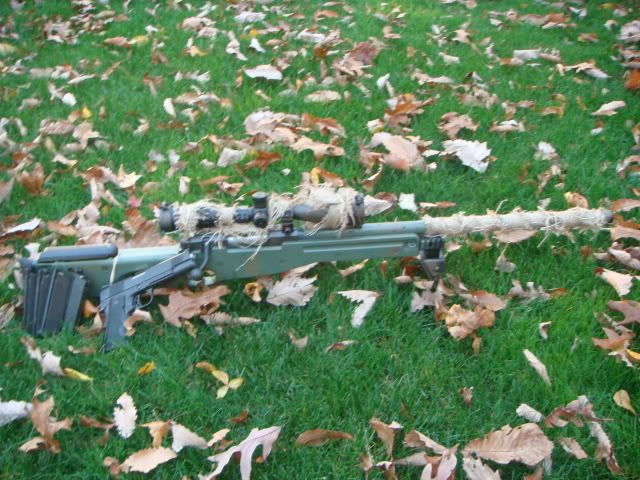
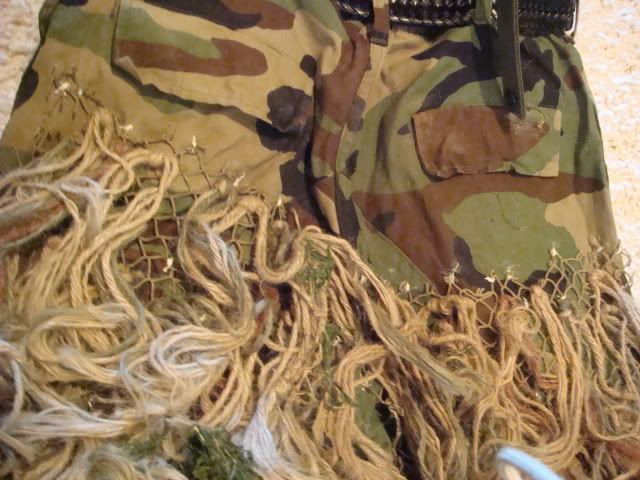
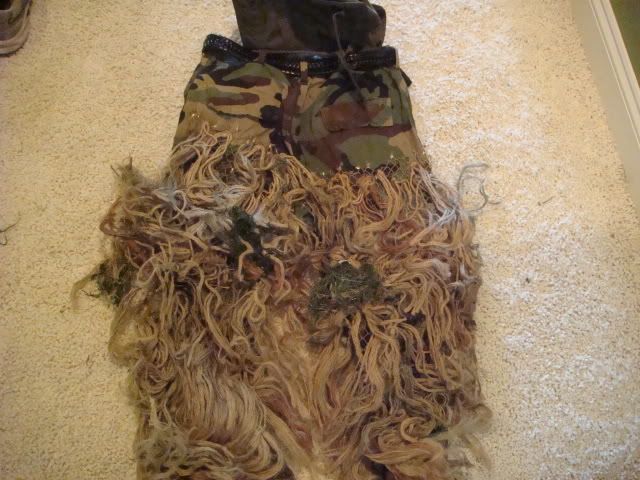
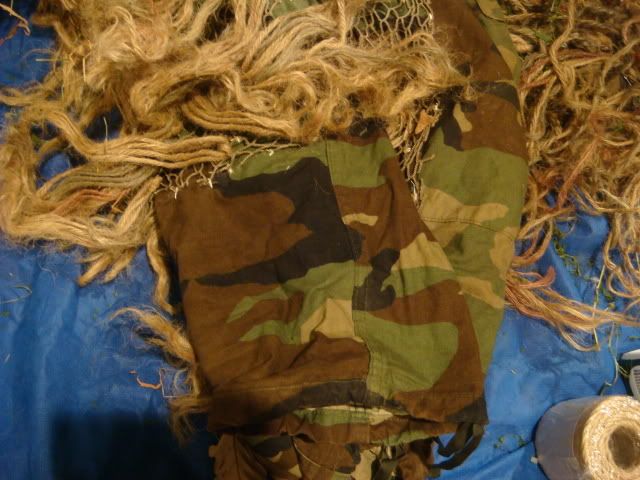
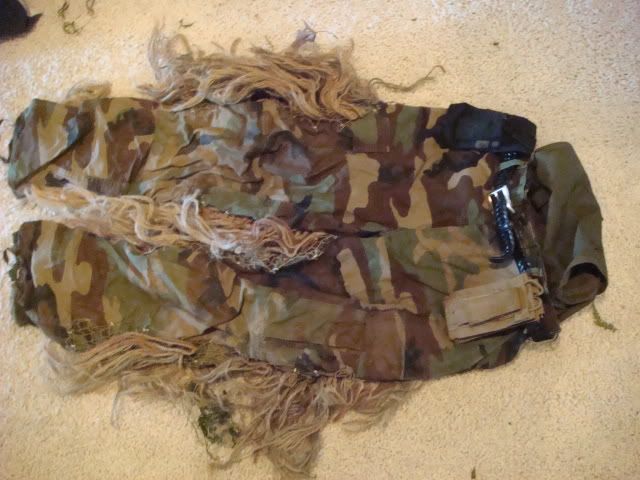
This is important. Like I said above, there are so many different options. Below you will see, I made a ghillie that is used primarily for prone situations. The jute is only on the back of the jacket and the pants. I did this to help eliminate getting entirely tangled in twigs, prickers, and other sticks and stuff Not only that, but I planned on being in prone most of the time, which is when the suit I made is most affective. Other pros are more mobility, easy access to pouches in front (no jute in the way), and isn't as hot to wear as a full suit is. However, cons include not really useful for stalking. The front is just a normal BDU, with no jute attached. Going prone is a better option, if trying to use this ghillie most efficiently.
How much time do you have?
Plain and simple. Do you have the time and energy to make one of these bad boys. Getting halfway done and then quitting would leave you with nothing but lost time and money. Get this in your head. You will get frustrated, especially if this is your first time. Its normal, just take a break, relax, and go back to work later. Do not wear yourself out. These things take time, patience, and diligence. If you cannot be patient enough to make one, then you should probably not be in the sniper role, or itleast stick to the urban setting
Carrying/Wearing Gear:
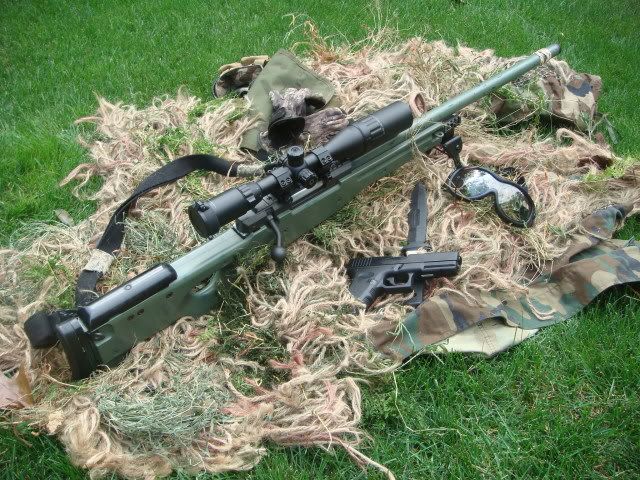
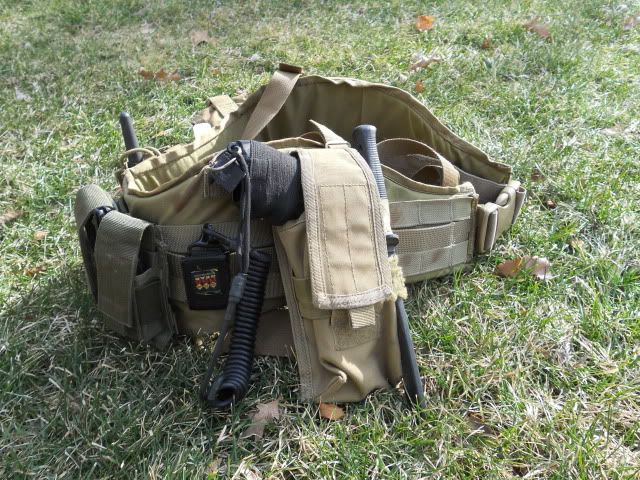
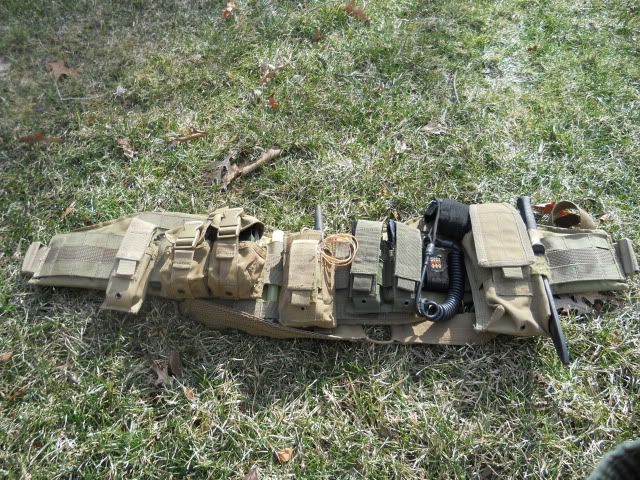
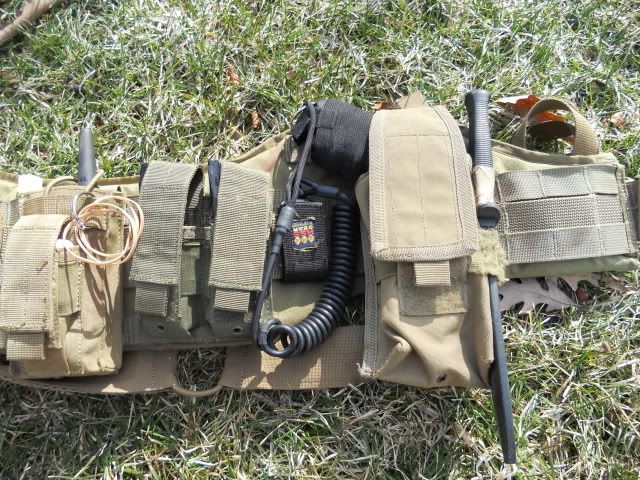
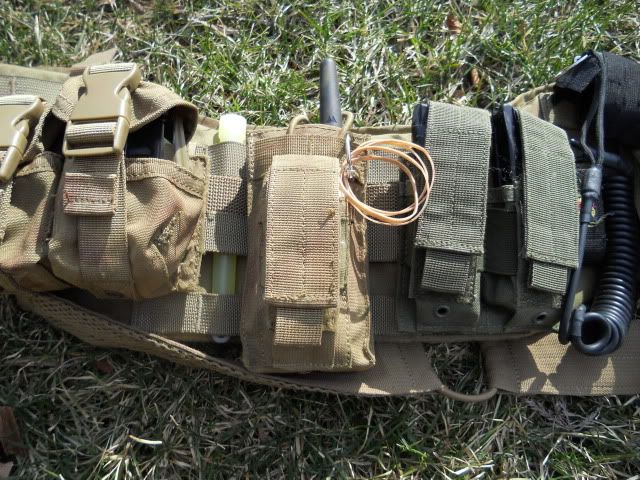
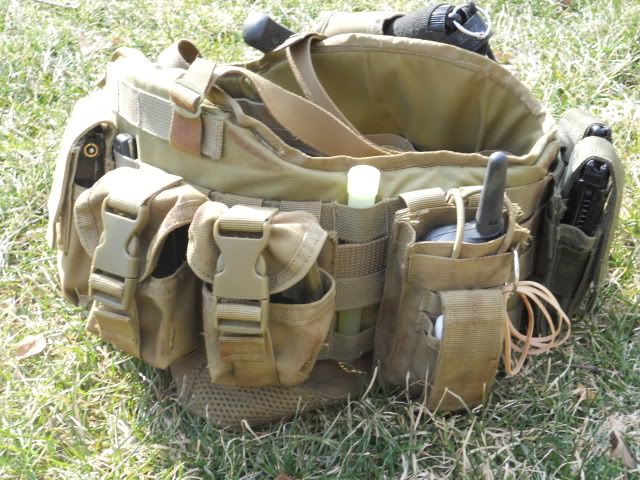
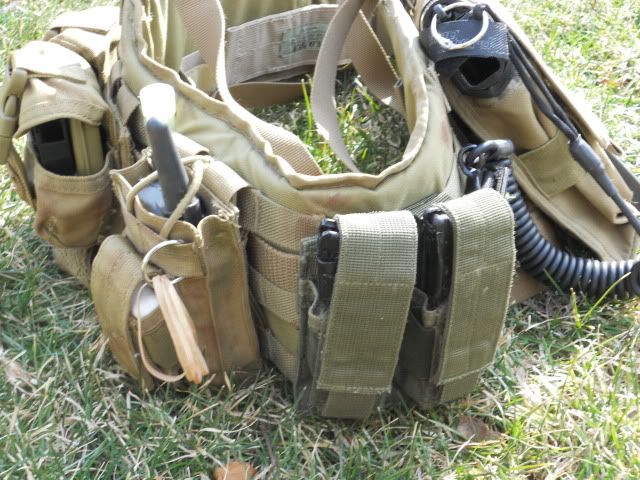
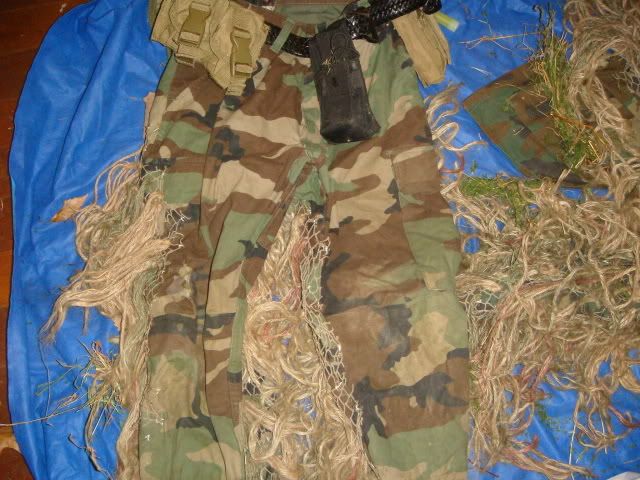
When wearing a ghillie suit, snipers have to determine what they can carry and how much they should carry, along with how they should carry it. I have found that a battle belt can be worn over top of the ghillie, allowing the jute to hang over top of it, concealing the belt. The battle belt offers plenty of room to carry gear and mags, along with being light weight, keeping mobility easy.
A sniper needs to determine how much gear/ammo to bring to a game. For my l96, I have 7 mags. Does that mean I use them all/bring them all to a game?? HEAVENS NO!. Depending on the length of the game, you may or may not only need three to four mags. I like to bring an extra one or two, because you never know what is going to happen on the field, and running out of ammo is something that I highly want to prevent.
If you are carrying a sidearm, make sure you can keep the mags in secure as well as the pistol itself. I like to use the magazine guard along with a pistol lanyard to ensure that if my pistol falls out, that I will be able to notice it, and retrieve it.
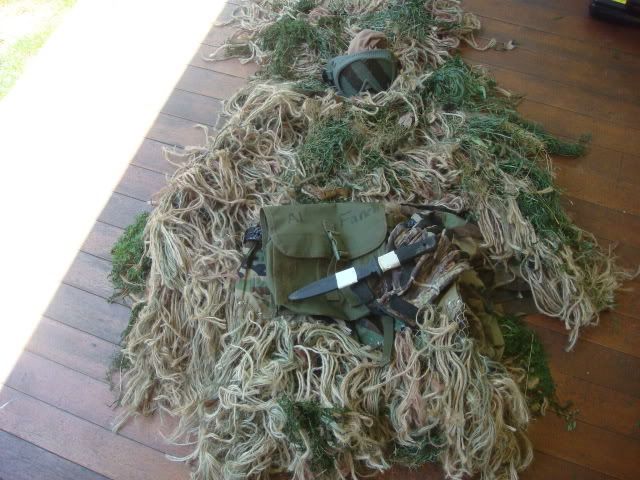
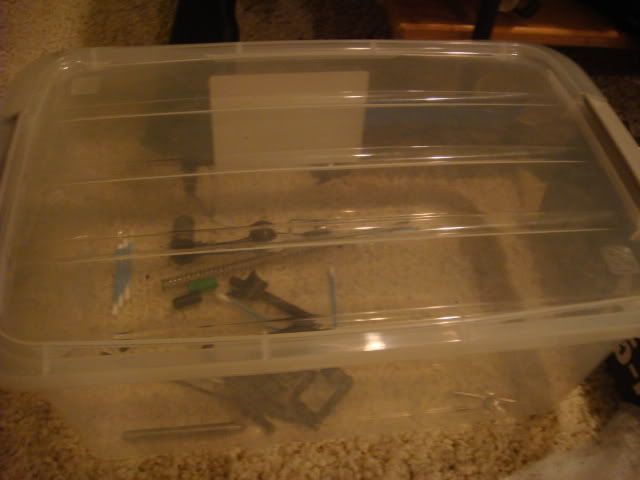
Pics of my gear that I carry:
Supplies
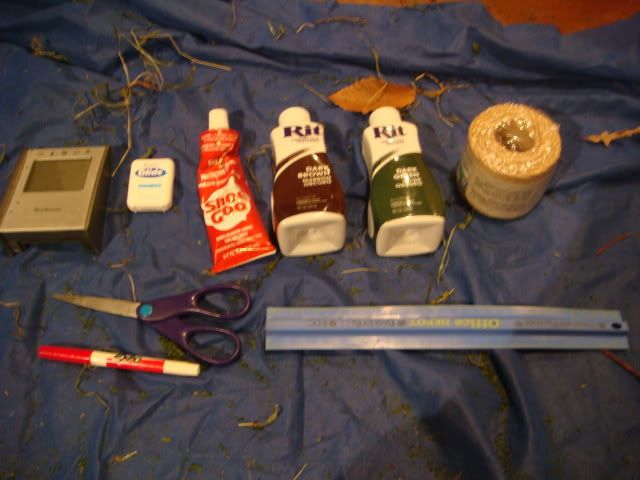
Here is one of the most important parts, the supplies. Here is a basic list of what you need. I even threw together a picture for you
List:
1. BDU (pants, jacket, boonie): Found everywhere!
2. Floss (non-scented) or strong sewing thread: Walmart
3. Needle or two (in case one breaks): Walmart
4. Jute and/or burlap: Found at walmart and home depot
5. Shoe Goo: Check wal-marts shoe department section
6. Ruler: Your desk...duh. Why a ruler? I use it to measure the length of my jute. I cut various lengths, and use the ruler to get a good estimate of what lengths I am cutting. I go for between 16 inches and 24 inches.
7. Scissors: Your desk
8. Marker: Comes in handy sometimes. Always good to have one on hand. Not completely necessary, I found some use for it.
9. Clock: Found in the picture, it represents all the time you are going to need ;D
10. Netting: I used 1in x 1in netting. Works great, I love it. Found it at michaels store.
11. Bin for dying the jute: Just make sure to take out the stuff inside it first
Now you have the supplies together, its time to get to work!
Making the ghillie
I started off with the jacket
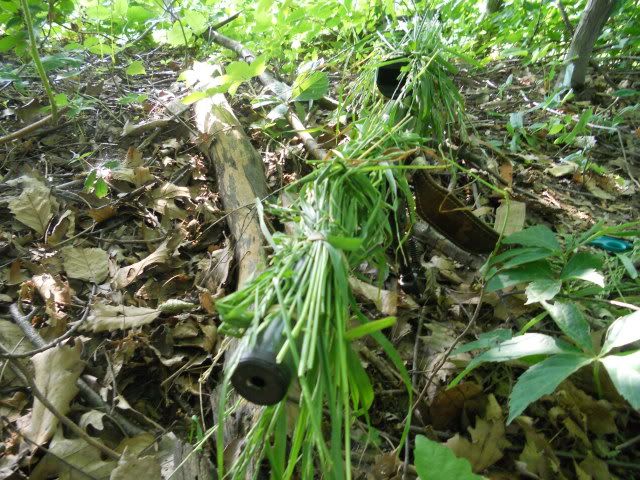
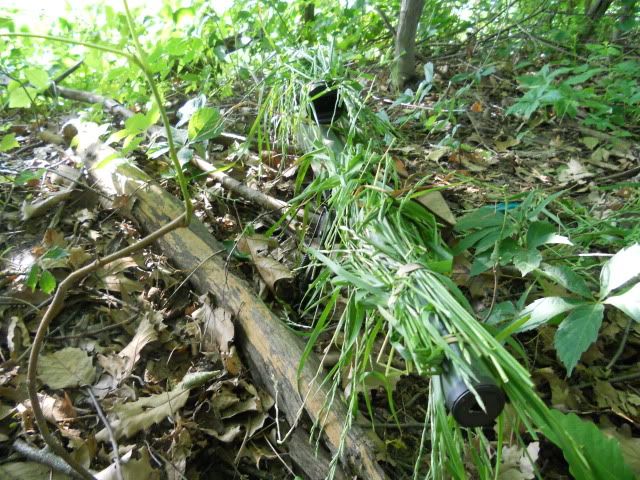
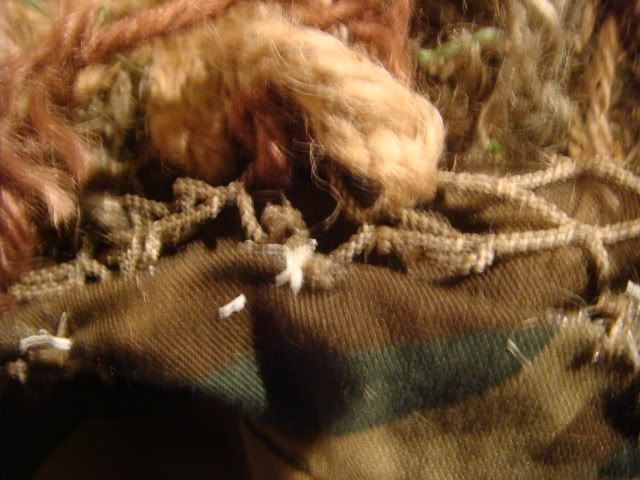
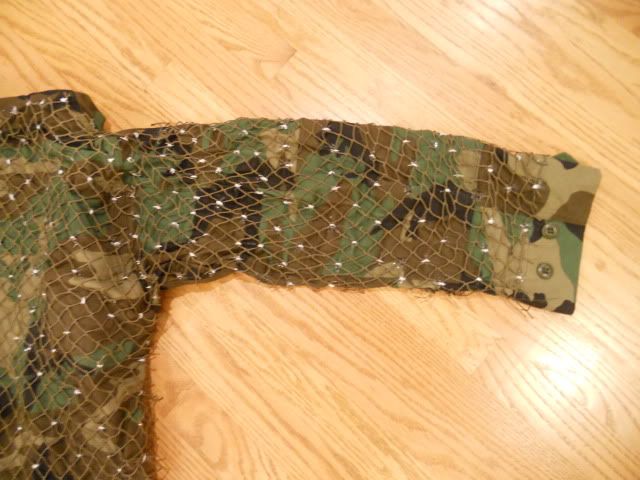
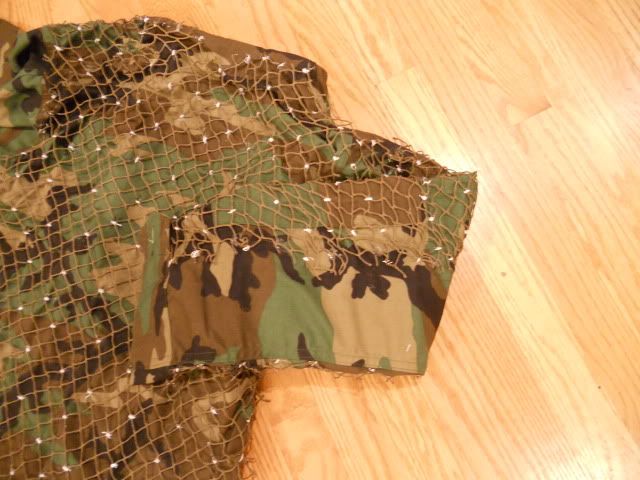
1. First you want to lay the netting over top of the BDU. Depending on how you make your ghillie, pay close attention to where you cut. I went to the border of the back of the jacket, and then cut. Make sure to stretch the netting out and not let it sag. For the arm portion of the jacket, wrap the netting slightly around over the top. When you put the jacket on, the netting sinks down behind you, and if you did not wrap the netting over top like I told you, it will sink to far behind you, leaving your shoulder area, and arm uncovered.

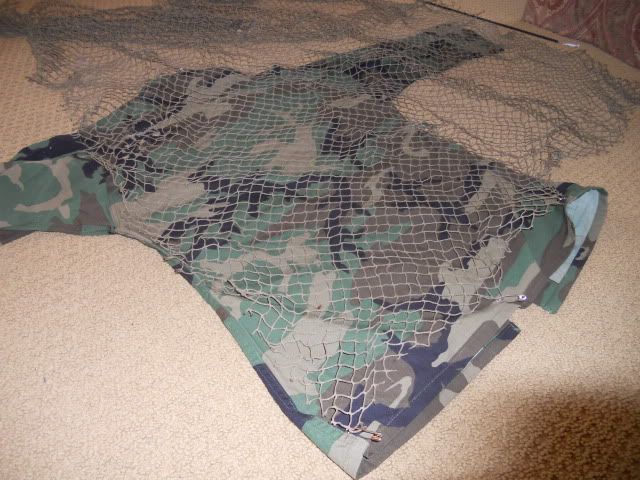
See how netting was wrapped around?
^Notice how the picture above, the netting goes to the edge, and is tied/glued down.
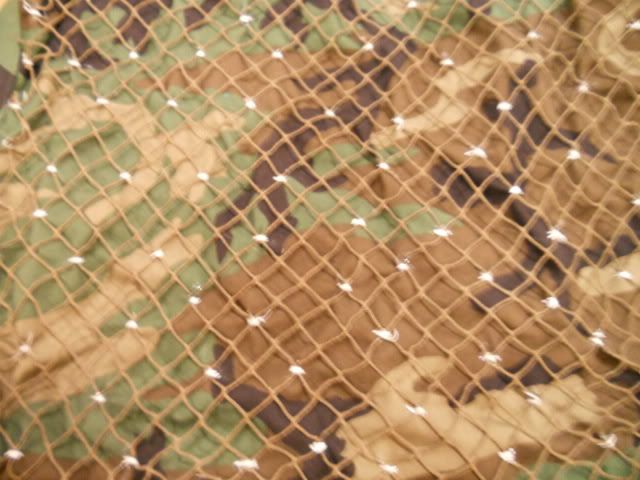
2. Once finished cutting, go ahead and make sure its all aligned correctly. Now start doing a perimeter of sewing down the netting. This makes sewing the rest of the netting down ten times easier. Note that you do not have to sew each small square down. Just enough so that if you pinch the netting, only a little bit of it can be pulled up.
The floss is used to sew the netting down. Do not apply the shoe goo yet. Wait til the end to do that part. I typically sew the floss down, wrapping it around three or four times.
3. The perimeter does not go up past the collar. Just put the netting up below this, sew it down and you are good. See below.
4. Now you have the netting tied down on the perimeter. Go ahead and sew the rest of the netting on the rest of the jacket. It will take awhile. This part is fun at first, then it just gets so boring. Take breaks every thirty minutes to an hour. Talk a walk, get a drink, or just do something (make sure its legal ) to get your mind off the ghillie so it can rest.
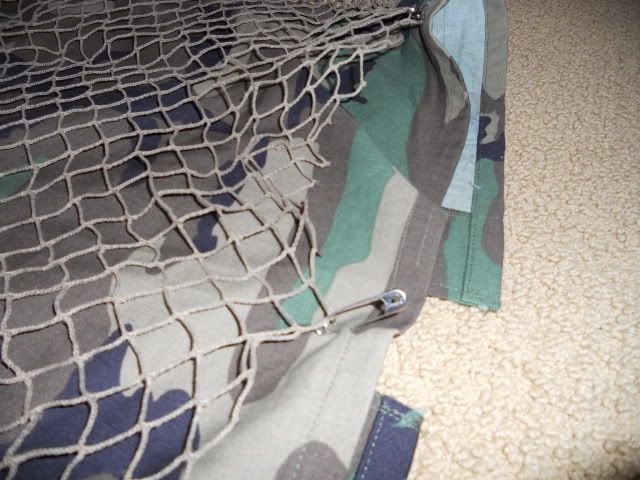
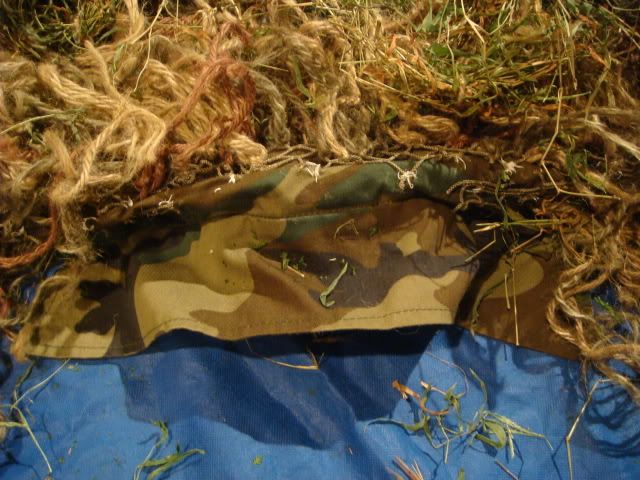
5. Repeat this process with the pants. One thing I like to do, is to wrap the netting around the pants a few inches. When you put the pants on, the netting will wrap around, just enough to cover the back side, along with the side of your legs as well. This is what you want. In addition, do not tie netting to the very bottom of the pants. Its not necessary. The jute will hang down 8 inches or so. The same applies to the top part of the pants. The jute will hang down from the jacket. Do not apply netting to the top part. Jute hangs down, so no netting is required there.
See how there is no netting at the top of the pants. The jute from the jacket will hang down.
See how the netting stops short of the bottom

The jute will hang down.
The netting is wrapped slightly to the front. Trust me, it looks dumb otherwise.
Start by sewing a perimeter, and then sew down the rest.
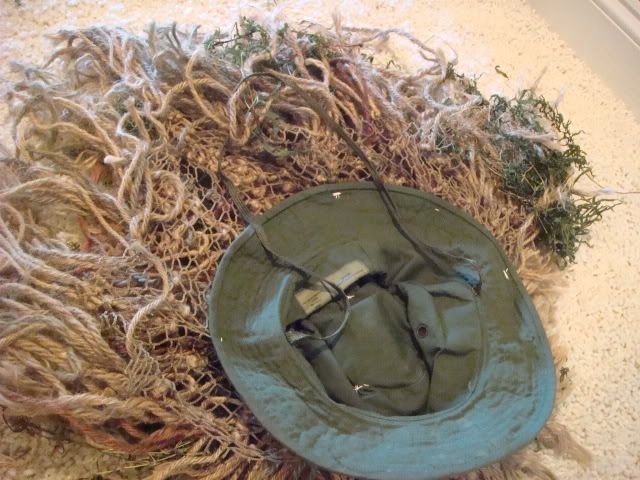
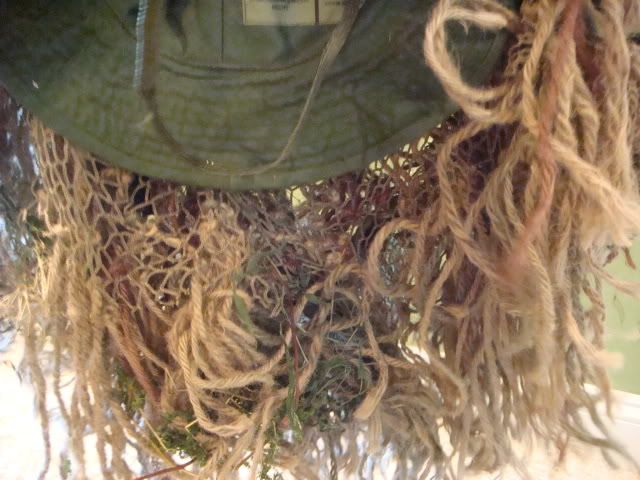
6. You can either do the boonie now, or do it later. Your choice. I get tired of sewing, and usually take a break and work on glueing, and tying jute. The boonie just needs netting to wrap around the brim and up to the top, covering it completely. Let the netting hand down in the back around 8 inches. On the side, about 4 inches. And alittle to none in the front.
7. Now its time to shoe glue. I do this to ensure the floss does not come undone. This creates a very durable ghillie that you can be confident in using on the field. Place alittle dab of glue over top of the floss. Let it dry for a day. Then you can go back to work on the ghillie. The glue will dry completely in three days, but after a day, you can handle it lightly.
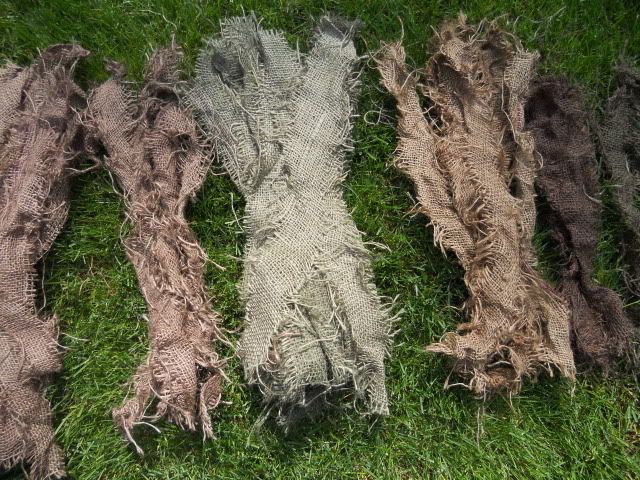
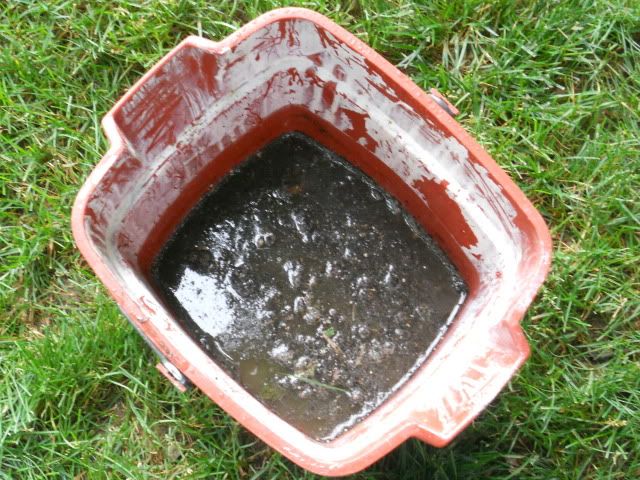
8. While the glue dries, you can dye your jute. That is if you are using any different colors other than the base tan. Also, I actually dyed my jute for my second ghillie first. This is not important. Do it in the order that you feel works best. It will not affect the outcome of the ghillie....obviously.
The bin pictured above, found at walmart, is great for placing your jute in when dying it. There are specific directions on the bottle of your dye, but I simply did the following. (I cut my jute before dying)
1. Start up some water, and place in the bin. I like the water hottt!
2. Pour some dye into the water. Just do alittle. Not much is needed. Depending on the amount of jute being dyed, it will vary. Just apply alittle, and stir it up. If the water is still clear, apply some more.
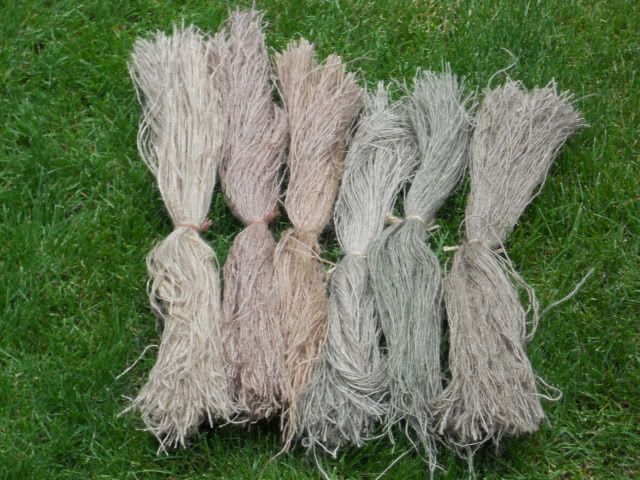
3. Put that jute in there! Stir it once and awhile for fifteen minutes. Make sure that jute gets dyed completely.
4. Get a bucket of cold water. Take the jute out of the dyed water, and squeeze out access. Place in the cold bucket. Rinse completely. The water squeezed from the jute should be clear.
5. Let it airdry. Put the jute in the sun.
6. Its dry! Now lets tie it to the netting. This is the fun part!
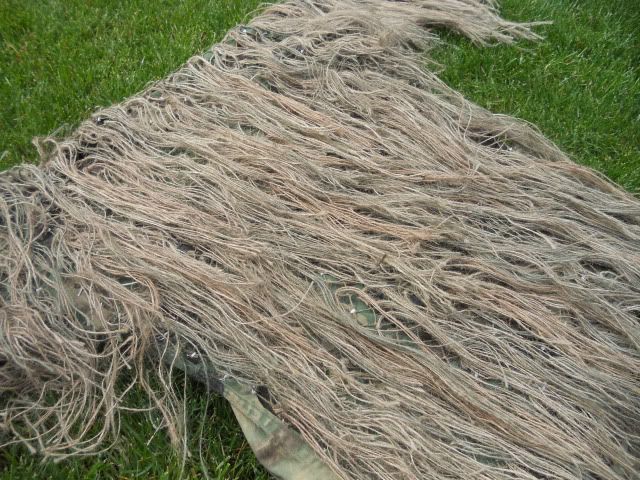
9. Tie the jute to the netting. I applied a base of two strands of tan jute to every other five squares of 1 in netting. Do this to the top of the ghillie. --Note: this was with the thicker styled jute. When stripping burlap, it will be much thinner and you should therefore tie around 3-4 peices together to the netting.
Now apply some green, brown, or whatever other colors you are using. Make sure your base color is the one you tie on most. Remember, a lighter ghillie can be darkened using vegetation. Its very hard to make a dark ghillie lighter. Also, check out your environment, and apply what you think will work best.
10. Look at your ghillie. Fill in spots that need to be filled. Are the secondary colors applied randomly across the base color of the ghillie?
Congrats, your ghillie is "technically" finished. Now for the best part EVA!
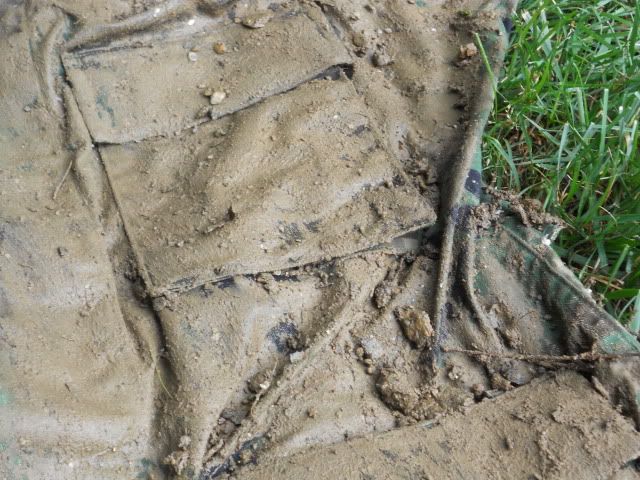
11. Wear the ghillie in. My favorite part To do so, make a mud hole. Filled with water, mud, leaves, bugs (they come with the mud), and other crap (not literally!) rub it all over your ghillie. If you made it right, don't worry, it won't fall apart.
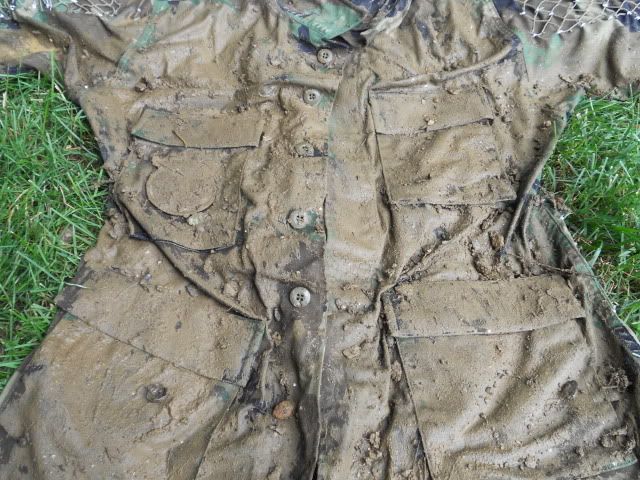
Do the same on the other side with the jute. Enjoy this part, its fun.
12. Now let the mud dry onto the ghillie. Let it sit for awhile. Watch out for creepy crawlers. Ghillies make great homes for bugs, spiders, and deer....ok, not deer. But you get the point.
13. Finished? No, do step 11 and 12 a few more times. Then do it again after that. No one likes a clean ghillie.
14. Now you are finished. Go grab a drink, sit down, and take a nap. You deserve it.
Keep scrolling through the thread for "Tips" section, along with a few other pics.
This seemed to be the appropriate section for this. Mods, sorry if it is not, feel free to move.
I have had a few people ask me how I made my ghillie from various forums. While I made mine a certain way, that does not mean there are not other ways to make a ghillie. In fact, there are so many options and different styles of ghillies out there. Which brings me to my first section.
Remember: As you read along, make sure to think about these questions and apply it to your situation. Mine is just an example!
Deciding what ghillie to make: The Layout/Planning Period
When I was deciding how to make my ghillie, I thought about the area I played in, and my style of play. For me, I play in PA, with lush green vegetation in the warmer months, and brown dead stuff
 in the colder months. I wanted to be able to use my ghillie all year round, so I needed to take into account, how I would be able to do so, without having to make drastic changes each season. In order to do so, I had to think about a few important things.
 Color
1) You can easily make your ghillie darker by adding vegetation. But a ghillie that is dark in colors, makes things more difficult, for making it lighter, is not as easy. Therefore, my base color should not be any dark greens. Remember, I need to be able to use it in both the summer and winter. Having a green base would cause me to stick out during the colder season. That would defeat the purpose of a ghillie
 This lead me to the conclusion that my base color would be tan. This is very easy to darken up by adding some vegetation. It also blends in fairly well with the earth, and dry leaves when cold season hits.
 2) What other colors to add? Realizing that I have a tan base, going with some green would help blend in with the surrounding vegetation. But be careful, too much will result in you having to remove it during the winter months. This is something I did not want to have to do, so I had to use green sparingly. For you, it might be different.
With that said, my plan was to add green randomly onto the netting. I was cautious in tying the jute on. After all, its easier to go back and put more on, then to take it off, which is kind of a pain (repetitive).
Now its time to think about any other colors you want to add. For me, I wanted some brown, but not a lot of it. Reason being, I like my ghillie dirty as hell. The tan jute gets covered in mud, to break it in. But I typically leave some of it on, rather than washing it off. After all, "no one likes a clean ghillie
 " Therefore, a lot of brown is not necessary. My plan involved keeping the base color tan, and thats exactly what I did.
Type of ghillie
This is important. Like I said above, there are so many different options. Below you will see, I made a ghillie that is used primarily for prone situations. The jute is only on the back of the jacket and the pants. I did this to help eliminate getting entirely tangled in twigs, prickers, and other sticks and stuff
Not only that, but I planned on being in prone most of the time, which is when the suit I made is most affective. Other pros are more mobility, easy access to pouches in front (no jute in the way), and isn't as hot to wear as a full suit is. However, cons include not really useful for stalking. The front is just a normal BDU, with no jute attached. Going prone is a better option, if trying to use this ghillie most efficiently. How much time do you have?
Plain and simple. Do you have the time and energy to make one of these bad boys. Getting halfway done and then quitting would leave you with nothing but lost time and money. Get this in your head. You will get frustrated, especially if this is your first time. Its normal, just take a break, relax, and go back to work later. Do not wear yourself out. These things take time, patience, and diligence. If you cannot be patient enough to make one, then you should probably not be in the sniper role, or itleast stick to the urban setting

Carrying/Wearing Gear:
When wearing a ghillie suit, snipers have to determine what they can carry and how much they should carry, along with how they should carry it. I have found that a battle belt can be worn over top of the ghillie, allowing the jute to hang over top of it, concealing the belt. The battle belt offers plenty of room to carry gear and mags, along with being light weight, keeping mobility easy.
A sniper needs to determine how much gear/ammo to bring to a game. For my l96, I have 7 mags. Does that mean I use them all/bring them all to a game?? HEAVENS NO!. Depending on the length of the game, you may or may not only need three to four mags. I like to bring an extra one or two, because you never know what is going to happen on the field, and running out of ammo is something that I highly want to prevent.
If you are carrying a sidearm, make sure you can keep the mags in secure as well as the pistol itself. I like to use the magazine guard along with a pistol lanyard to ensure that if my pistol falls out, that I will be able to notice it, and retrieve it.
Pics of my gear that I carry:
Supplies
Here is one of the most important parts, the supplies. Here is a basic list of what you need. I even threw together a picture for you

List:
1. BDU (pants, jacket, boonie): Found everywhere!
2. Floss (non-scented) or strong sewing thread: Walmart
3. Needle or two (in case one breaks): Walmart
4. Jute and/or burlap: Found at walmart and home depot
5. Shoe Goo: Check wal-marts shoe department section
6. Ruler: Your desk...duh. Why a ruler? I use it to measure the length of my jute. I cut various lengths, and use the ruler to get a good estimate of what lengths I am cutting. I go for between 16 inches and 24 inches.
7. Scissors: Your desk
8. Marker: Comes in handy sometimes. Always good to have one on hand. Not completely necessary, I found some use for it.
9. Clock: Found in the picture, it represents all the time you are going to need ;D
10. Netting: I used 1in x 1in netting. Works great, I love it. Found it at michaels store.
11. Bin for dying the jute: Just make sure to take out the stuff inside it first
Now you have the supplies together, its time to get to work!
Making the ghillie
I started off with the jacket
1. First you want to lay the netting over top of the BDU. Depending on how you make your ghillie, pay close attention to where you cut. I went to the border of the back of the jacket, and then cut. Make sure to stretch the netting out and not let it sag. For the arm portion of the jacket, wrap the netting slightly around over the top. When you put the jacket on, the netting sinks down behind you, and if you did not wrap the netting over top like I told you, it will sink to far behind you, leaving your shoulder area, and arm uncovered.
See how netting was wrapped around?
^Notice how the picture above, the netting goes to the edge, and is tied/glued down.
2. Once finished cutting, go ahead and make sure its all aligned correctly. Now start doing a perimeter of sewing down the netting. This makes sewing the rest of the netting down ten times easier. Note that you do not have to sew each small square down. Just enough so that if you pinch the netting, only a little bit of it can be pulled up.
The floss is used to sew the netting down. Do not apply the shoe goo yet. Wait til the end to do that part. I typically sew the floss down, wrapping it around three or four times.
3. The perimeter does not go up past the collar. Just put the netting up below this, sew it down and you are good. See below.
4. Now you have the netting tied down on the perimeter. Go ahead and sew the rest of the netting on the rest of the jacket. It will take awhile. This part is fun at first, then it just gets so boring. Take breaks every thirty minutes to an hour. Talk a walk, get a drink, or just do something (make sure its legal
) to get your mind off the ghillie so it can rest. 5. Repeat this process with the pants. One thing I like to do, is to wrap the netting around the pants a few inches. When you put the pants on, the netting will wrap around, just enough to cover the back side, along with the side of your legs as well. This is what you want. In addition, do not tie netting to the very bottom of the pants. Its not necessary. The jute will hang down 8 inches or so. The same applies to the top part of the pants. The jute will hang down from the jacket. Do not apply netting to the top part. Jute hangs down, so no netting is required there.
See how there is no netting at the top of the pants. The jute from the jacket will hang down.
See how the netting stops short of the bottom
The jute will hang down.
The netting is wrapped slightly to the front. Trust me, it looks dumb otherwise.
Start by sewing a perimeter, and then sew down the rest.
6. You can either do the boonie now, or do it later. Your choice. I get tired of sewing, and usually take a break and work on glueing, and tying jute. The boonie just needs netting to wrap around the brim and up to the top, covering it completely. Let the netting hand down in the back around 8 inches. On the side, about 4 inches. And alittle to none in the front.
7. Now its time to shoe glue. I do this to ensure the floss does not come undone. This creates a very durable ghillie that you can be confident in using on the field. Place alittle dab of glue over top of the floss. Let it dry for a day. Then you can go back to work on the ghillie. The glue will dry completely in three days, but after a day, you can handle it lightly.
8. While the glue dries, you can dye your jute. That is if you are using any different colors other than the base tan. Also, I actually dyed my jute for my second ghillie first. This is not important. Do it in the order that you feel works best. It will not affect the outcome of the ghillie....obviously.
The bin pictured above, found at walmart, is great for placing your jute in when dying it. There are specific directions on the bottle of your dye, but I simply did the following. (I cut my jute before dying)
1. Start up some water, and place in the bin. I like the water hottt!
2. Pour some dye into the water. Just do alittle. Not much is needed. Depending on the amount of jute being dyed, it will vary. Just apply alittle, and stir it up. If the water is still clear, apply some more.
3. Put that jute in there! Stir it once and awhile for fifteen minutes. Make sure that jute gets dyed completely.
4. Get a bucket of cold water. Take the jute out of the dyed water, and squeeze out access. Place in the cold bucket. Rinse completely. The water squeezed from the jute should be clear.
5. Let it airdry. Put the jute in the sun.
6. Its dry! Now lets tie it to the netting. This is the fun part!
9. Tie the jute to the netting. I applied a base of two strands of tan jute to every other five squares of 1 in netting. Do this to the top of the ghillie. --Note: this was with the thicker styled jute. When stripping burlap, it will be much thinner and you should therefore tie around 3-4 peices together to the netting.
Now apply some green, brown, or whatever other colors you are using. Make sure your base color is the one you tie on most. Remember, a lighter ghillie can be darkened using vegetation. Its very hard to make a dark ghillie lighter. Also, check out your environment, and apply what you think will work best.
10. Look at your ghillie. Fill in spots that need to be filled. Are the secondary colors applied randomly across the base color of the ghillie?
Congrats, your ghillie is "technically" finished. Now for the best part EVA!
11. Wear the ghillie in. My favorite part
 To do so, make a mud hole. Filled with water, mud, leaves, bugs (they come with the mud), and other crap (not literally!) rub it all over your ghillie. If you made it right, don't worry, it won't fall apart.
 Do the same on the other side with the jute. Enjoy this part, its fun.
12. Now let the mud dry onto the ghillie. Let it sit for awhile. Watch out for creepy crawlers. Ghillies make great homes for bugs, spiders, and deer....ok, not deer. But you get the point.
13. Finished? No, do step 11 and 12 a few more times. Then do it again after that. No one likes a clean ghillie.
14. Now you are finished. Go grab a drink, sit down, and take a nap. You deserve it.
Keep scrolling through the thread for "Tips" section, along with a few other pics.