

Post by Zinger on Mar 4, 2014 15:40:41 GMT -5
*Mods feel free to move this to the Accessories & Ammo section if you think it belongs there. I just figured since it was about WE GBBR mags it belonged in this topic.
Hello to all my fellow airsoft enthusiasts, I've been a GBBR user for around a year and a half now, and recently I decided to freshen up my WE SCAR(Open Bolt System). In doing so I found the standard WE AR/M4 mags boring, and wanted to spice them up a bit. Being the Magpul fan boy that I am, my first thought was to look for WE PMAG's. Well, my search turned up no results, (before the new WE MSK came about), but I found an interesting video on YouTube(Linked Below). The guy took real steel PMAG's and modified them to fit the guts of a WE GBBR mag in them. That's what I'm here to show you. Now I'm sure there are other guides to do this on the internet, but the ones I've seen are not always the most helpful. I hope to fix that with this step by step guide.
Now that the WE MSK is available, PMAG style magazines are available for WE GBBR rifles. However, from what I've heard, these do not always work well with other WE GBBR's. In addition to faulty operation, they do not feature Magpul trademarks. And after years on this forum, I know you guys love your realism, and small details like that matter. So why not give it try?
Video: www.youtube.com/watch?v=cQPZOBdmXY4 (Not my video: Credit to MaximusMJG)
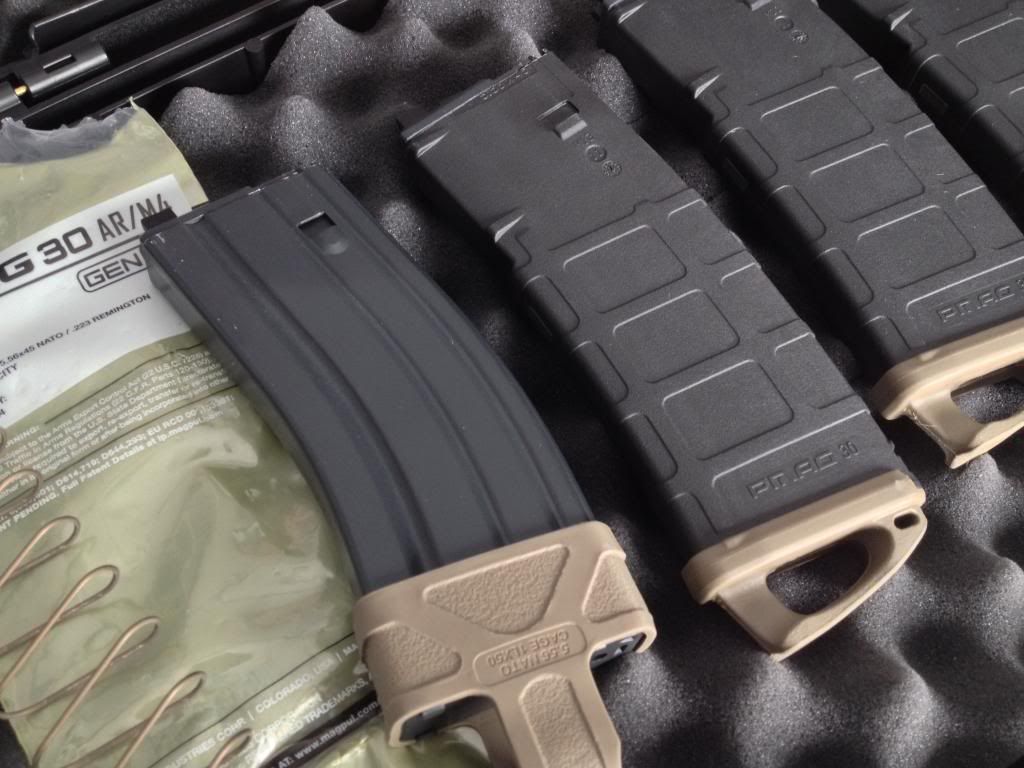
First off here is a picture of the finished product: (I'm keeping the image size large so you can really see the details)
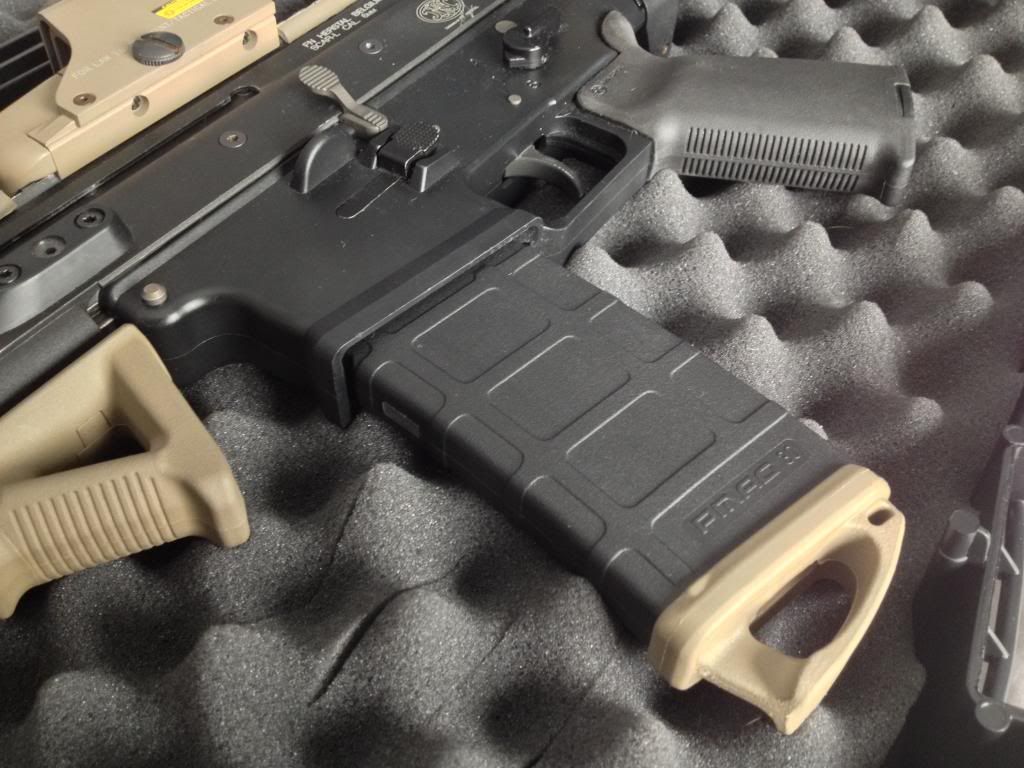
Okay, now that you've seen the finished product, lets get on to showing how to make them.
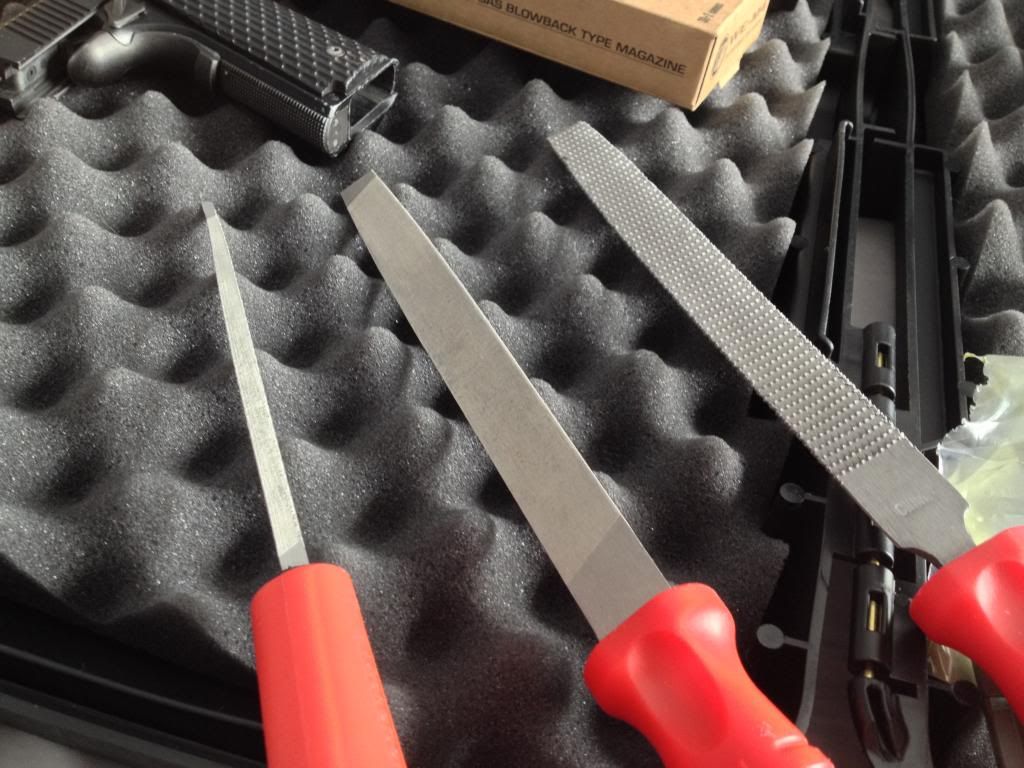
1. First you will need a couple of tools to get the job done.
I recommend to use the following:
The files and rasp I used:
2. Okay now we need to remove the "guts" of the WE GBBR mag
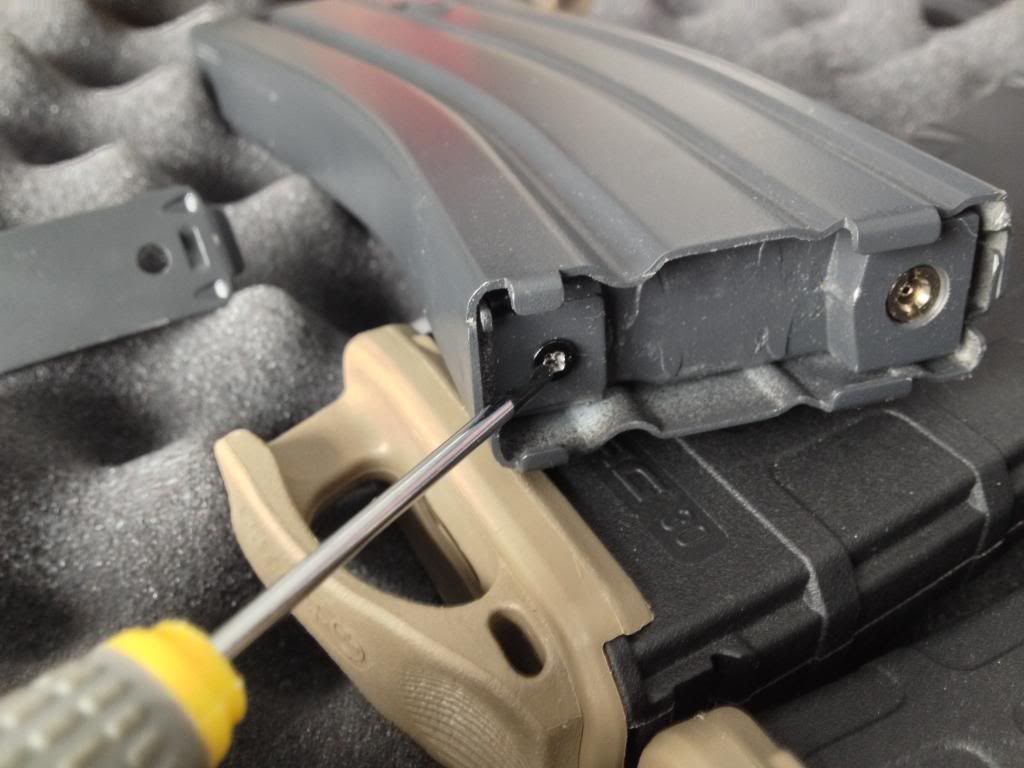
2a. Remove the plate on the bottom of the original magazine
2b. Then remove the screw and push the "guts" of the magazine out the top of the mag
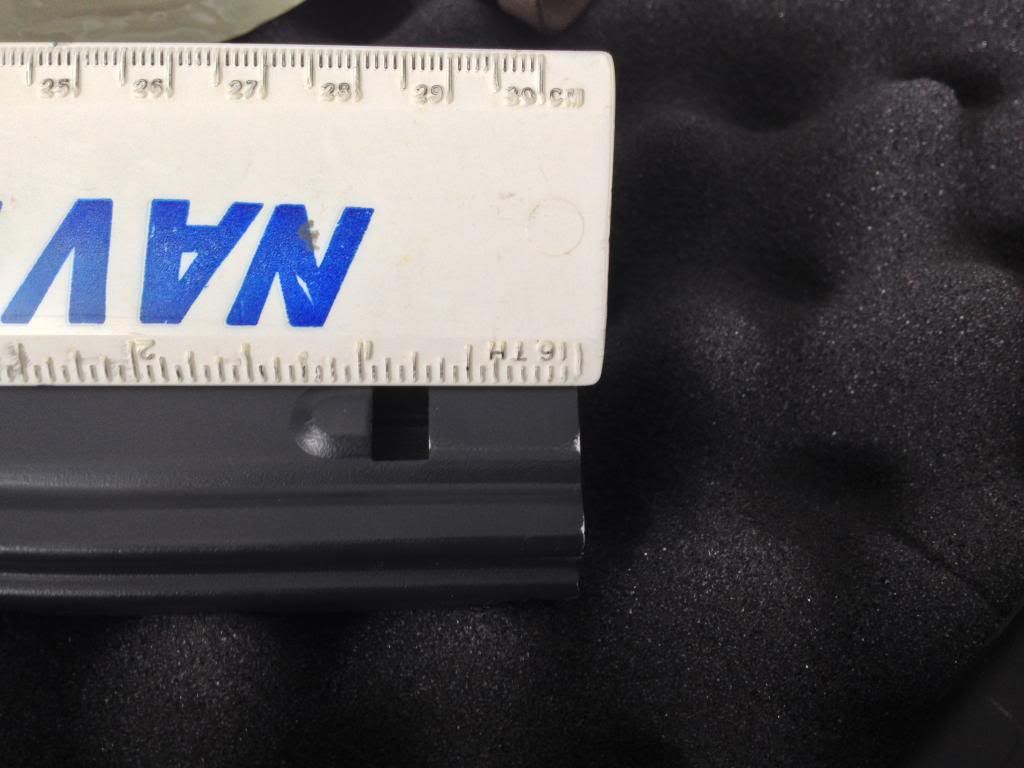
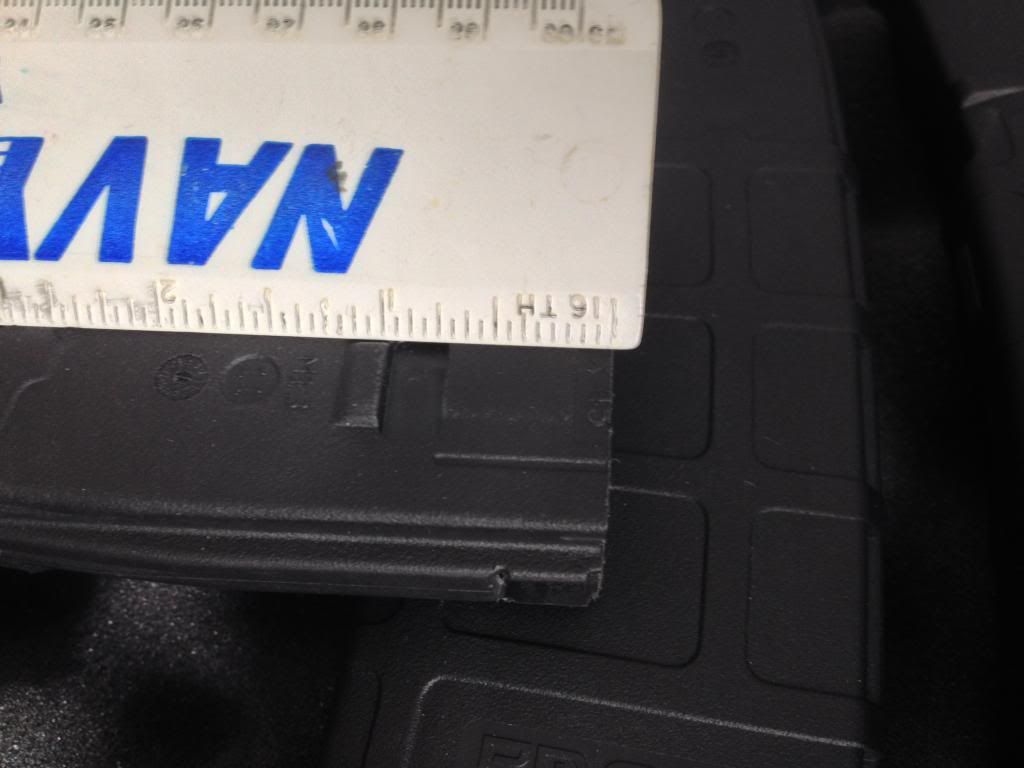
3. Now that the "guts" are out, its time to take some measurements
***I highly recommened using a set of calipers for this step, precision is key, with out the accurate measurements, the gun will not cycle. Also measure from the top of the mag catch slot, to the top of the magazine shell. Again this is the most crucial step measure 20 times if you have to!***
4. Okay now we need to dissemble the AR-15/M4 PMAG (Unfortunately i do not have any pictures of this step but it should be simple enough to figure out)
Slide the bottom plate of the PMAG off and the spring and follower should slide right out.
5. Next we will need to cut off the top of the PMAG
5a. Remember that measurement? Good take a ruler and place a mark about a 1/16" of an inch above the measurement you took earlier (This 1/16" will be filed off later to allow for measurement error and fine tuning)
5b. Now we will use a miter box or band saw to cut off those feeding lips, I put the blade just above the mark I made so I didn't take too much off, I also found the fence on the miter box useful to keep the top of the mag perpendicular to the side of the magazine.
Here is what your PMAG should look like now:
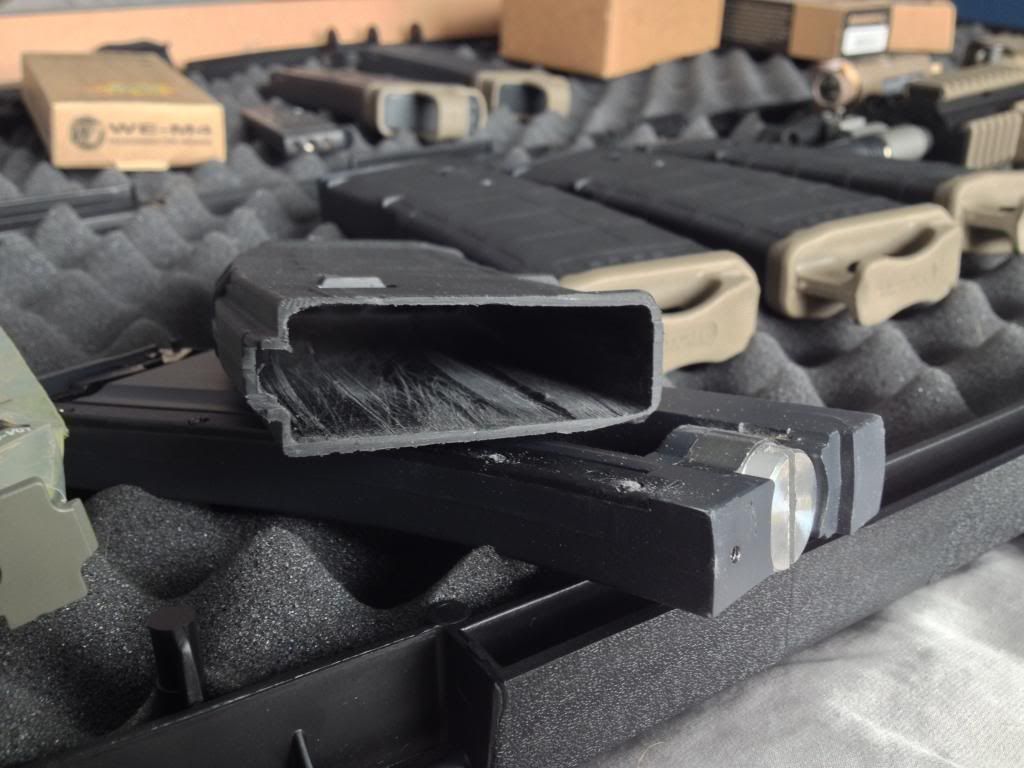
6. Looking inside you will notice some guides and ridges inside the magazine. These are used to guide the casings of the .223 bullet up the mag and into the feeding lips. But this is airsoft and we don't need them. So get rid of them all till the insides are flat, using the rasp, files and chisel. *This is very time consuming, so don't get frustrated*
Like this:
***NOTICE: the top of the mag is slightly thinner than the bottom, this is for the bolt catch assembly on the "guts" of the magazine. Be sure to make room for it or your bolt catch will not function!***
7. After step 6, it is just a bunch of putting that old WE GBBR mag to use.
7a. Test the fit by putting the "guts" into the PMAG. If it doesn't slide all the way in(yeah yeah, make your jokes), keep filing. *Please note that some force will be required, you should not have to use excessive force, like a hammer, to get the mag to fit*
7b. If when testing if the "guts" get stuck inside, use the hammer and wrench to pound it out(more jokes? really come on now) from the bottom.
8. Eventually you will get the mag to sit flush with the exposed portion of the "guts" like below.
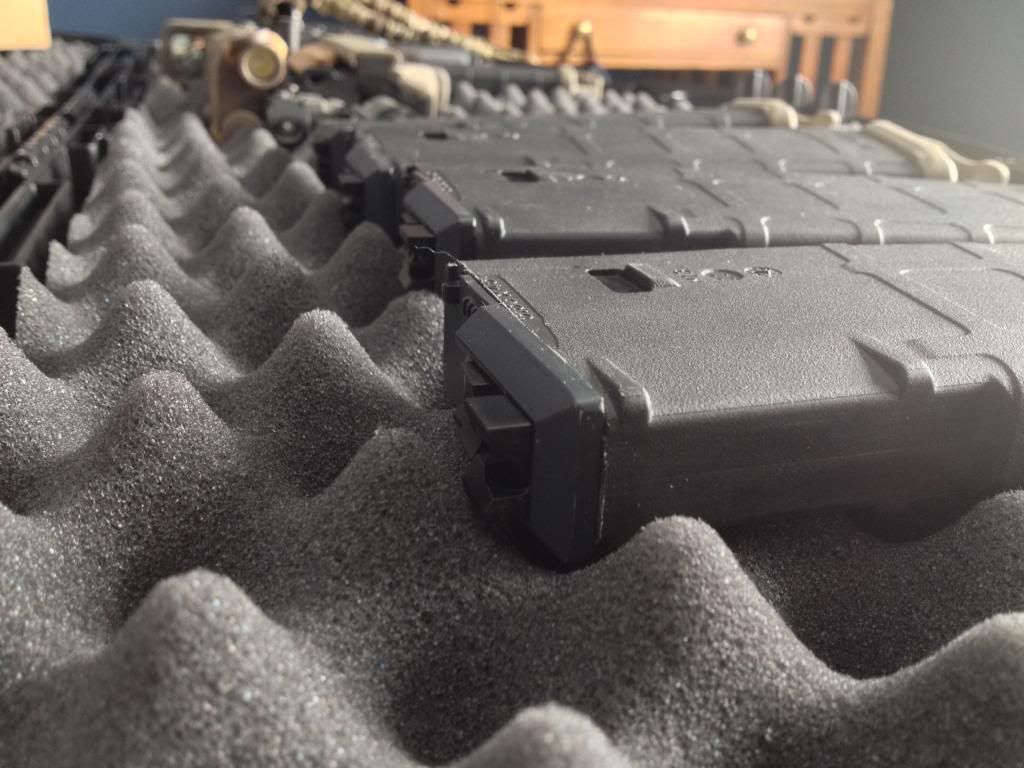
9. Almost done, hang in there! Now we need to make a space for the valve knocker(in your WE GBBR) to hit the release valve(on your mag). I used the larger file's narrow edge to basically cut(or file) a gap such as the one shown below, there are two notches on the back of the PMAG, cut down to those notches.

10. Now that you are practically finished, we need to test them in your WE GBBR. *Do not test them with gas at first* Using the charging handle, cycle the bolt a few times. If the bolt gets hung up on the mag or does not cycle smooth, remove the mag, and the "guts", and file down the top of the PMAG. Keep this process up until the bolt cycles nice and smooth(or normally), only after that would I recommend testing with gas and shooting it. (I didn't try cycling the bolt first and ended up having to replace my nozzle)
11. Congratulations! You are now able to construct your very own, and very realistic, WE GBBR PMAG! Get out there, have fun, and show them how awesome a Gas Blow Back Rifle can be!
***If you have any questions or recommendations to make this guide better, feel free to send me a PM or just post below.***
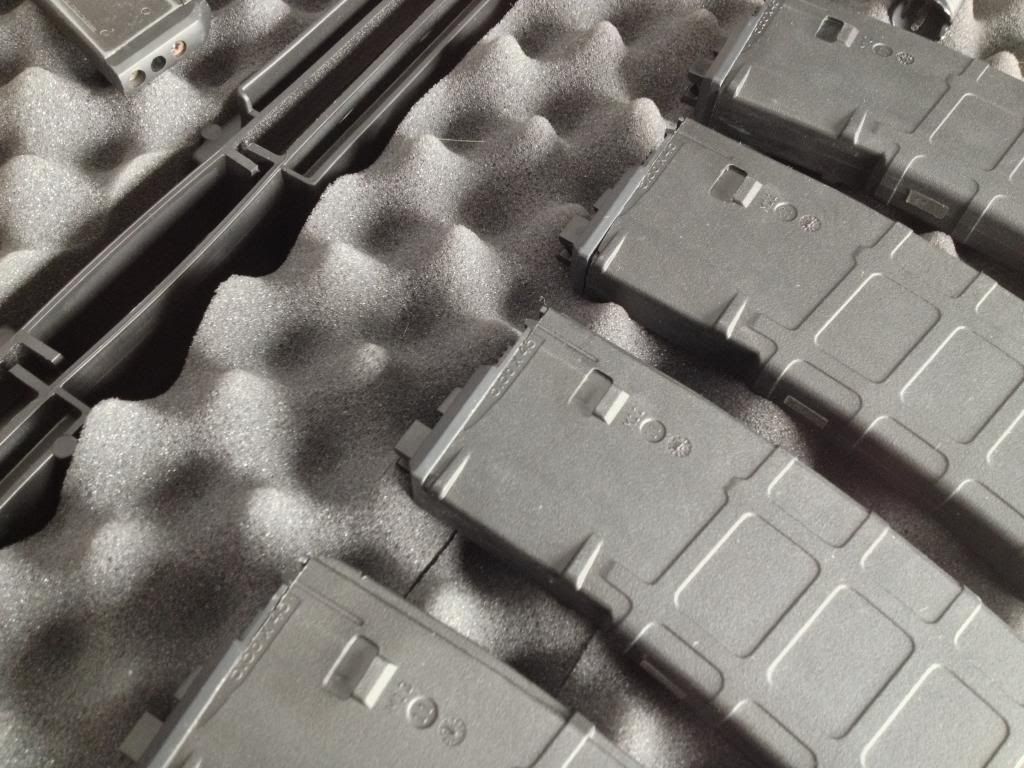
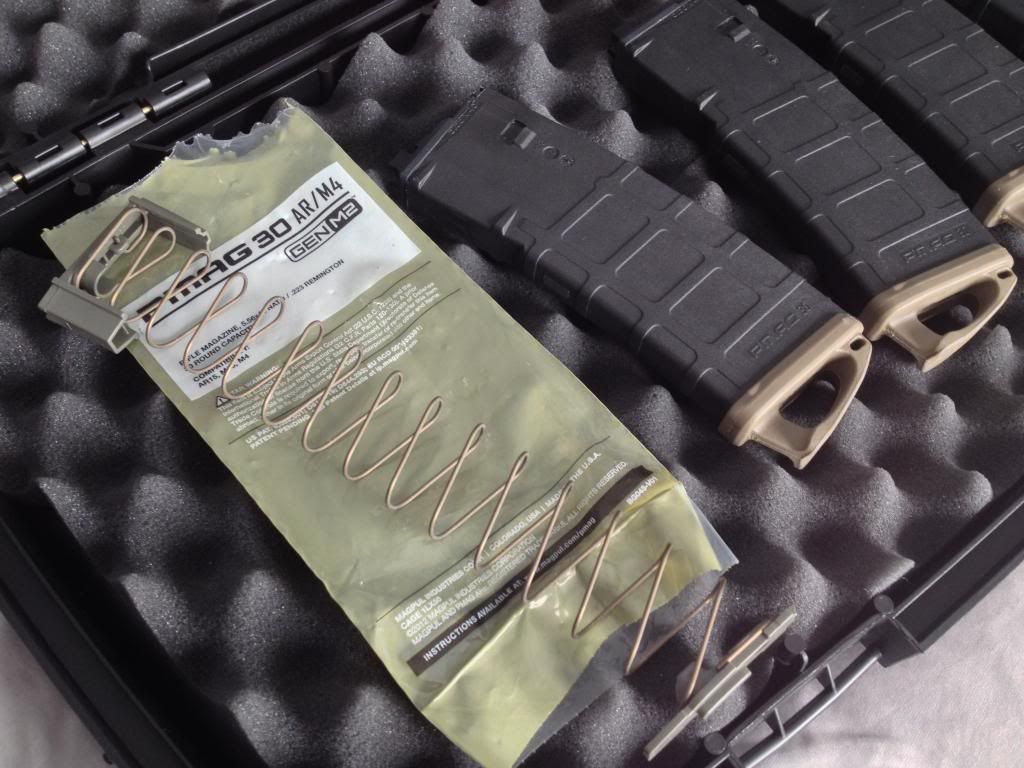
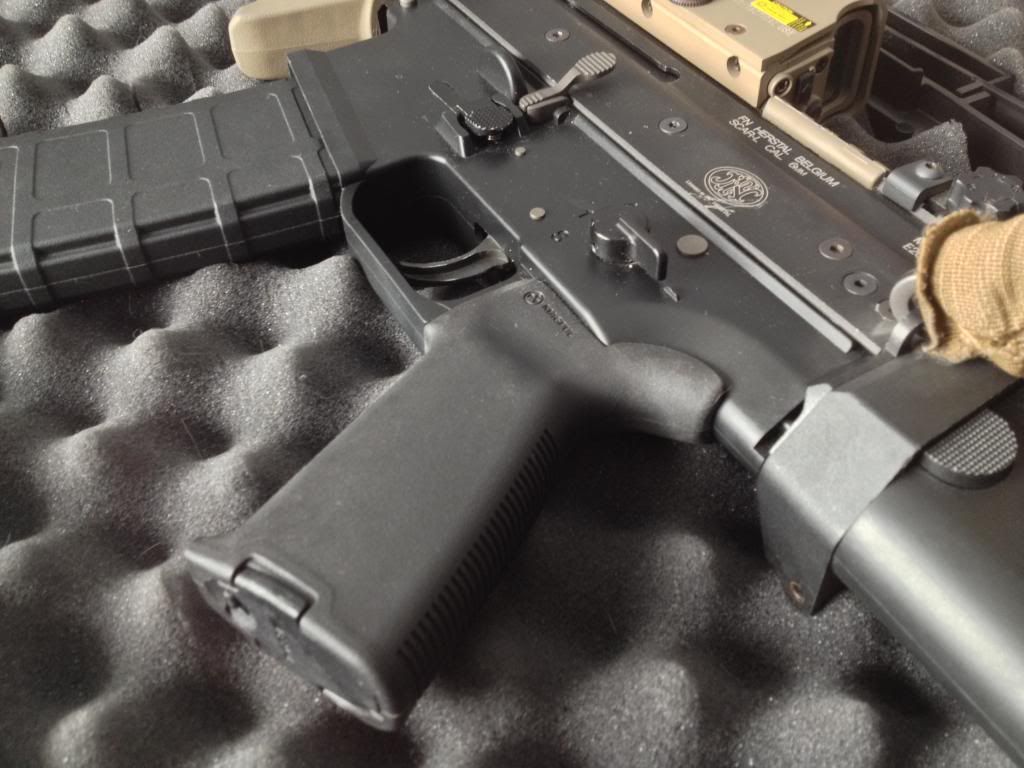
Here are a few more pictures I have of the mags:
Hello to all my fellow airsoft enthusiasts, I've been a GBBR user for around a year and a half now, and recently I decided to freshen up my WE SCAR(Open Bolt System). In doing so I found the standard WE AR/M4 mags boring, and wanted to spice them up a bit. Being the Magpul fan boy that I am, my first thought was to look for WE PMAG's. Well, my search turned up no results, (before the new WE MSK came about), but I found an interesting video on YouTube(Linked Below). The guy took real steel PMAG's and modified them to fit the guts of a WE GBBR mag in them. That's what I'm here to show you. Now I'm sure there are other guides to do this on the internet, but the ones I've seen are not always the most helpful. I hope to fix that with this step by step guide.
Now that the WE MSK is available, PMAG style magazines are available for WE GBBR rifles. However, from what I've heard, these do not always work well with other WE GBBR's. In addition to faulty operation, they do not feature Magpul trademarks. And after years on this forum, I know you guys love your realism, and small details like that matter. So why not give it try?
Video: www.youtube.com/watch?v=cQPZOBdmXY4 (Not my video: Credit to MaximusMJG)
First off here is a picture of the finished product: (I'm keeping the image size large so you can really see the details)
Okay, now that you've seen the finished product, lets get on to showing how to make them.
1. First you will need a couple of tools to get the job done.
I recommend to use the following:
- A narrow (about 1/4" wide), fine texture file and a wider (3/4" or 1") file with a more aggressive texture to it
- A wide (3/4" or 1") rasp, this will remove material very quickly and become your best friend!
- Narrow Chisel (no bigger than 1/2")
- Phillips head screw driver
- Miter Box, the video recommends a band saw, I don't have one, but I found it very easy to just use a miter box
- Wrench and Hammer (Sound strange? It'll make sense later)
- Old non-functioning or no longer cared about WE GBBR mag (Highly recommended, but not necessary)
- Ruler or better yet a good caliper, it will be needed for very precise measurements
- Magpul PMAG (Gen 2 tends to work the best, I can not confirm gen 1 or gen 3 compatibility
The files and rasp I used:
2. Okay now we need to remove the "guts" of the WE GBBR mag
2a. Remove the plate on the bottom of the original magazine
2b. Then remove the screw and push the "guts" of the magazine out the top of the mag
3. Now that the "guts" are out, its time to take some measurements
***I highly recommened using a set of calipers for this step, precision is key, with out the accurate measurements, the gun will not cycle. Also measure from the top of the mag catch slot, to the top of the magazine shell. Again this is the most crucial step measure 20 times if you have to!***
4. Okay now we need to dissemble the AR-15/M4 PMAG (Unfortunately i do not have any pictures of this step but it should be simple enough to figure out)
Slide the bottom plate of the PMAG off and the spring and follower should slide right out.
5. Next we will need to cut off the top of the PMAG
5a. Remember that measurement? Good take a ruler and place a mark about a 1/16" of an inch above the measurement you took earlier (This 1/16" will be filed off later to allow for measurement error and fine tuning)
5b. Now we will use a miter box or band saw to cut off those feeding lips, I put the blade just above the mark I made so I didn't take too much off, I also found the fence on the miter box useful to keep the top of the mag perpendicular to the side of the magazine.
Here is what your PMAG should look like now:
6. Looking inside you will notice some guides and ridges inside the magazine. These are used to guide the casings of the .223 bullet up the mag and into the feeding lips. But this is airsoft and we don't need them. So get rid of them all till the insides are flat, using the rasp, files and chisel. *This is very time consuming, so don't get frustrated*
Like this:
***NOTICE: the top of the mag is slightly thinner than the bottom, this is for the bolt catch assembly on the "guts" of the magazine. Be sure to make room for it or your bolt catch will not function!***
7. After step 6, it is just a bunch of putting that old WE GBBR mag to use.
7a. Test the fit by putting the "guts" into the PMAG. If it doesn't slide all the way in(yeah yeah, make your jokes), keep filing. *Please note that some force will be required, you should not have to use excessive force, like a hammer, to get the mag to fit*
7b. If when testing if the "guts" get stuck inside, use the hammer and wrench to pound it out(more jokes? really come on now) from the bottom.
8. Eventually you will get the mag to sit flush with the exposed portion of the "guts" like below.
9. Almost done, hang in there! Now we need to make a space for the valve knocker(in your WE GBBR) to hit the release valve(on your mag). I used the larger file's narrow edge to basically cut(or file) a gap such as the one shown below, there are two notches on the back of the PMAG, cut down to those notches.
10. Now that you are practically finished, we need to test them in your WE GBBR. *Do not test them with gas at first* Using the charging handle, cycle the bolt a few times. If the bolt gets hung up on the mag or does not cycle smooth, remove the mag, and the "guts", and file down the top of the PMAG. Keep this process up until the bolt cycles nice and smooth(or normally), only after that would I recommend testing with gas and shooting it. (I didn't try cycling the bolt first and ended up having to replace my nozzle)
11. Congratulations! You are now able to construct your very own, and very realistic, WE GBBR PMAG! Get out there, have fun, and show them how awesome a Gas Blow Back Rifle can be!
***If you have any questions or recommendations to make this guide better, feel free to send me a PM or just post below.***
Here are a few more pictures I have of the mags:


