Post by cqbr on Feb 18, 2009 16:32:42 GMT -5
I was somewhat bored today and decided to clean my 1911 after using it in a few games. While I had it out I decided to make a pictorial guide on how to completely dissasemble the slide and reassemble it. I didn't have time to do the lower frame guide since I don't really have a reason to right now. But if something happens to break, or if someone desperately needs help on dissasembling their lower, I may make one.
This guide is done with a fully functioning 1911, if yours is broken or damaged, you may have to take it apart using a different method or by skipping certain steps of the process. Please make sure that you know what you are doing before attempting this since no one likes to break their own gun.
I took some pictures of what your "Parts Pile" should look like throughout the process to make sure you didn't remove the wrong part, and to assist in keeping everything organized.
============================================================================================
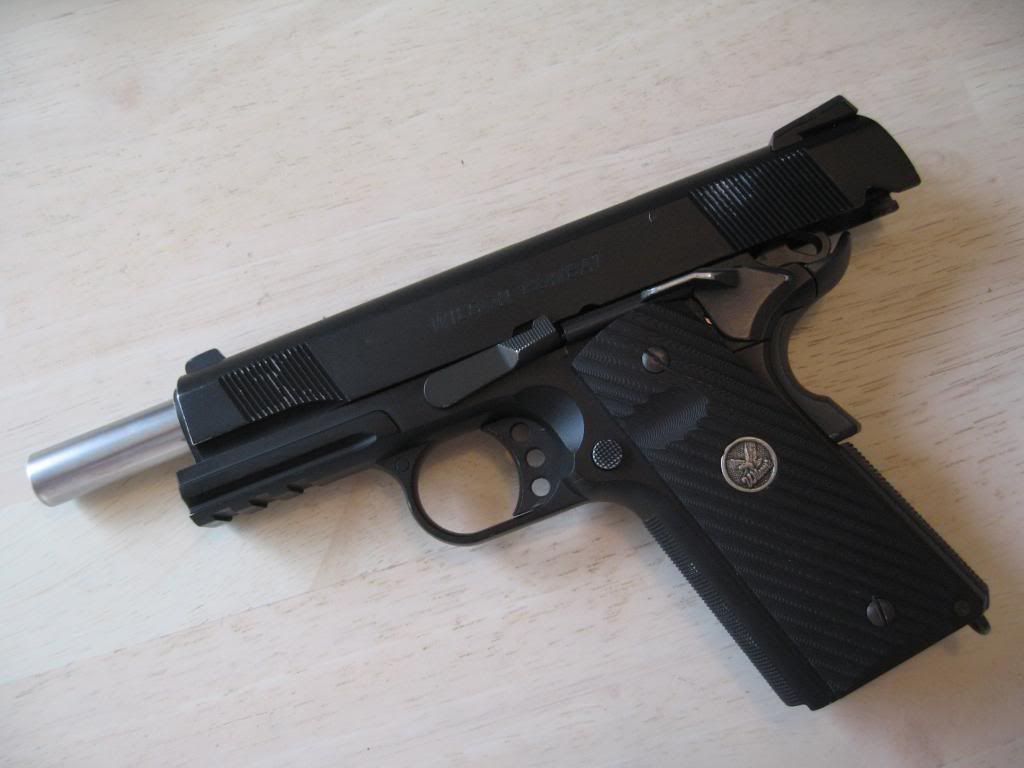
Model: 08' WE Wilson Combat 1911 Tactical
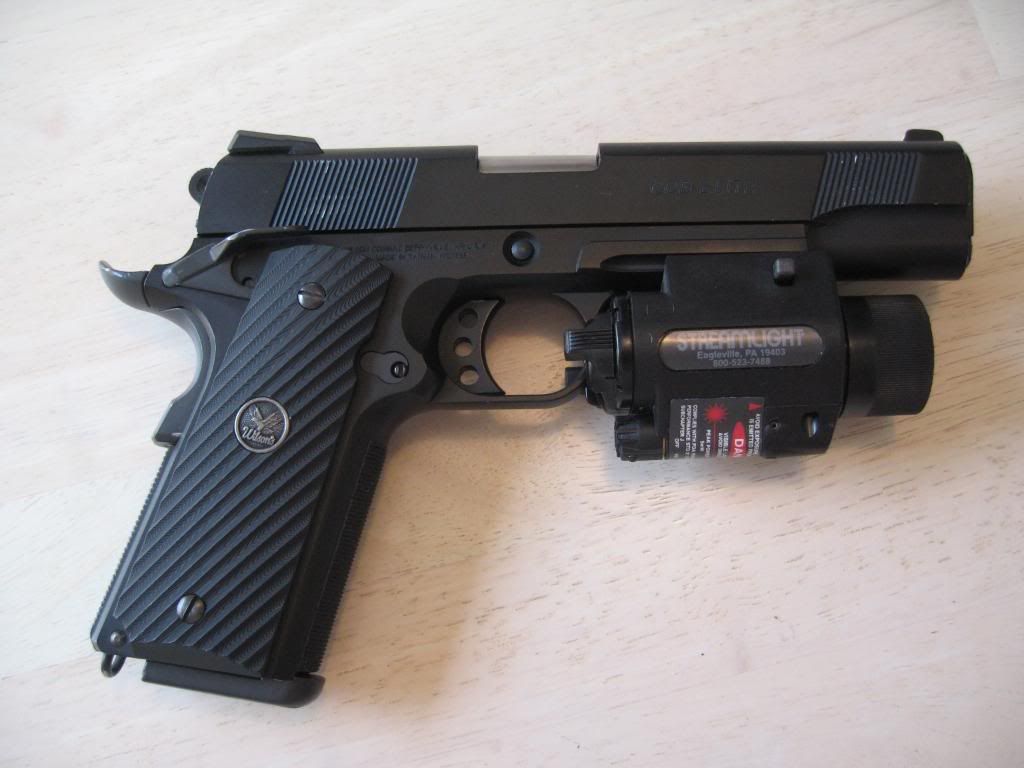
1911 Slide Dissasembly Guide:
1) Remove your magazine from the gun.
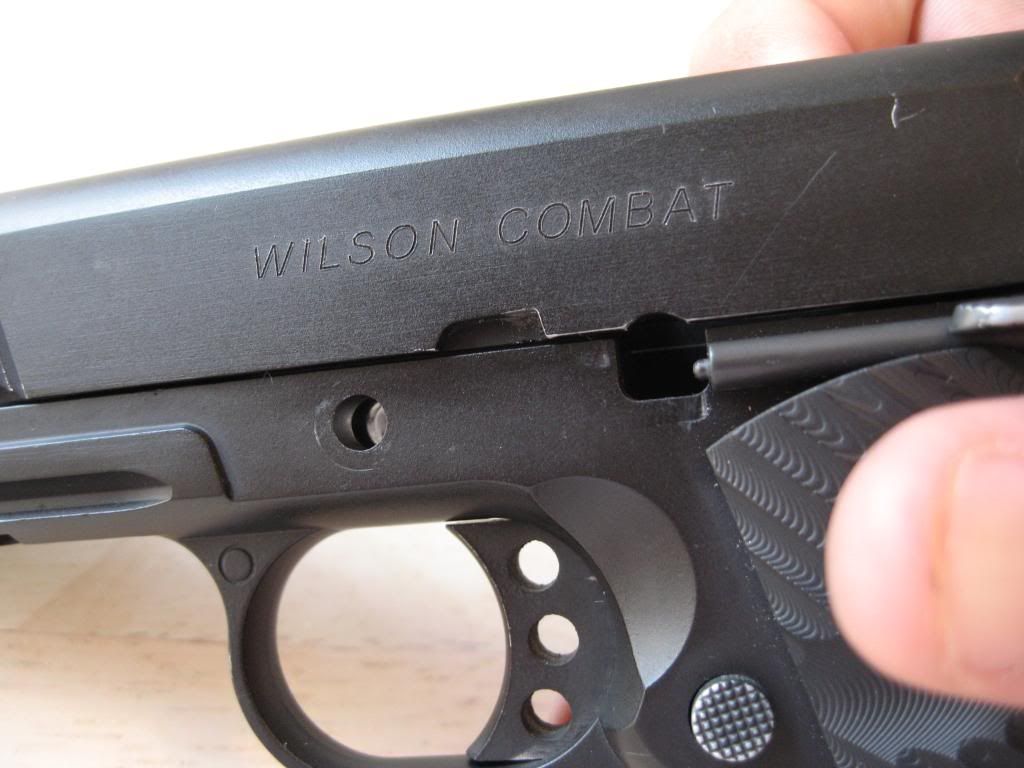
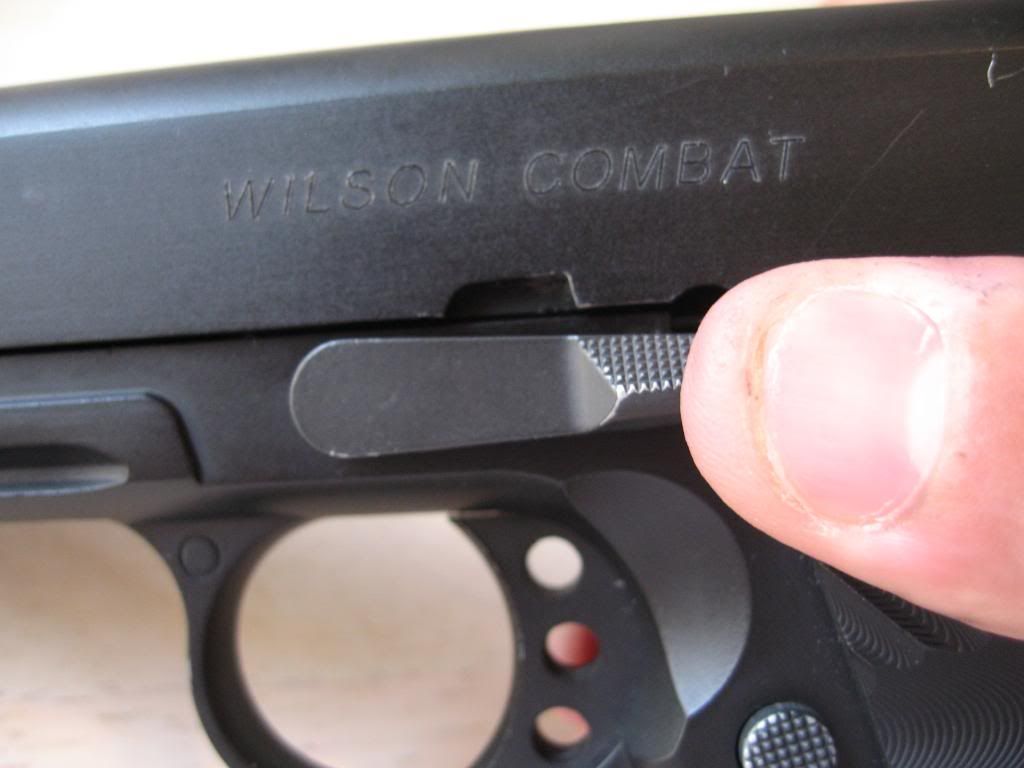
2) Rack back your slide to this position then release the slide lock.
3) Pull your slide back once more until you have it in this position.
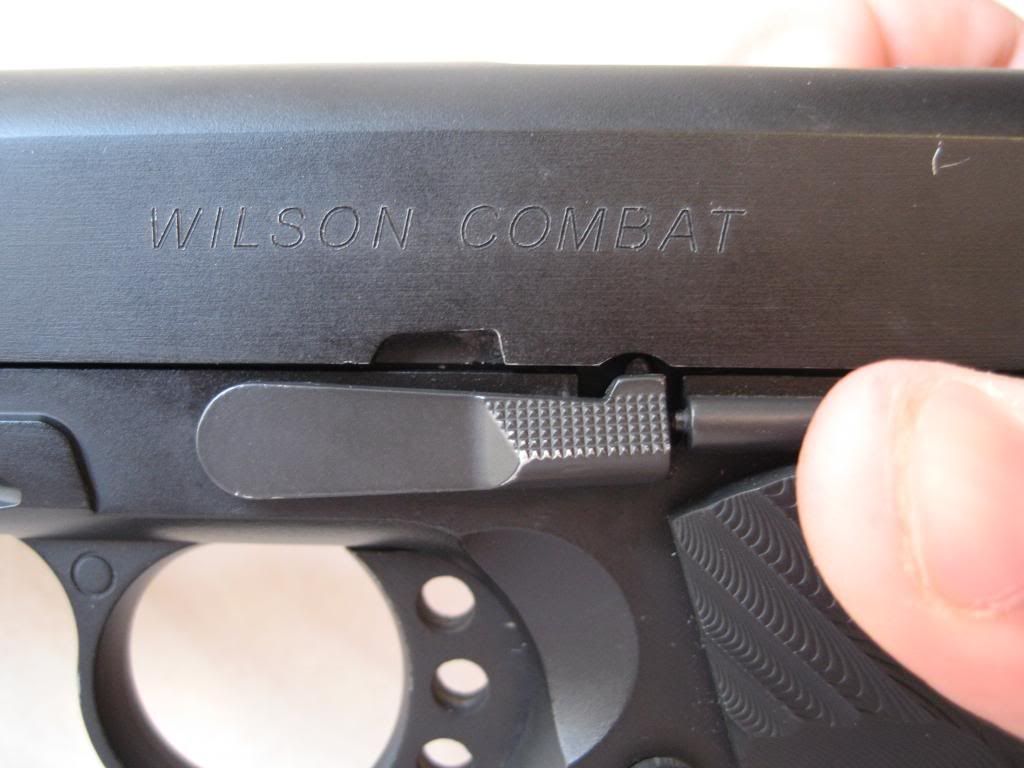
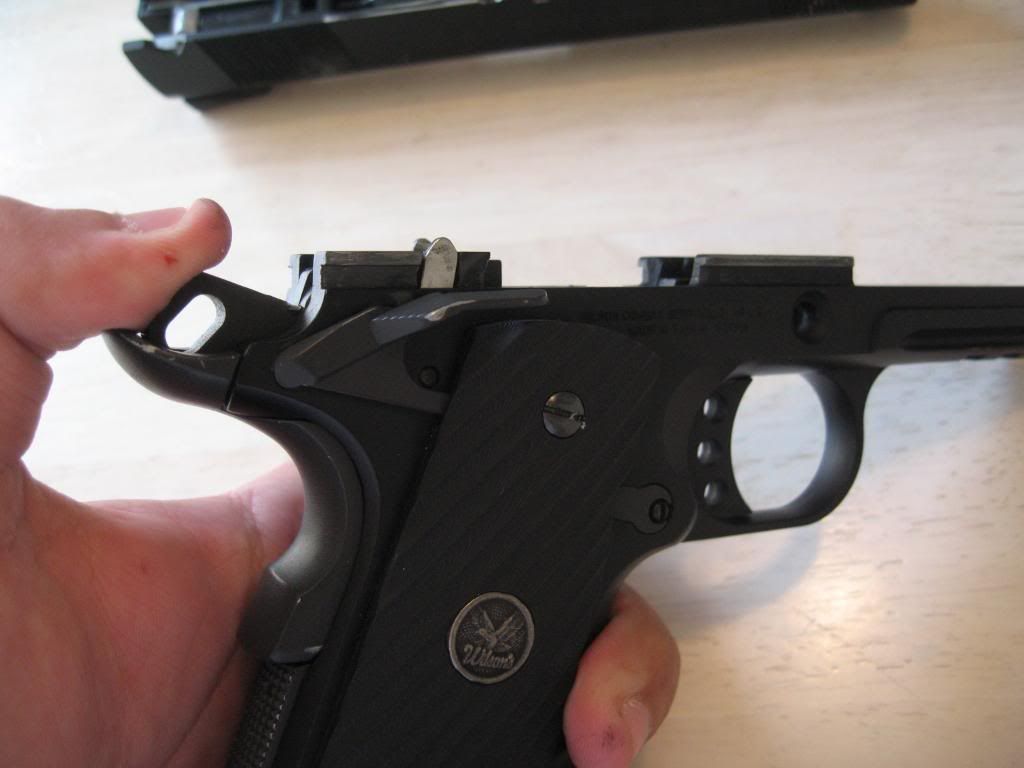
4) While holding your slide in place with your hand as shown, turn the gun over to the opposit side and push out the slide lock.
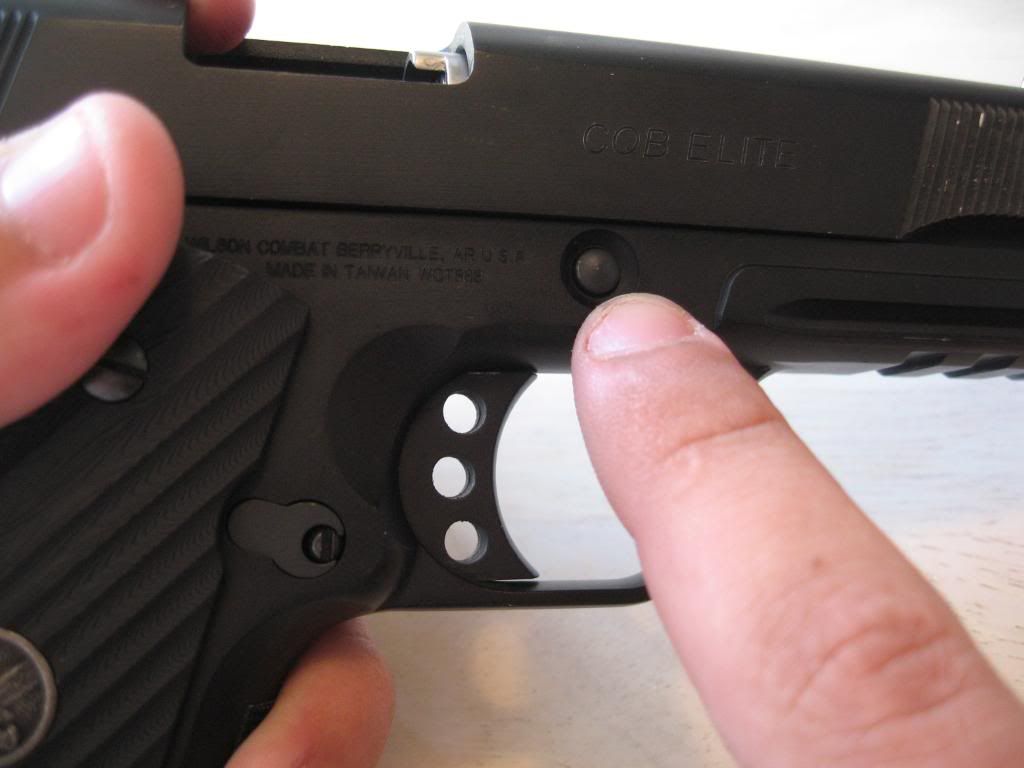
5) Once pushed out, you will have something like this, or the lock will just fall out depending on how tightly it is held in place.
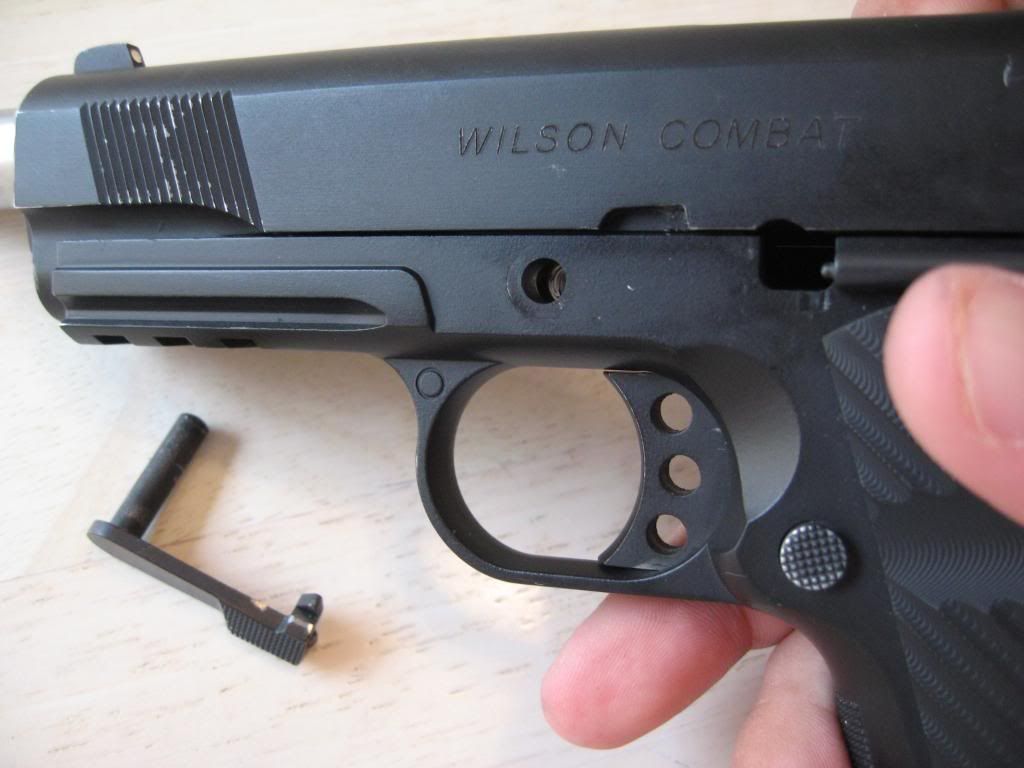
6) Now gently remove the slide from the lower frame.
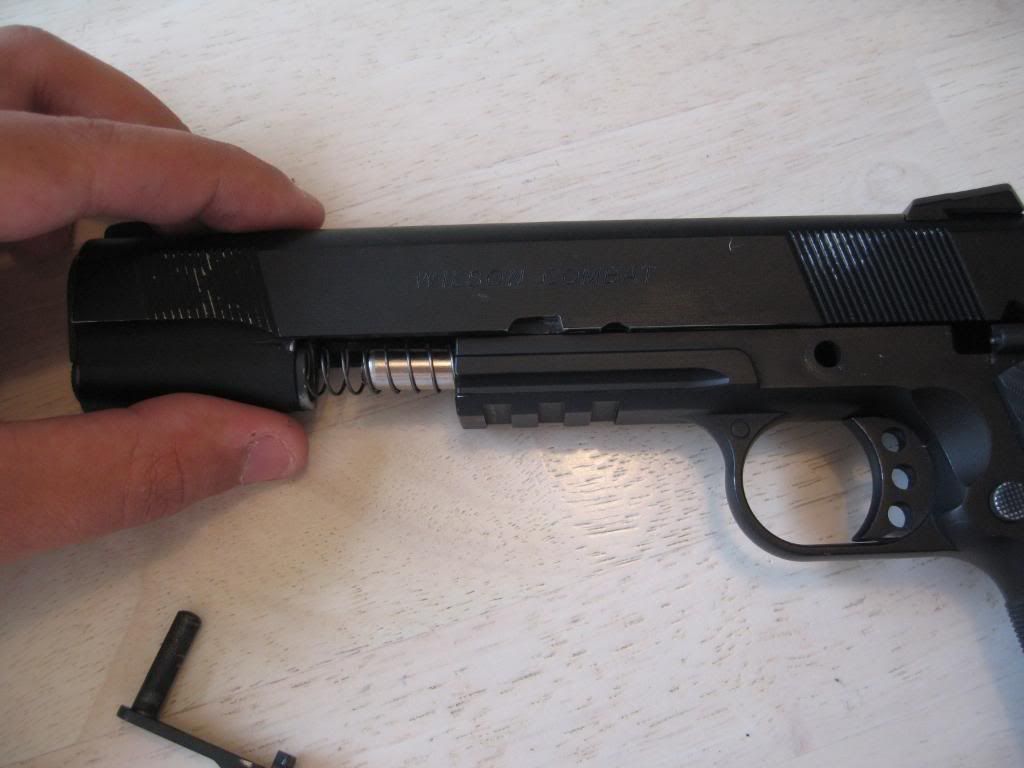
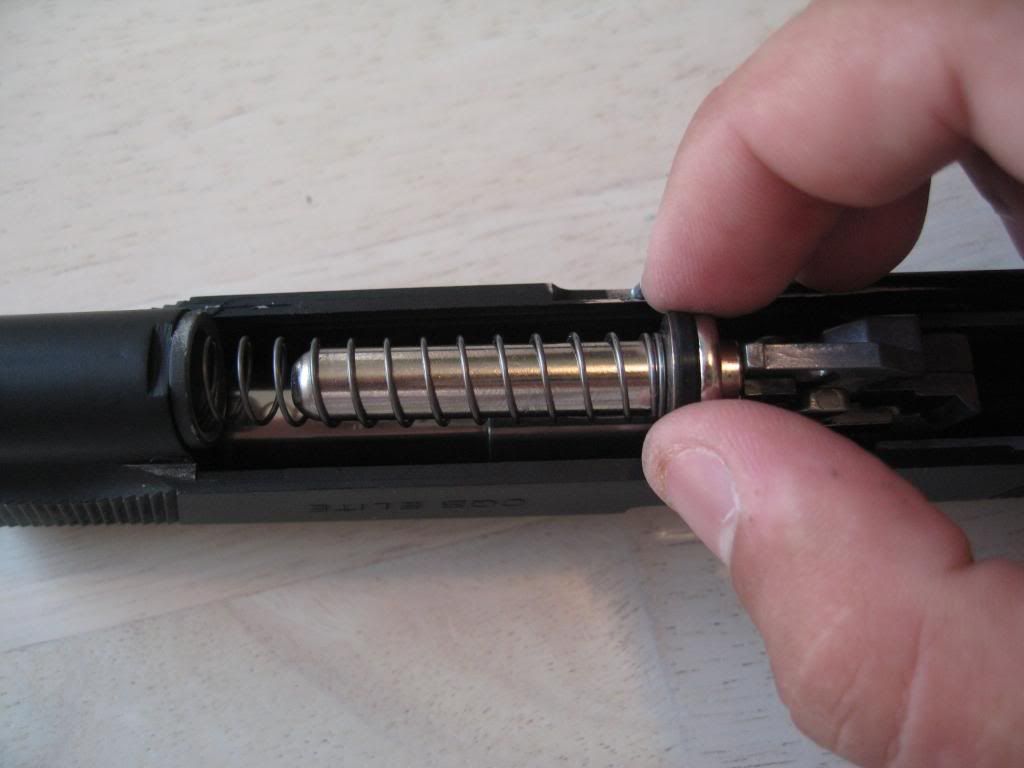
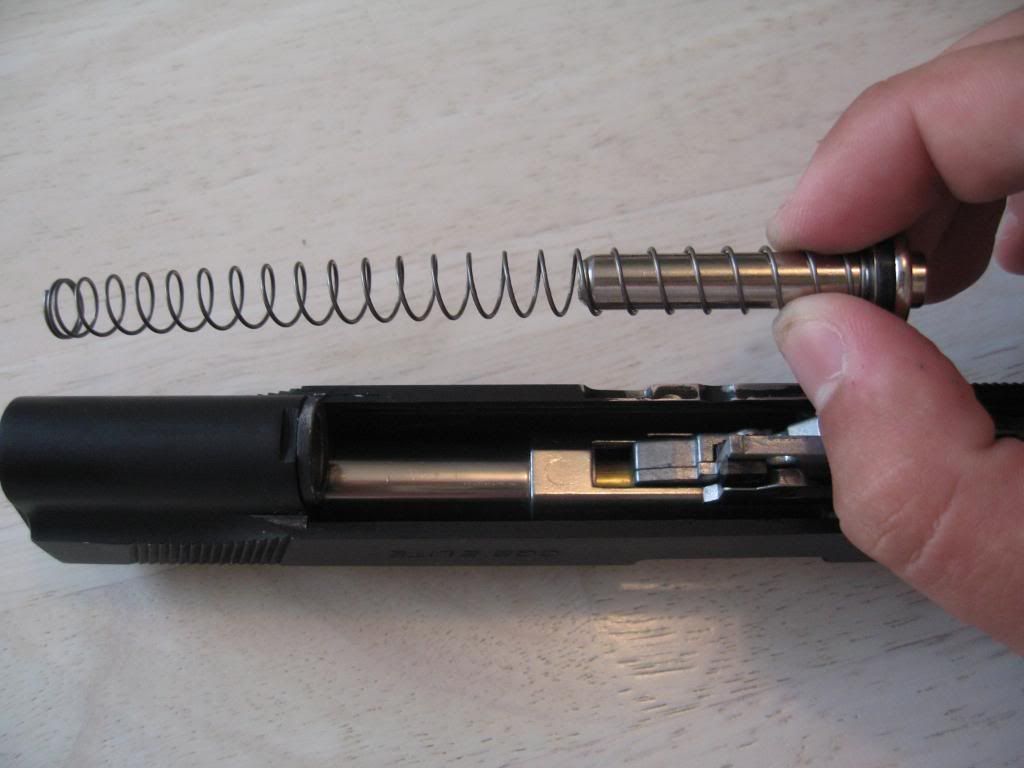
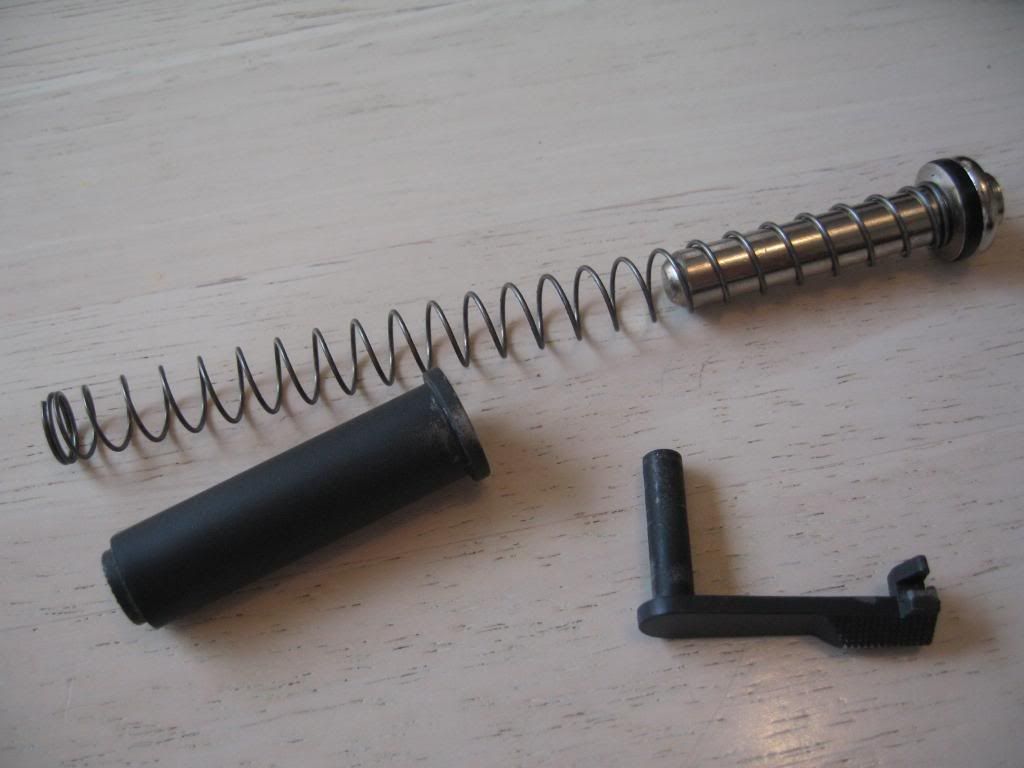
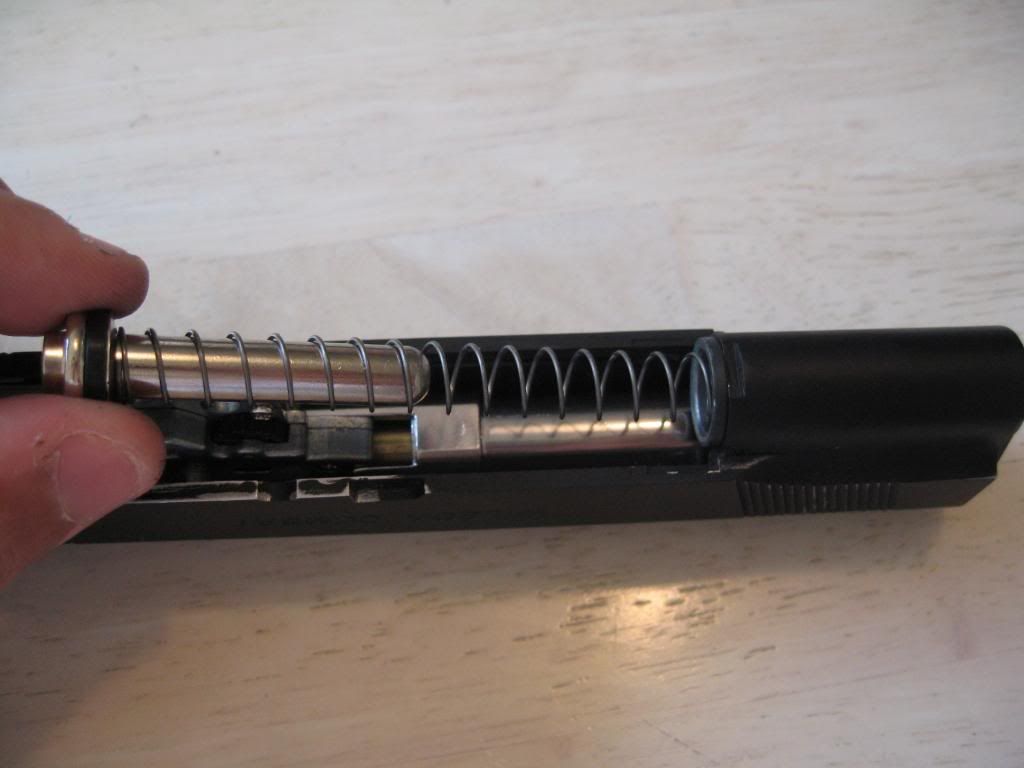
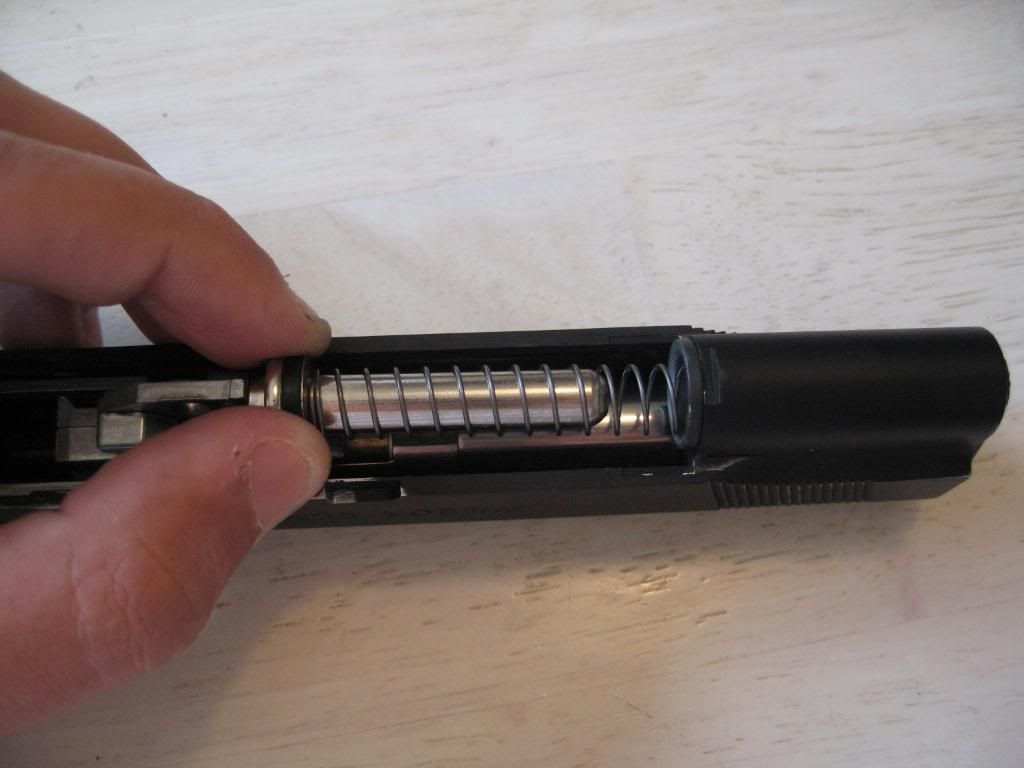
7) Grab your recoil spring assembly and pull it up away from the barrel in order to remove it.
Grab it:
Removed:
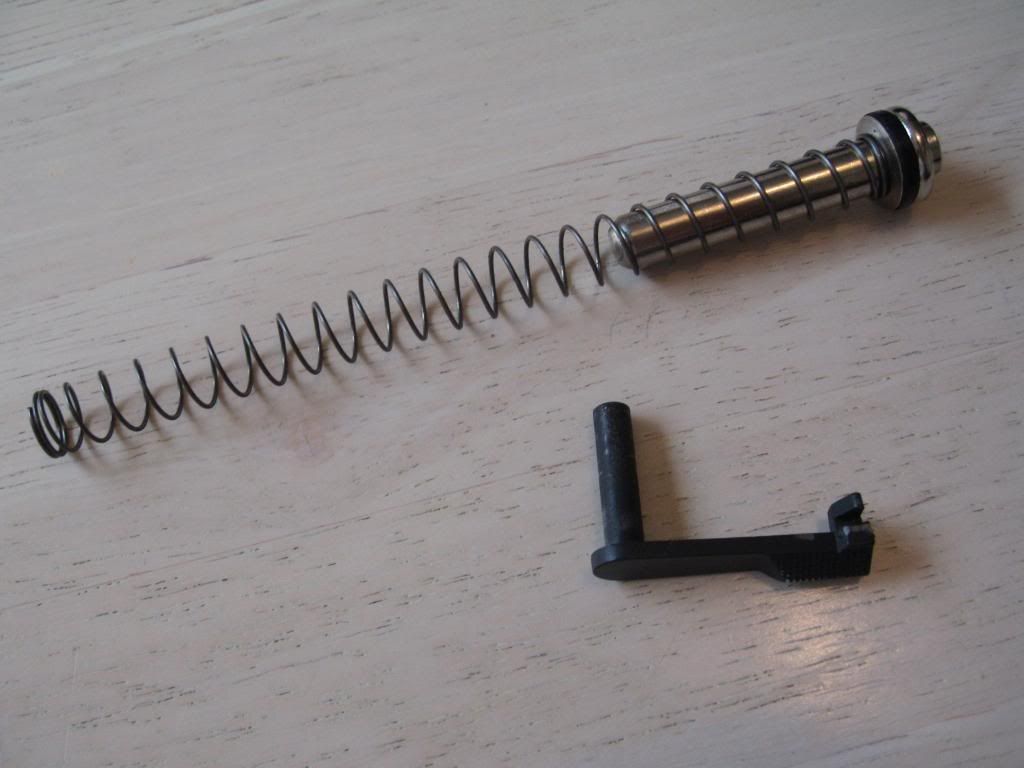
Parts Pile #1:
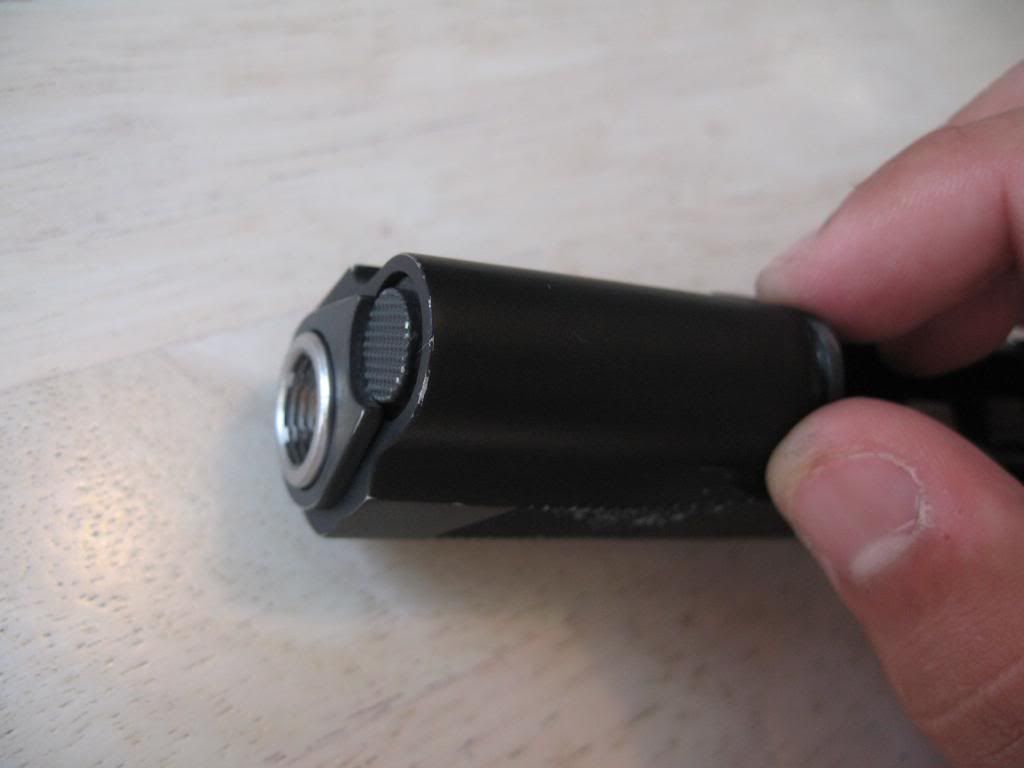
8) Next, remove your spring guide bushing/housing. (Part name?)
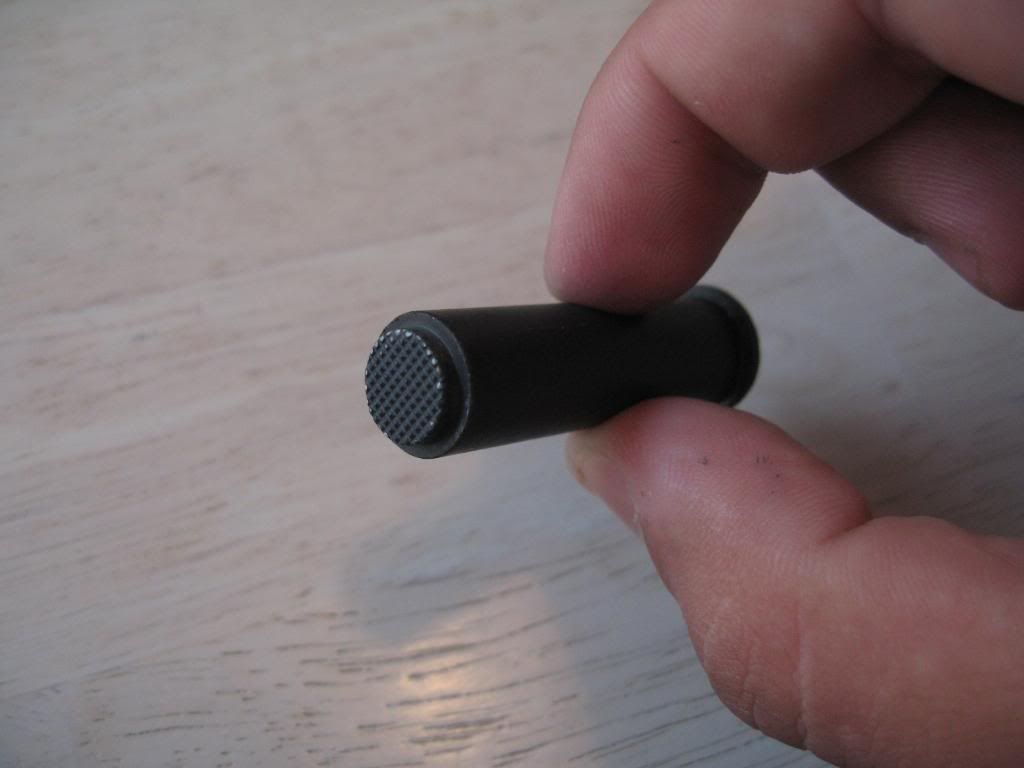
Parts Pile #2:
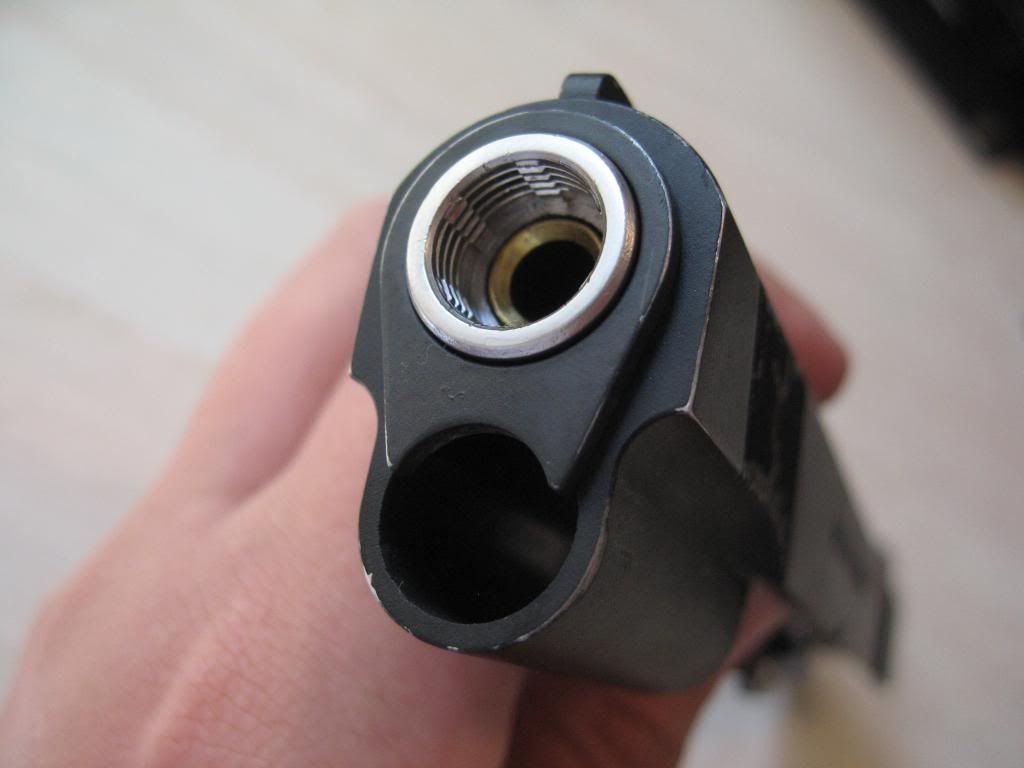
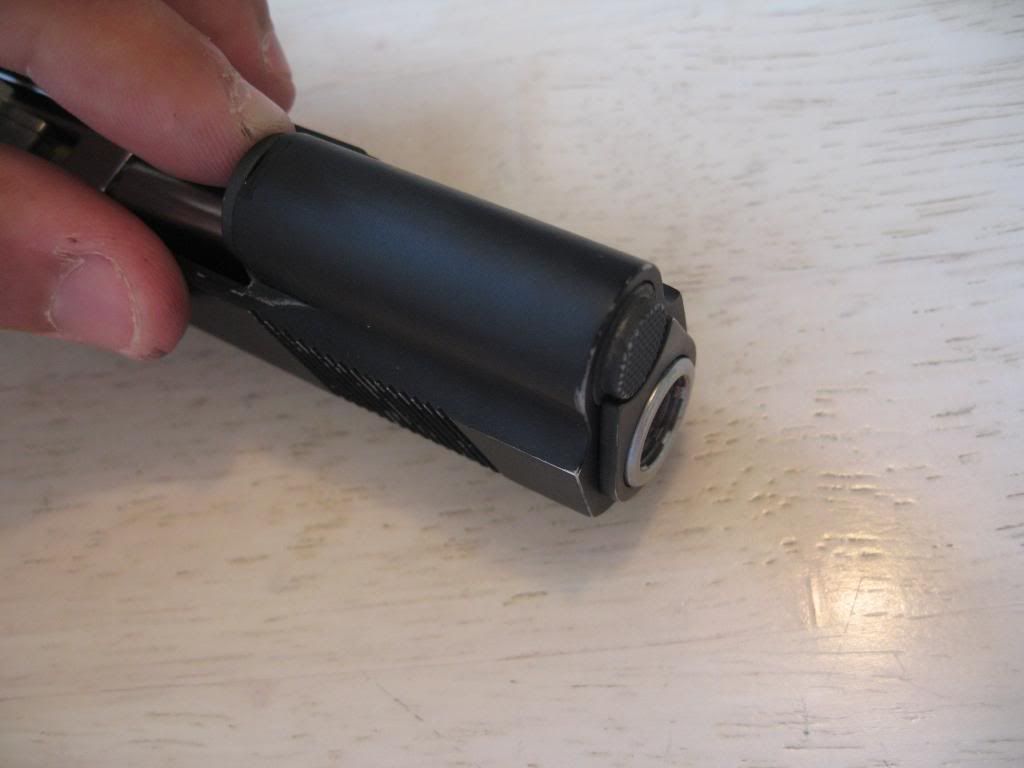
9) Now remove the barrel bushing. Twist it Counter clockwise approximately 90 degrees to remove it from the front of the slide.
Bushing Location:
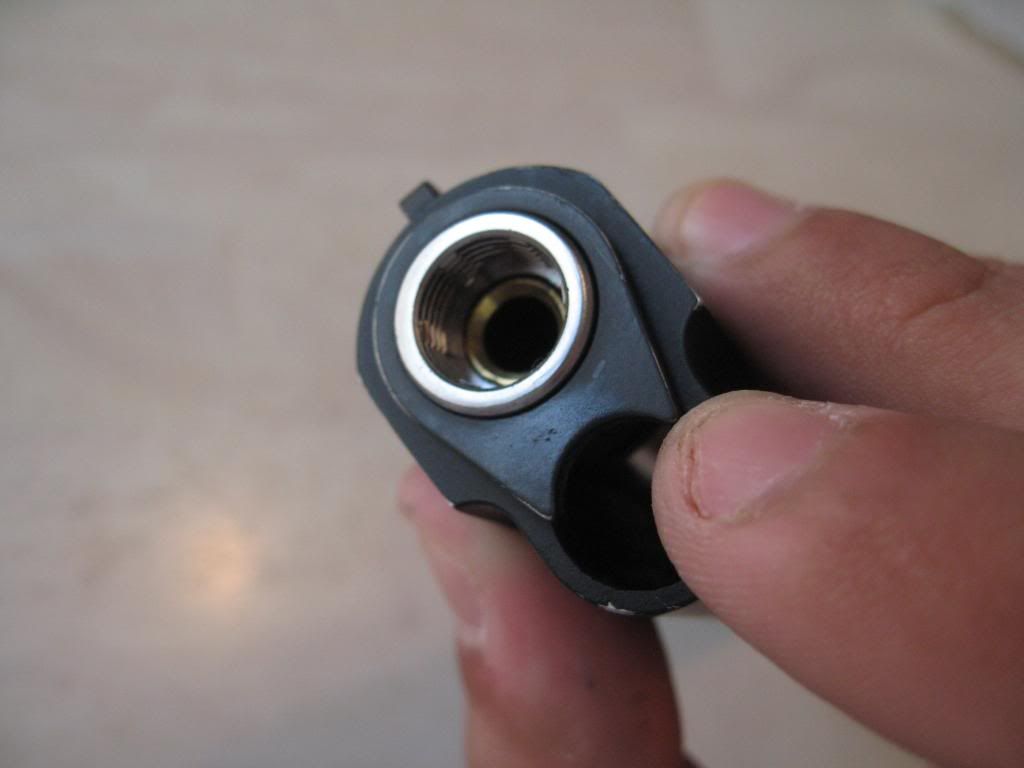
Rotated:

Parts Pile #3:

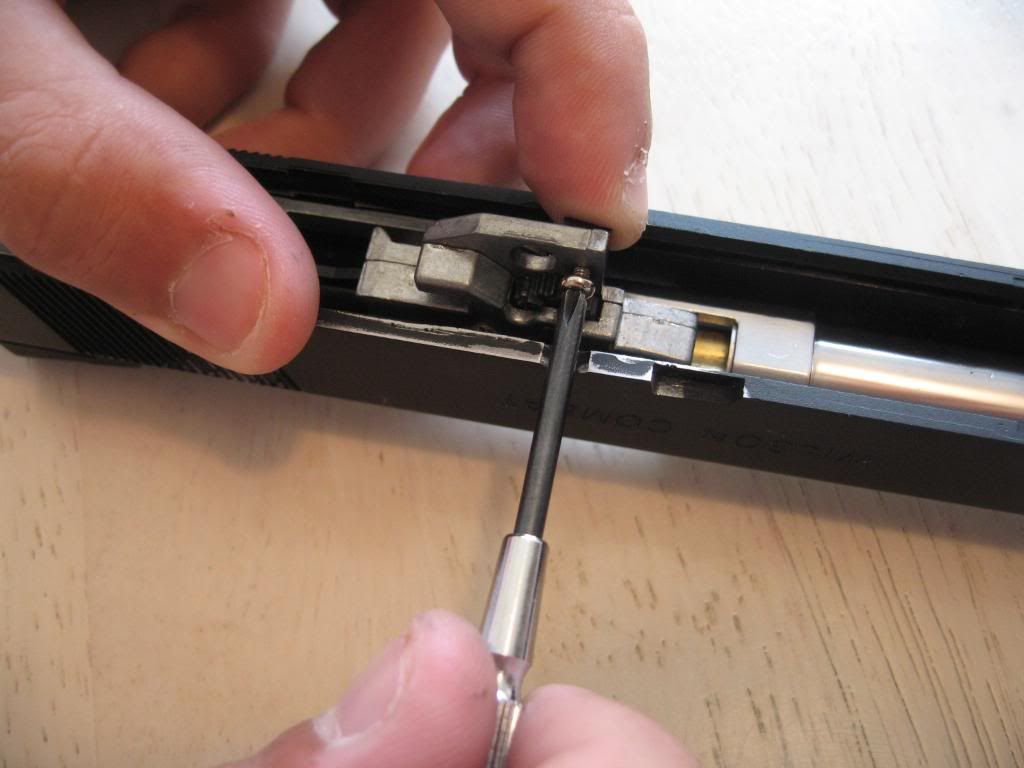
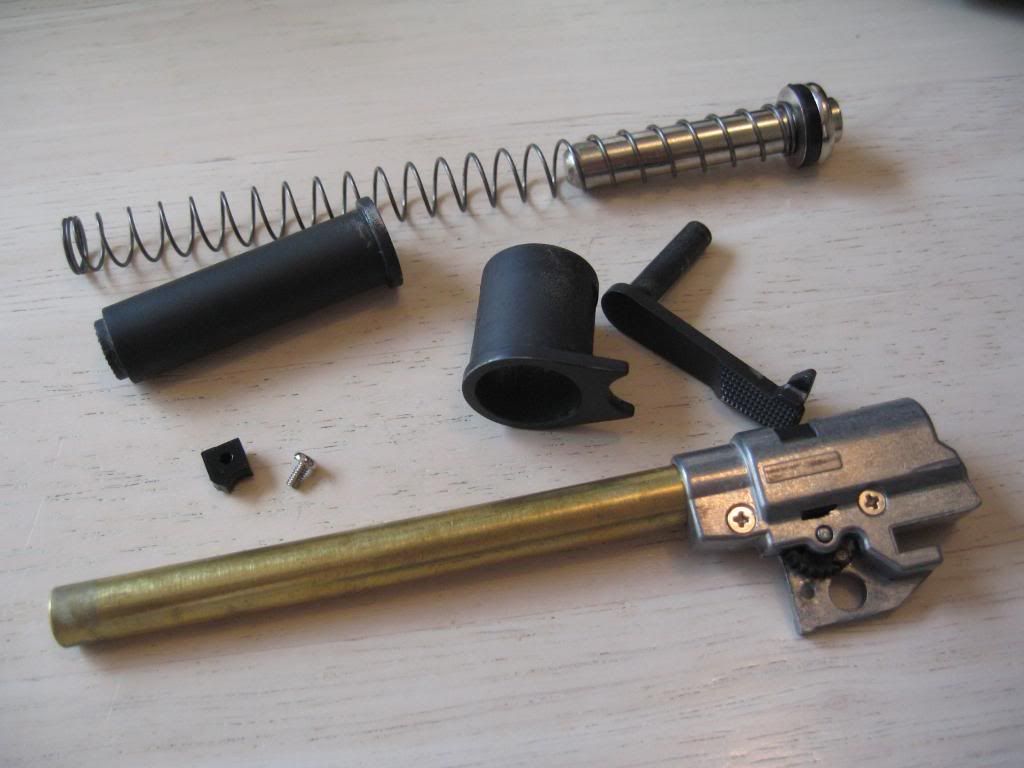
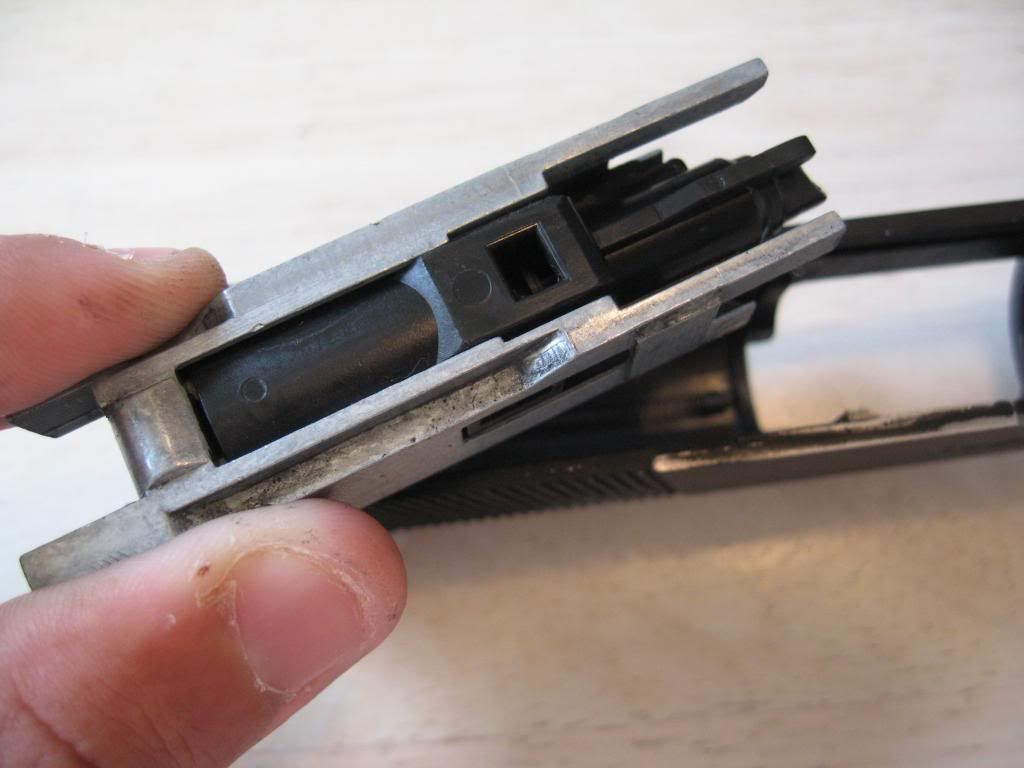
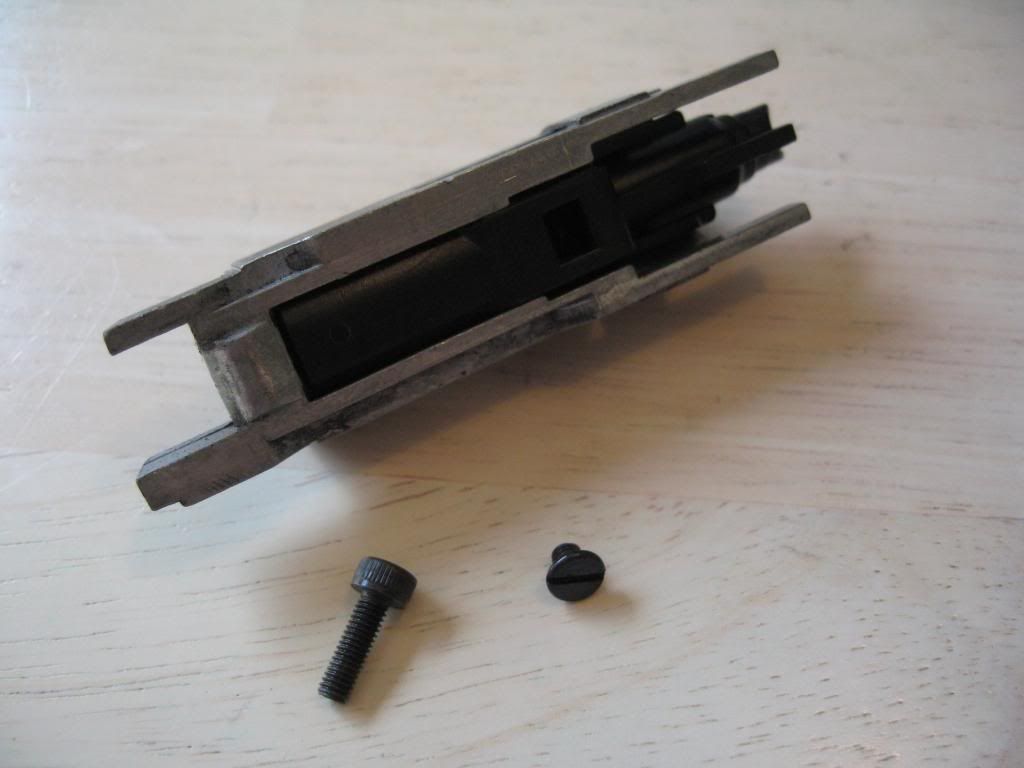
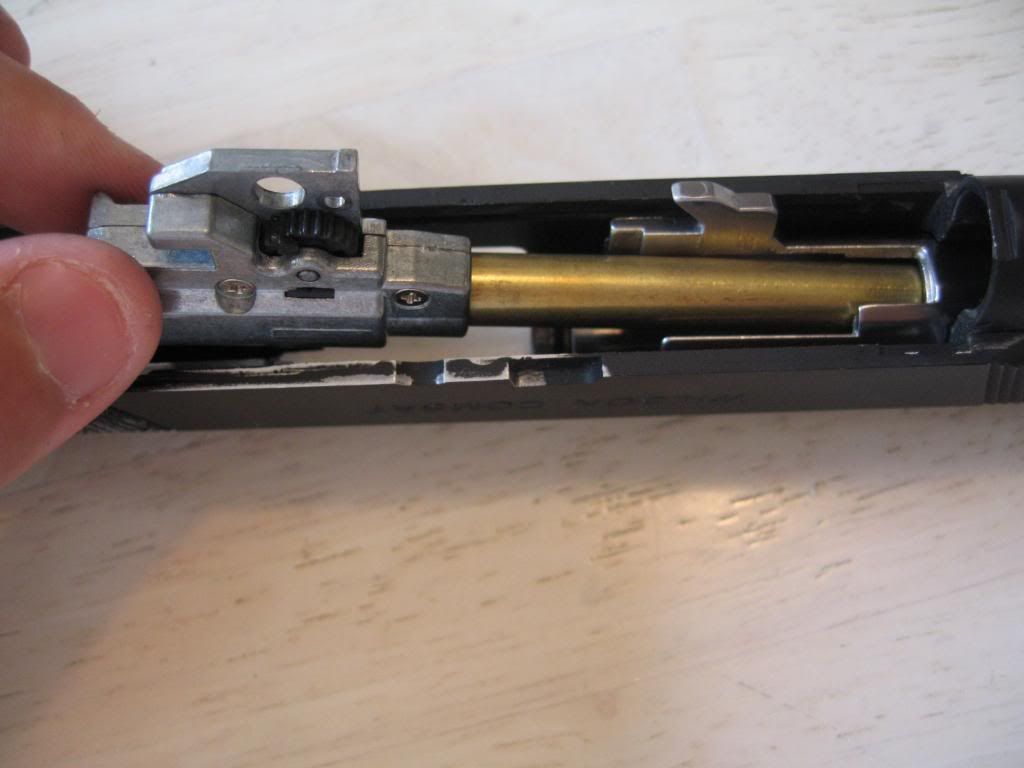
10) Remove the Inner Barrel and Hop-Up unit by unscrewing this small screw on the hop up unit and small Black back-plate.
Keep pressure on the back-plate to avoid from stripping the plastic piece and to get the screw out in less time.
Parts Pile #4:
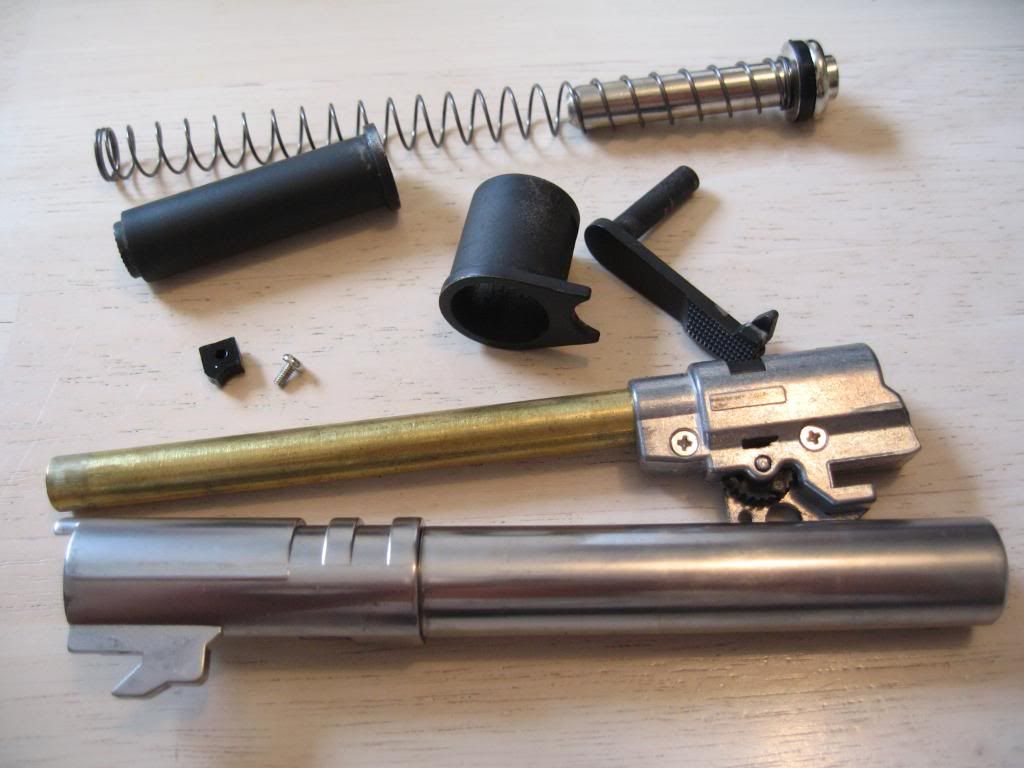
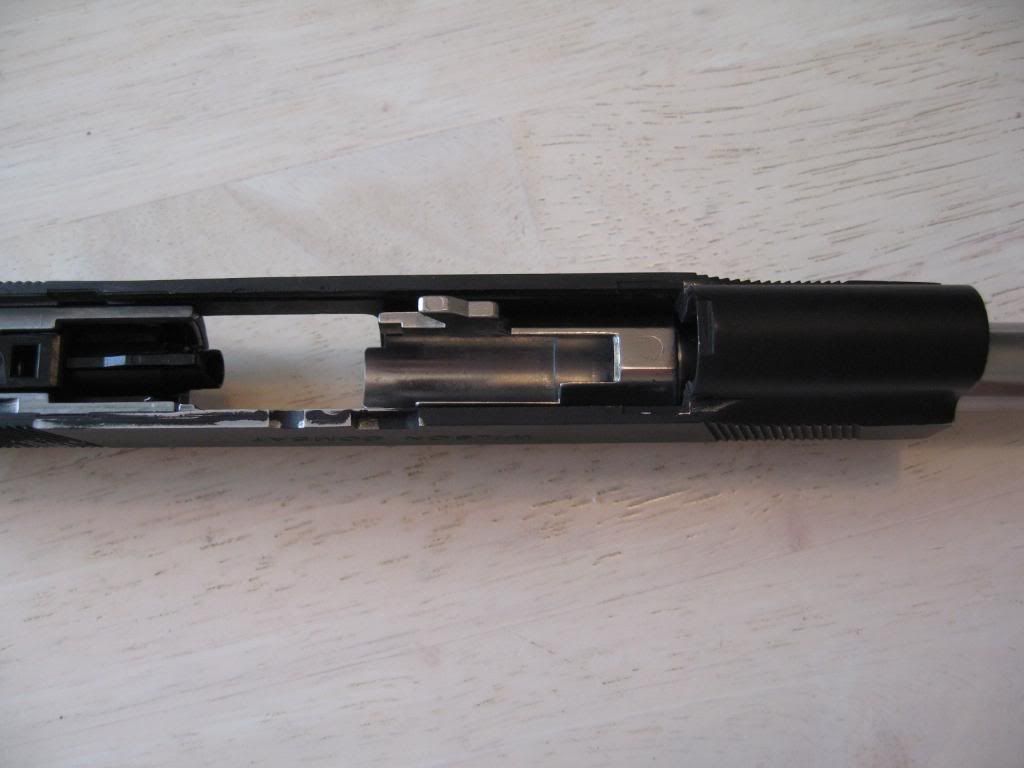
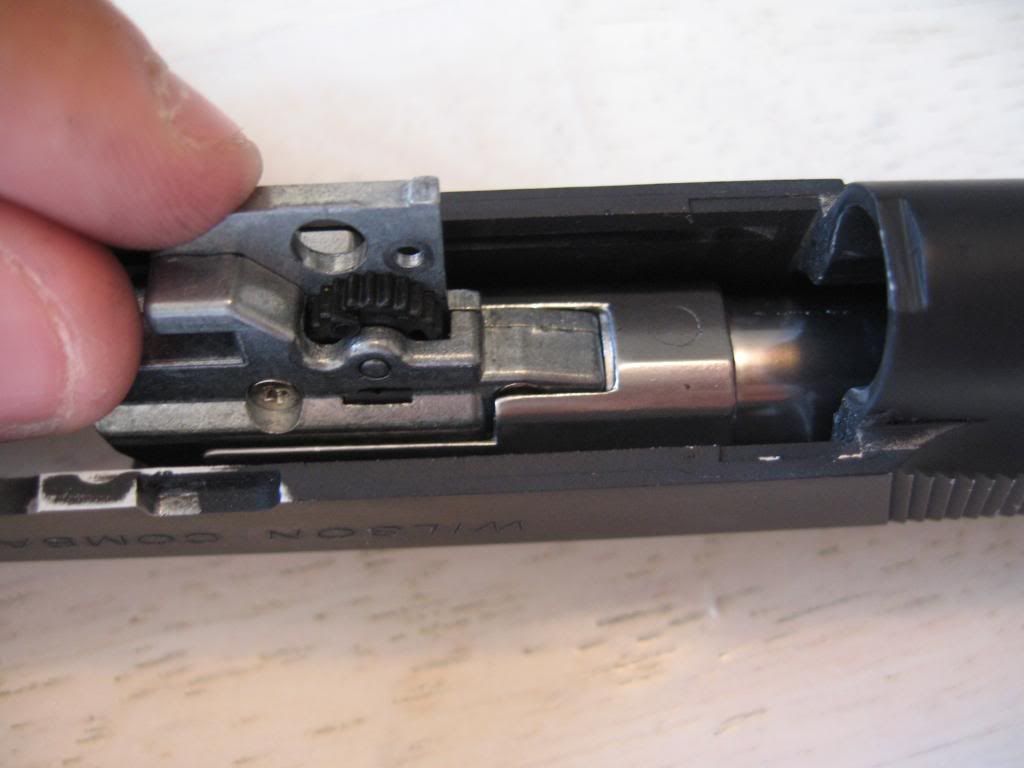
11) Now remove the Inner Barrel by sliding it out from the Outer Barrel unit. You need to tilt the Inner Barrel up slightly to remove it a bit easier.
Parts Pile #5:
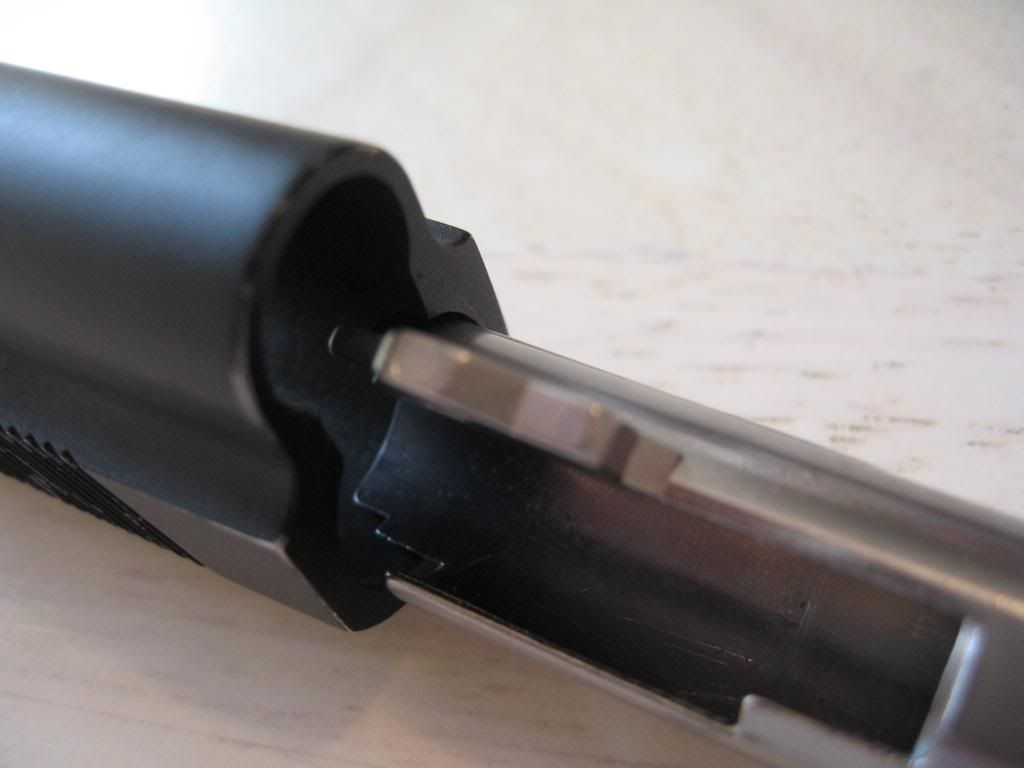
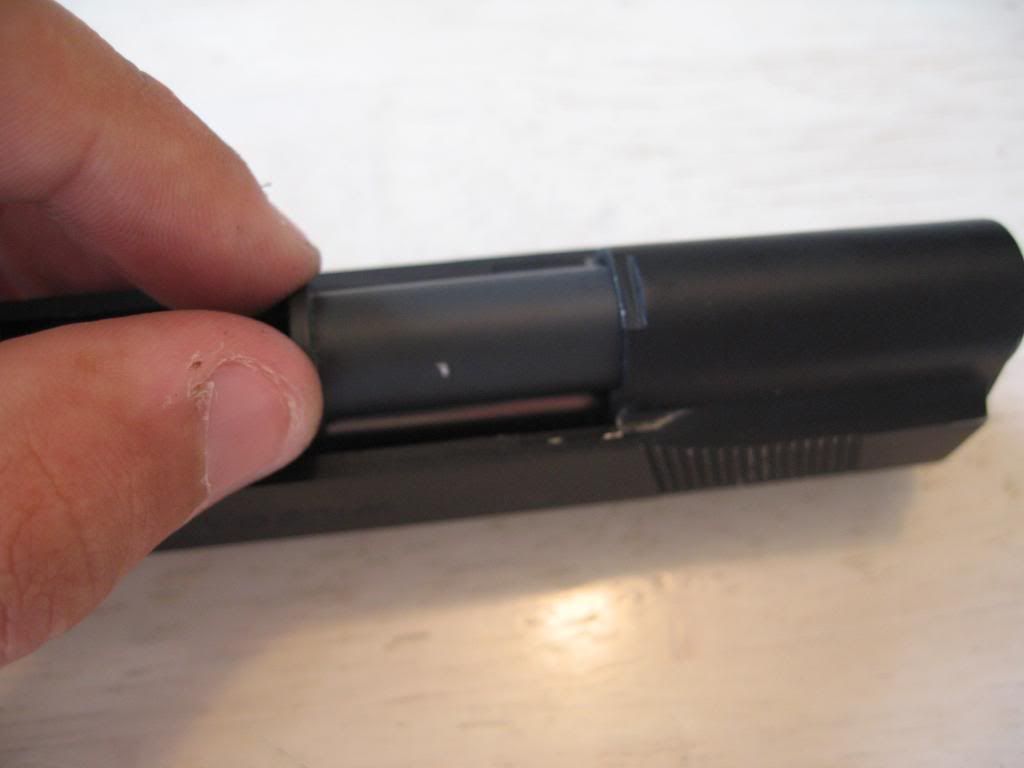
12) Now remove the Outer Barrel by rotating it towards you (Or Clockwise) slightly.
Part Location:
Rotated:

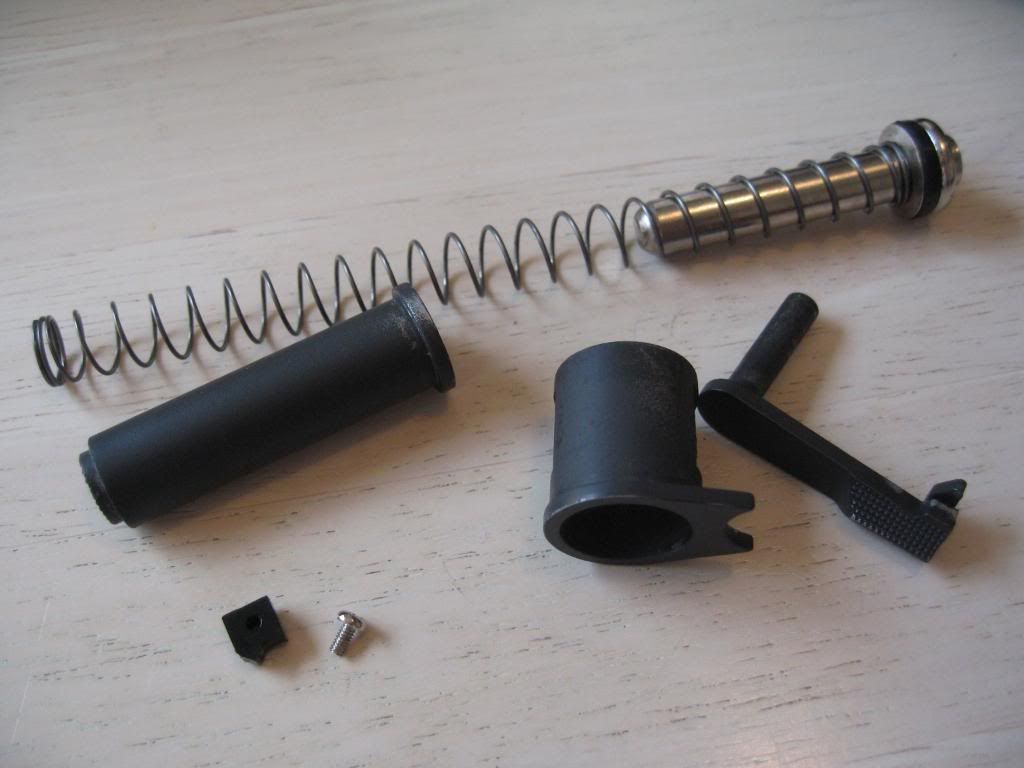
Parts Pile #6:
That is what your final pile should look like once you are done taking apart the Front/Barrel portion of the slide.
You are now done with the front portion of the slide. Enjoy an ice cold Pepsi Cola (Yes, Pepsi has paid for this advertising) and move onto the back portion.

Rear Portion Dissasembly
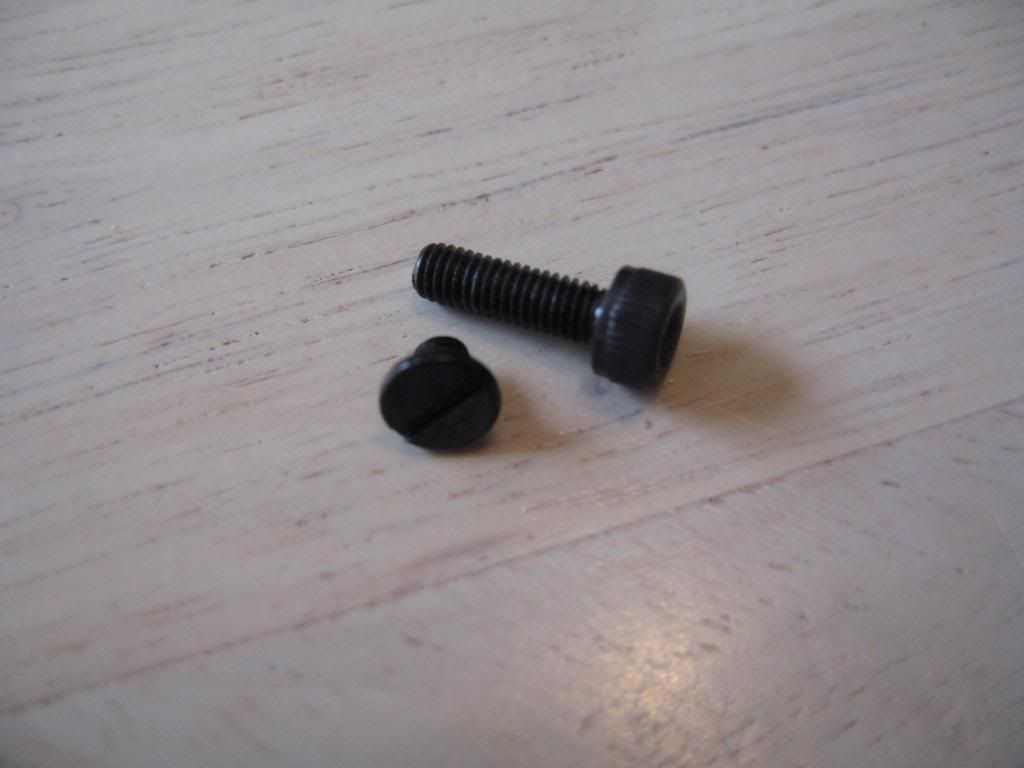
1) Remove your rear sight set screw.
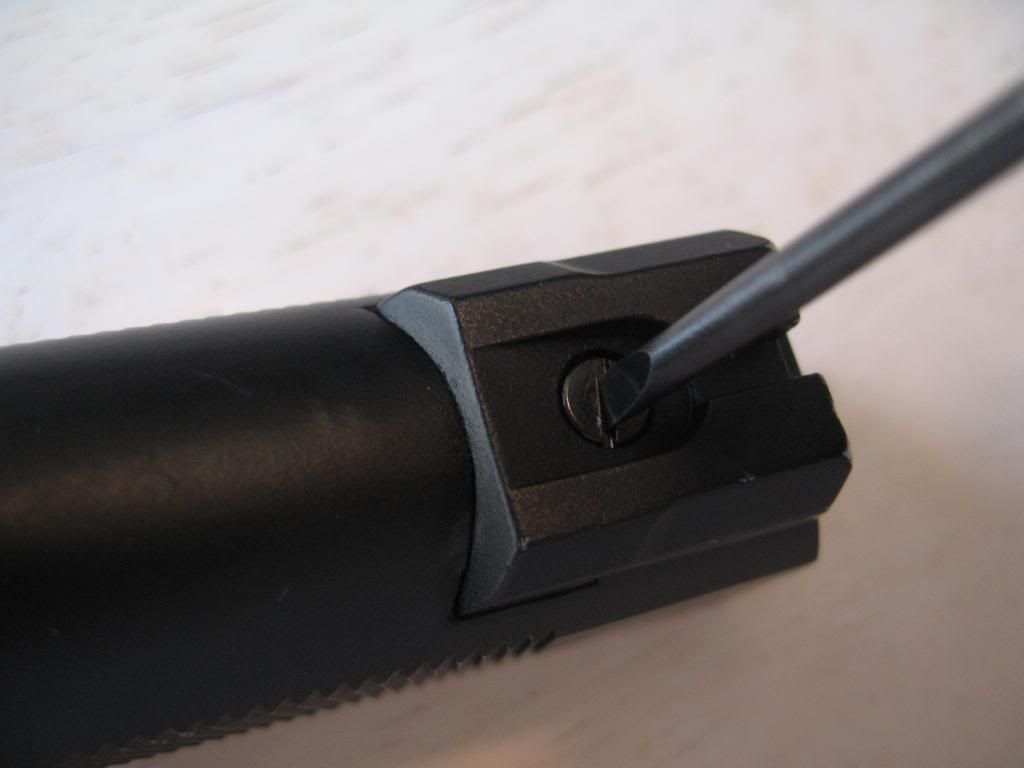
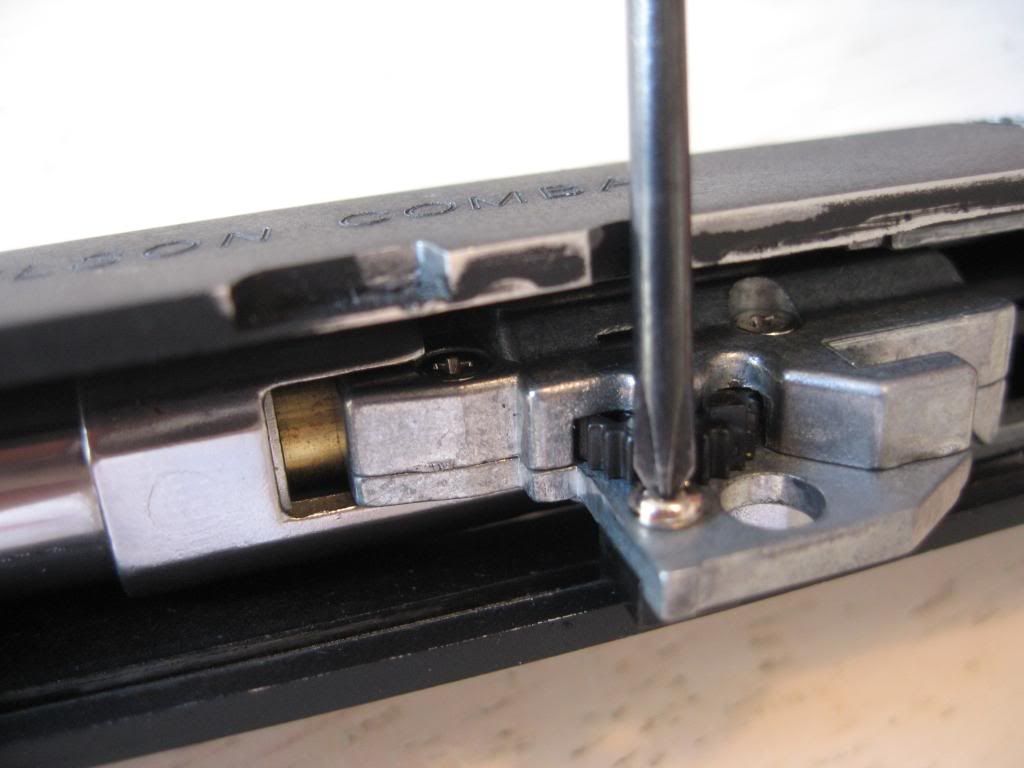
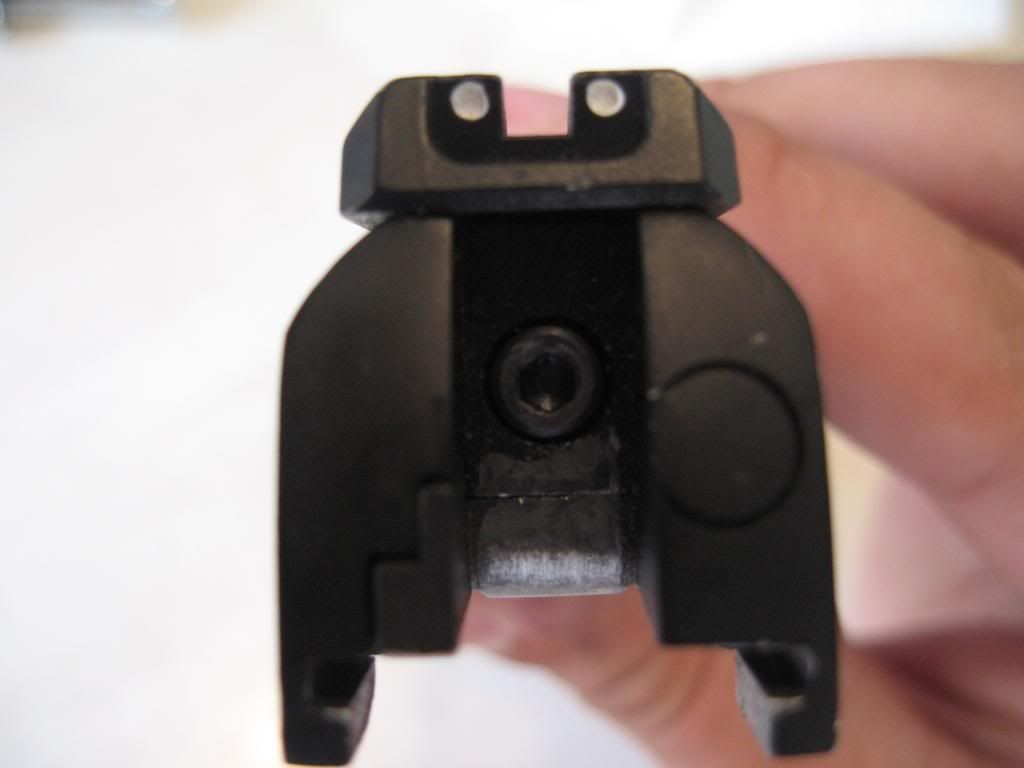
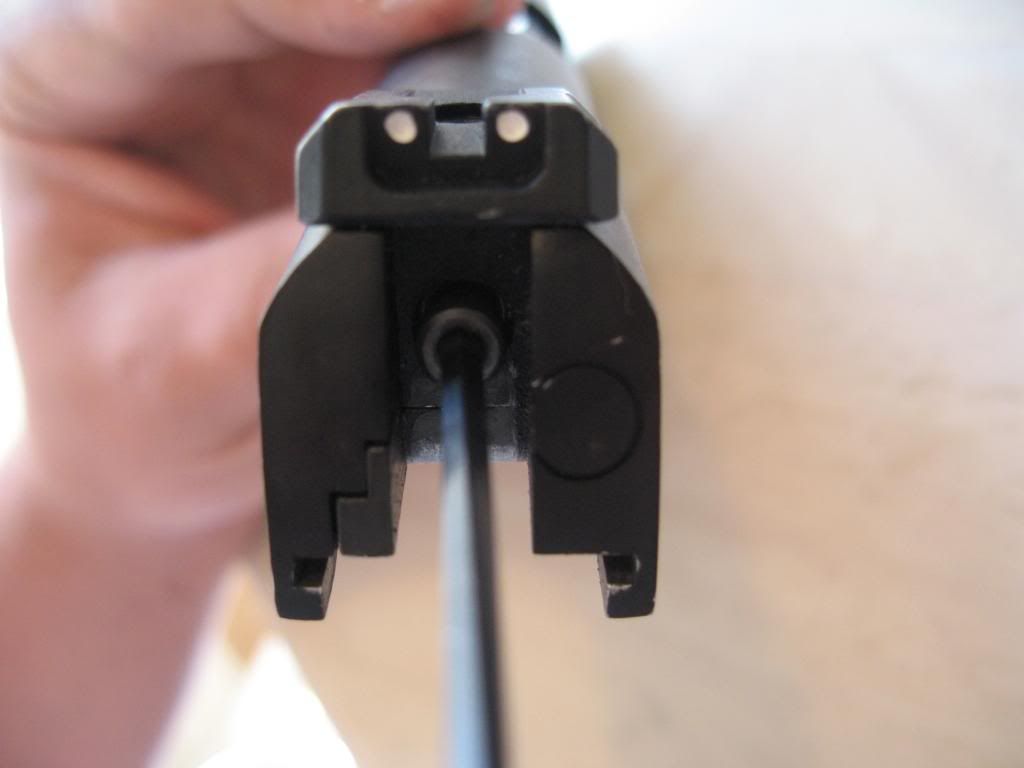
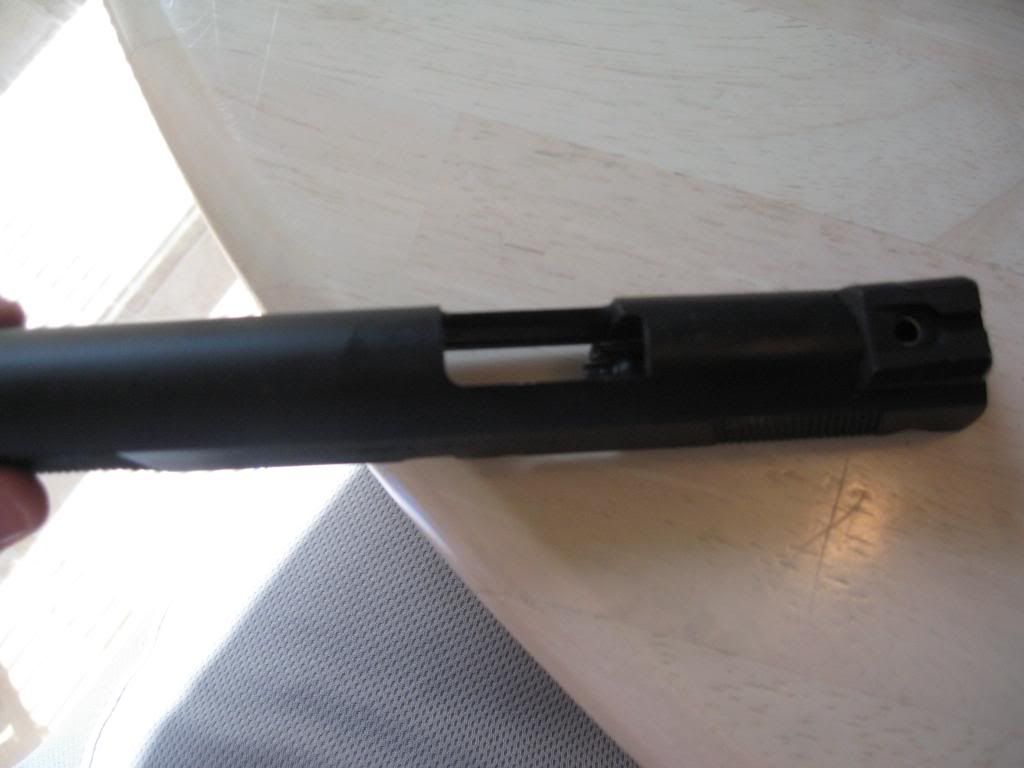
2) Locate the allen screw on the back of the slide. (Area where the hammer strikes to make the gun shoot) Remove the allen screw.
Parts Pile #1:
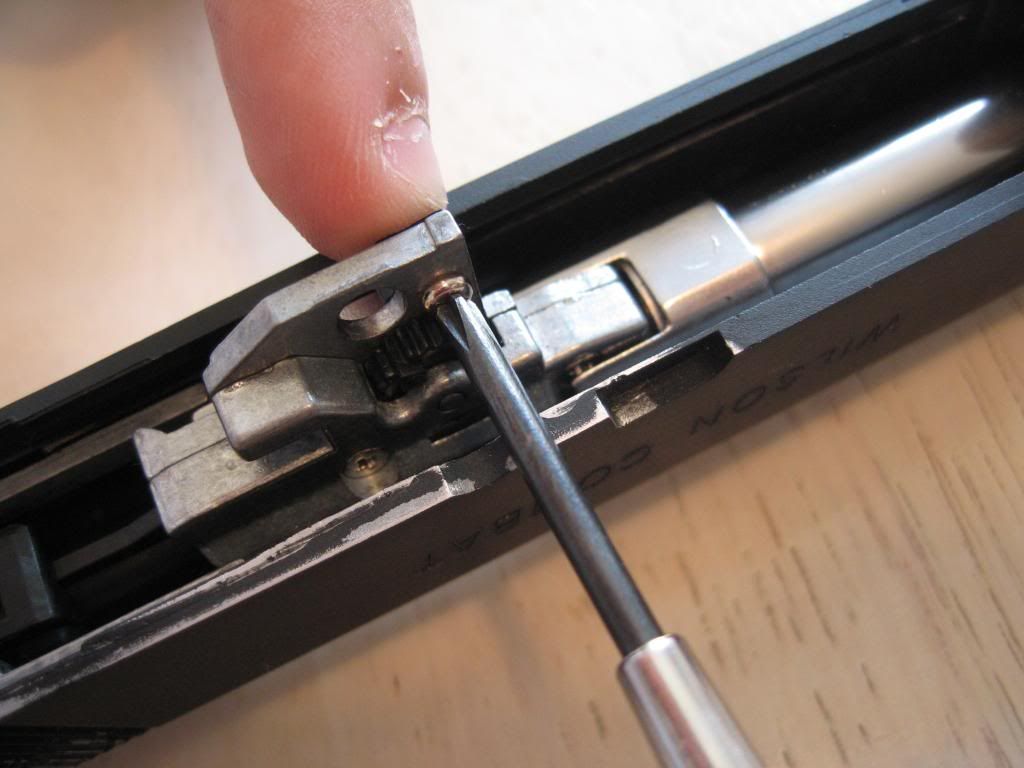
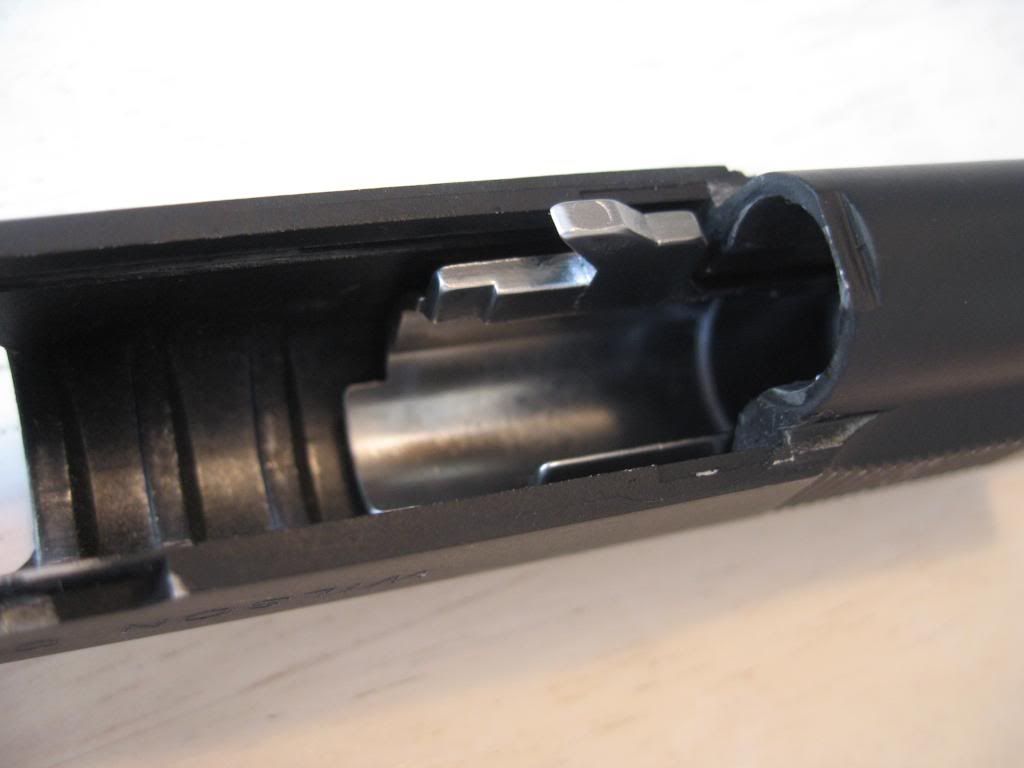
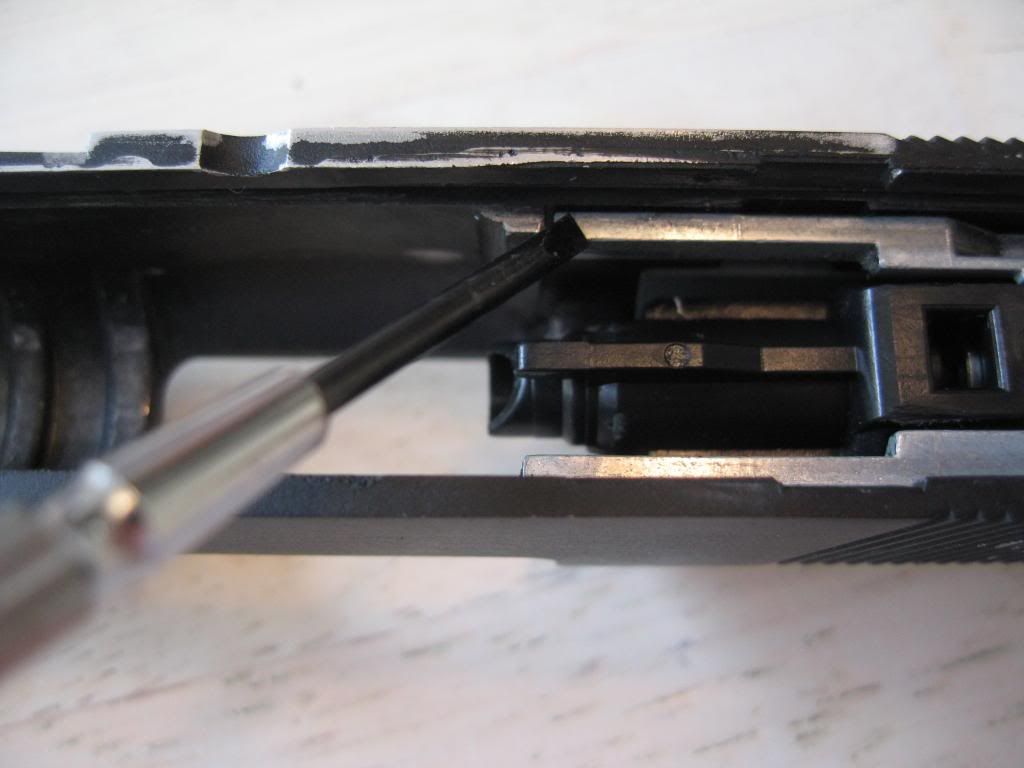
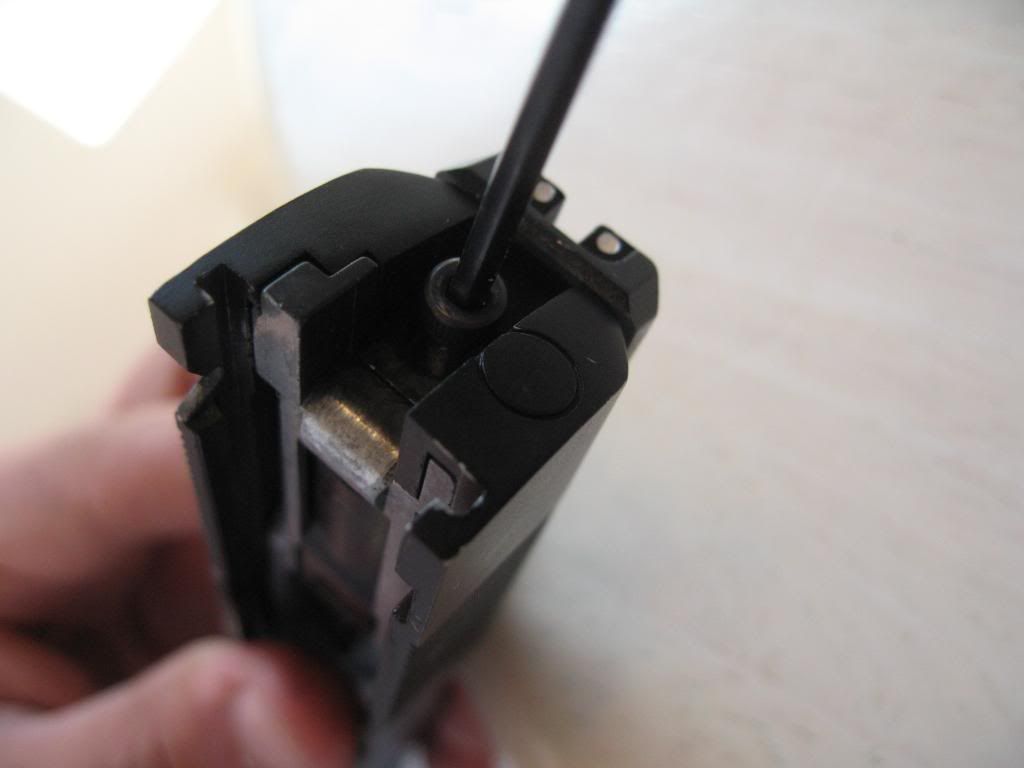
3) Now you are able to remove the entire rear slide assembly. You can use one of your flat head screwdrivers to GENTLY push up the tabs on the slide walls.
Stick the screwdriver through the ejection port and place it against the slide wall to push up the rear assembly.
Screwdriver pointing to tabs:
Against tab:
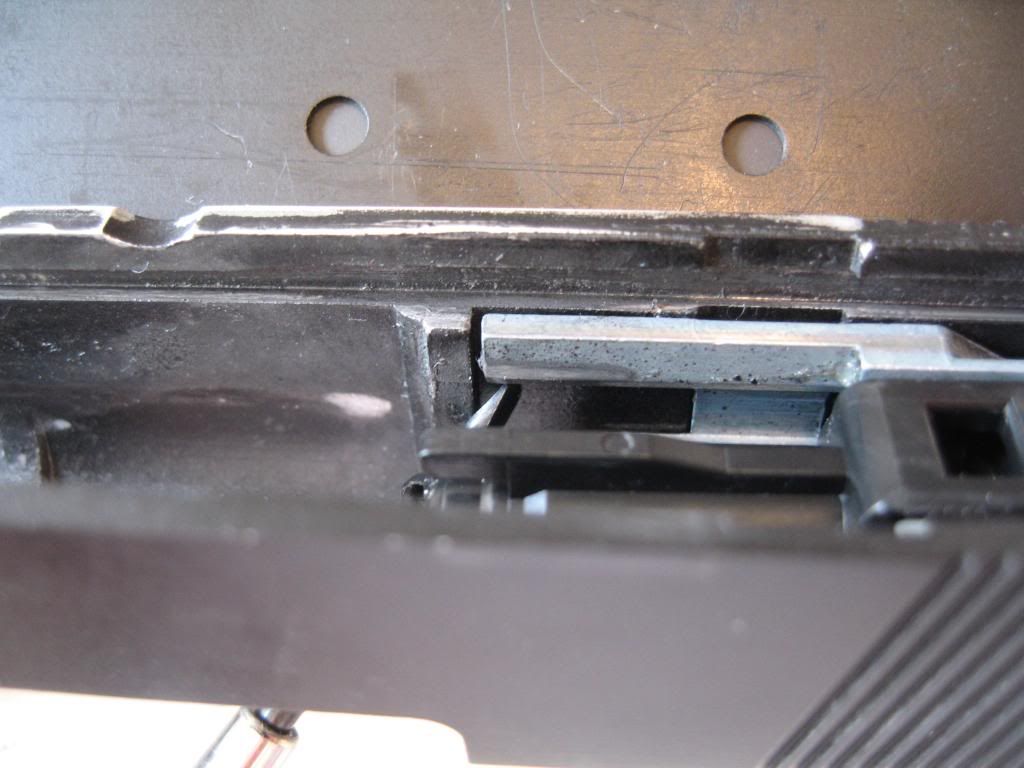
Tab has been moved slightly:
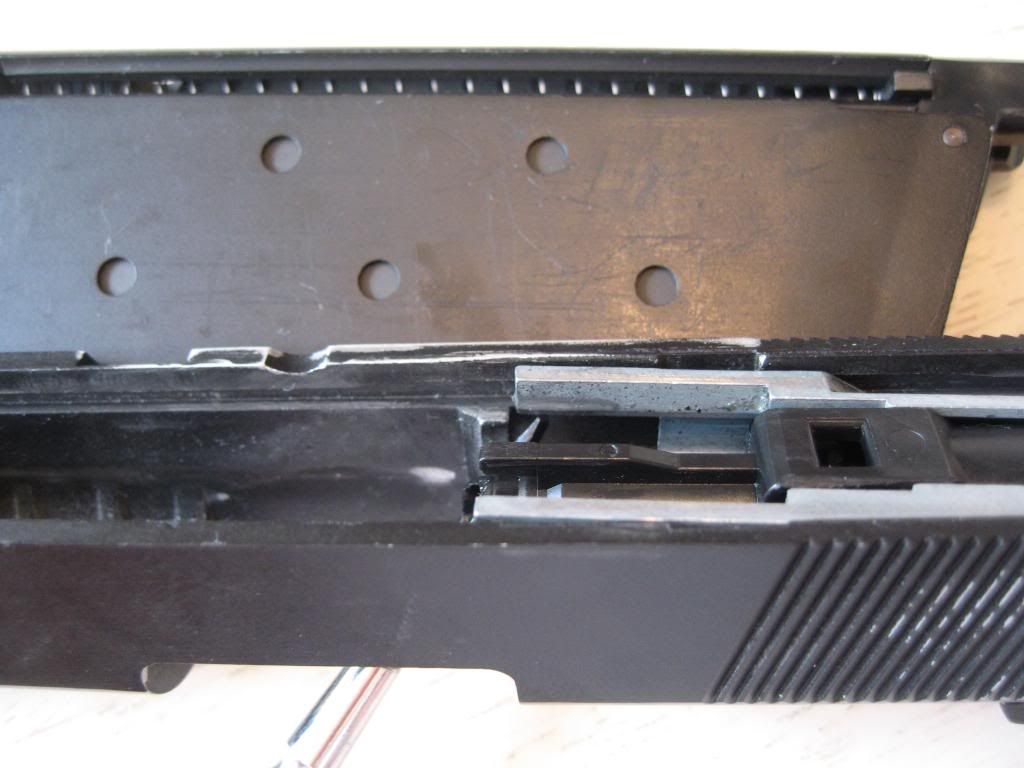
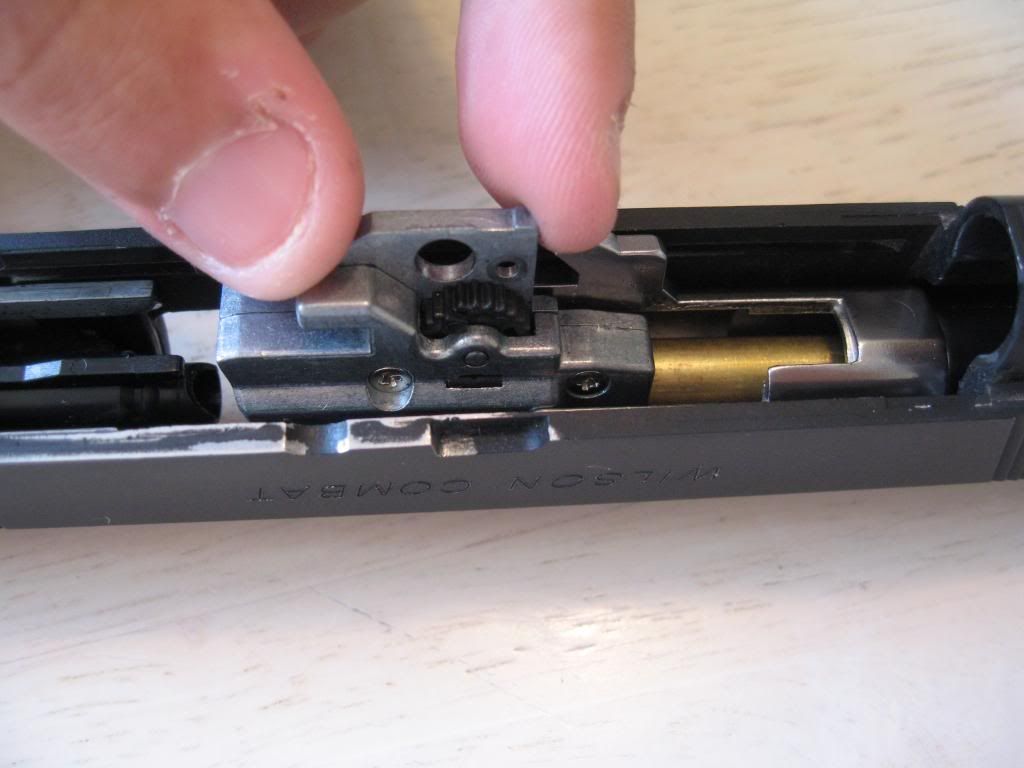
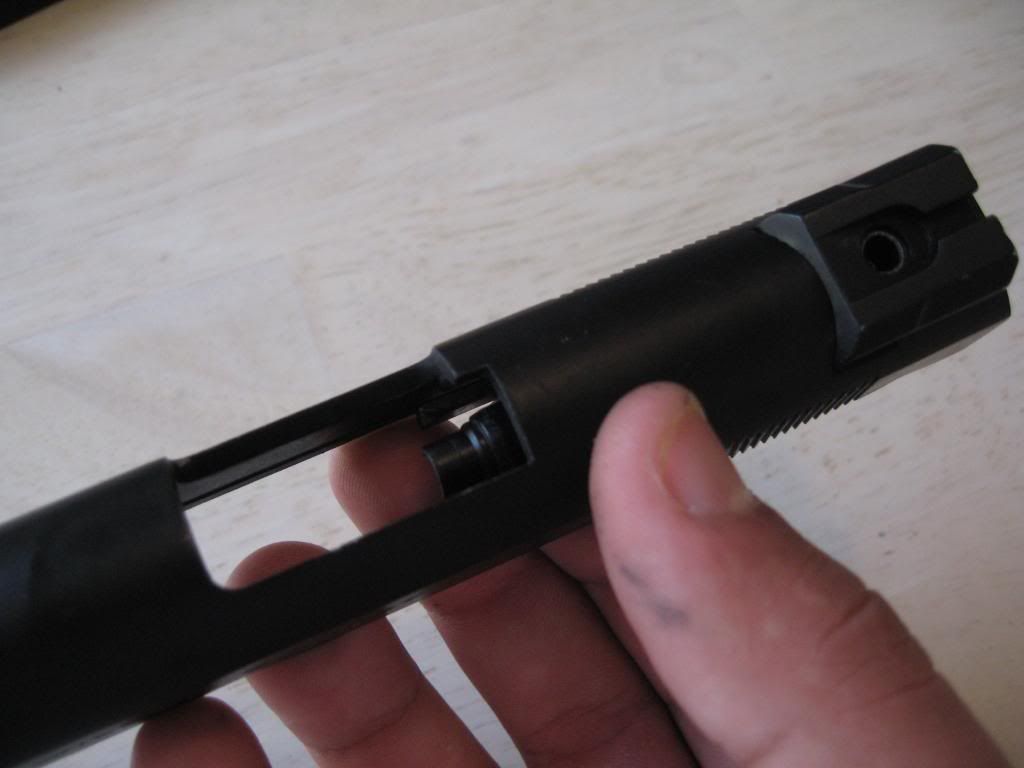
4) Once you have pushed up the tabs a few millimeters, you can move to the back of the slide again, and use that gap to remove the assembly further.
Back Gap:
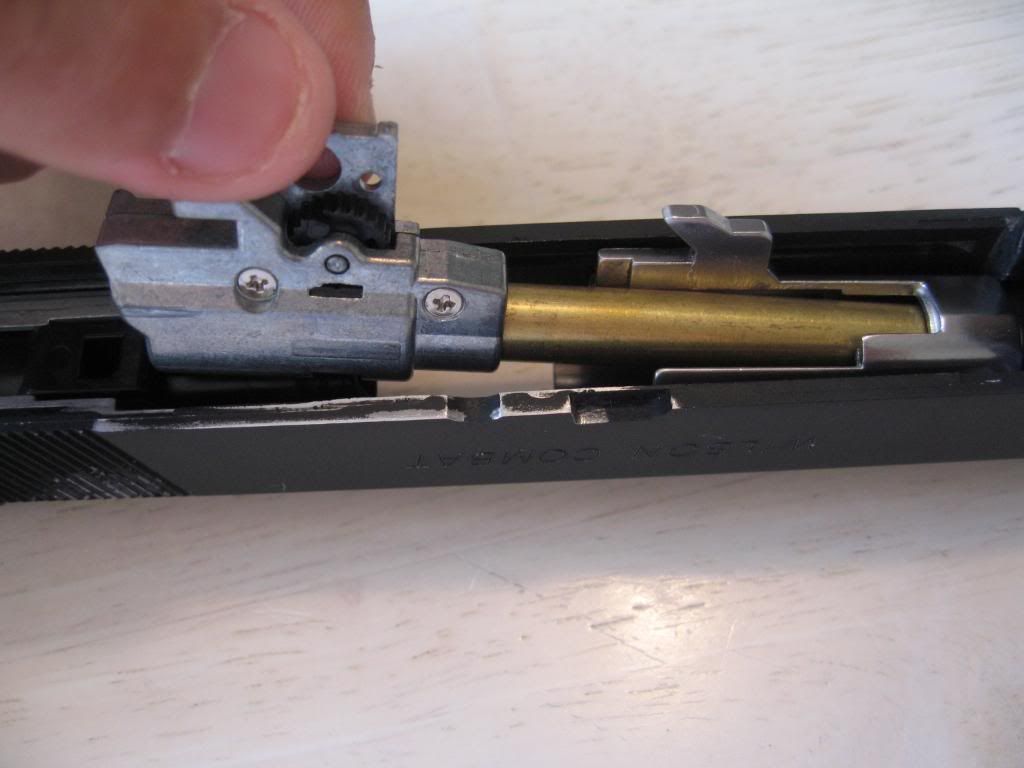
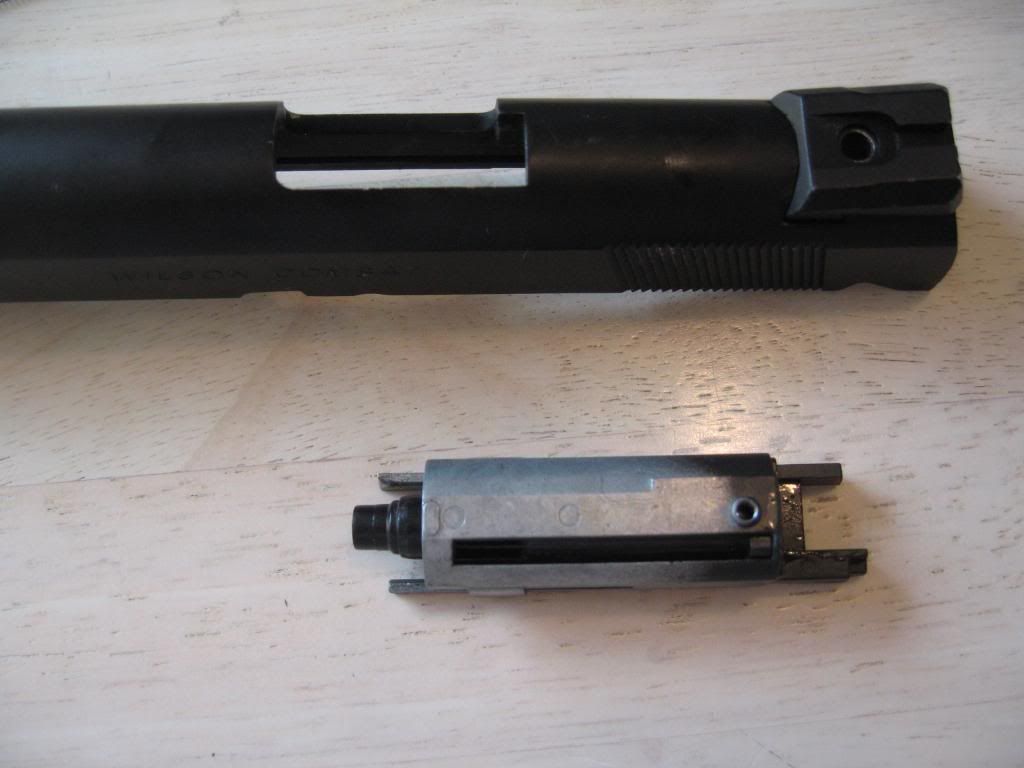
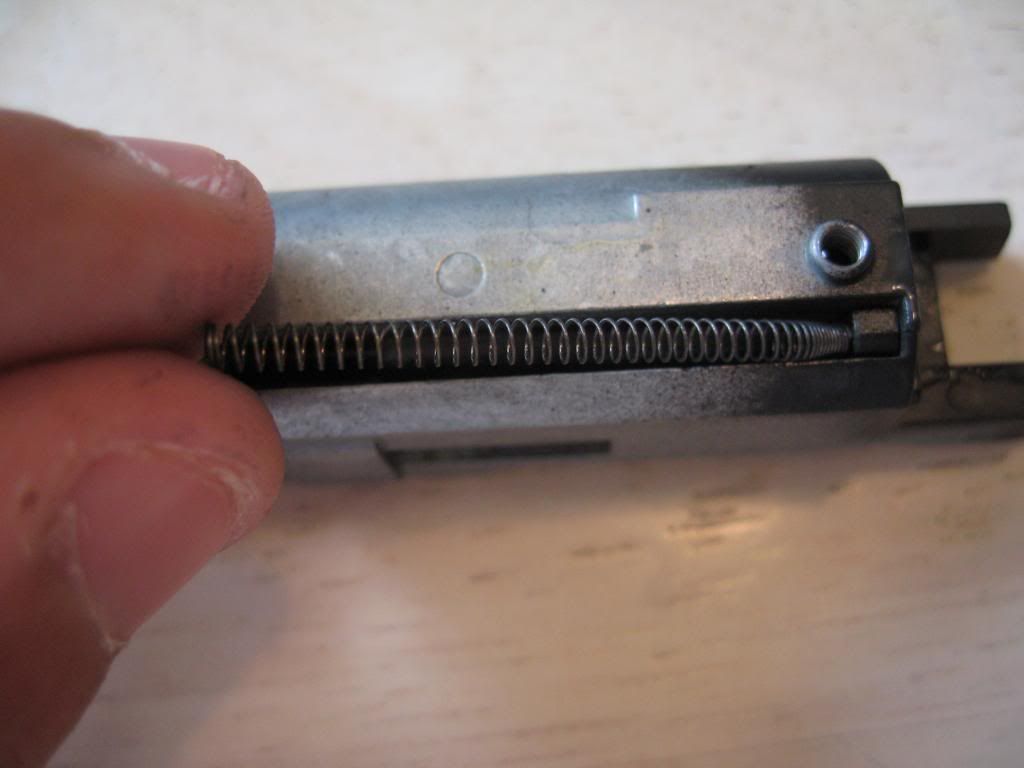
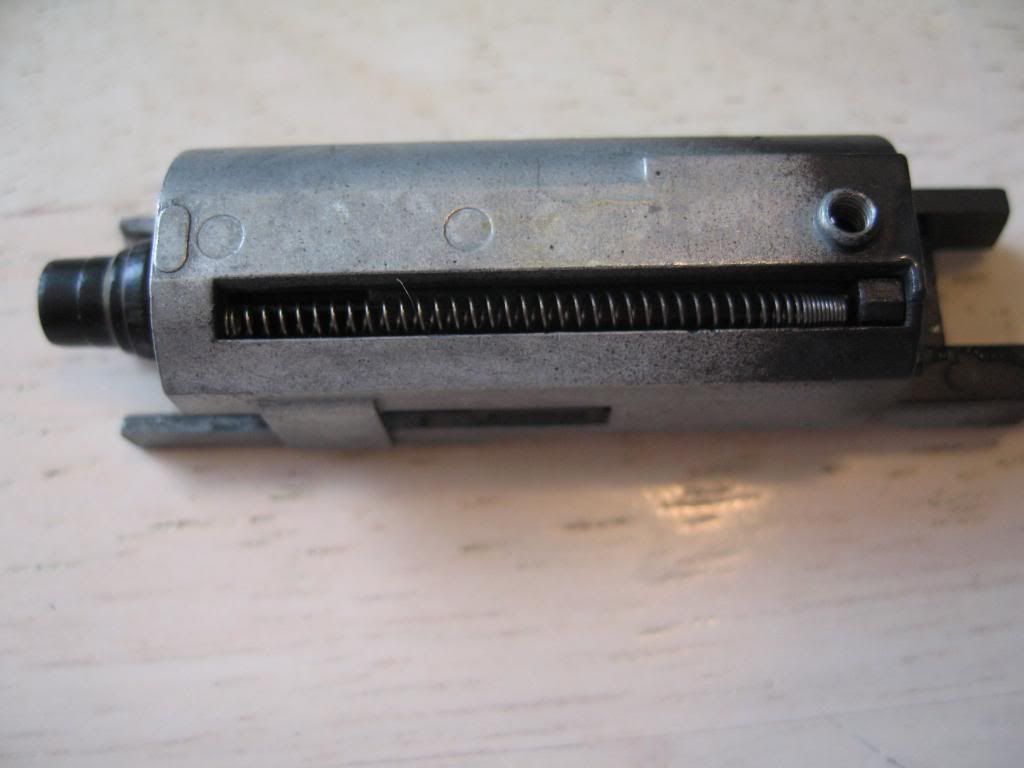
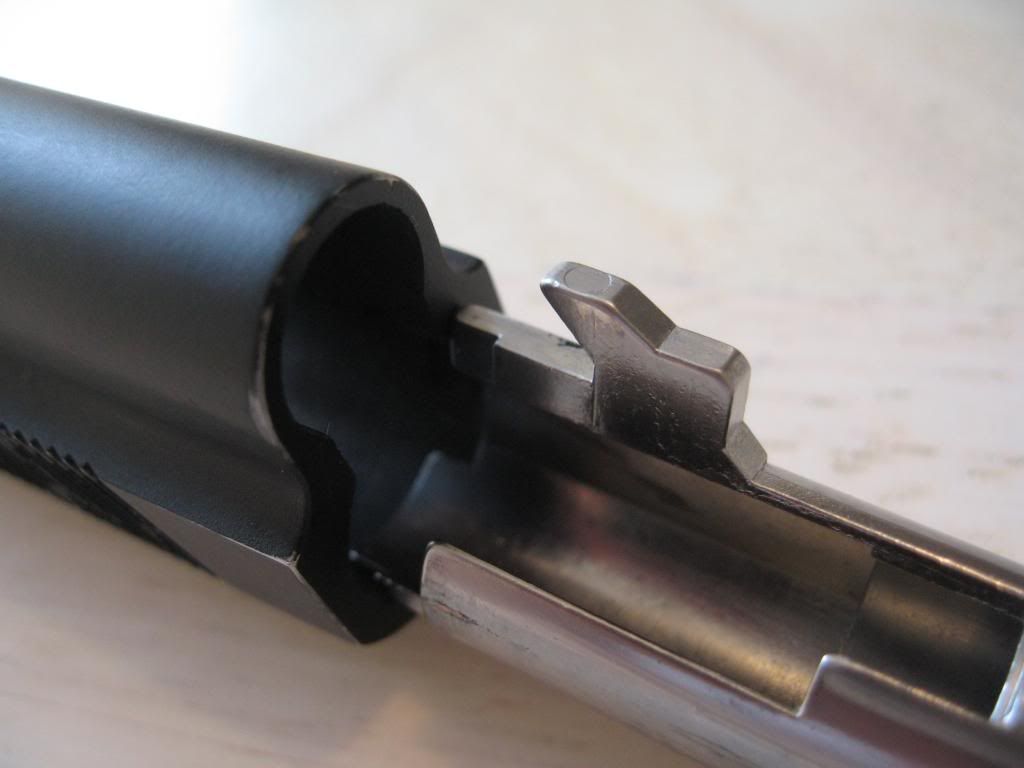
5) You can now remove the assembly.
Parts Pile #2:
6) Once you remove the assembly, your slide will probably look like this, with a small spring still in the slide. Do not fear, this spring is VERY easy to put back in the assembly.
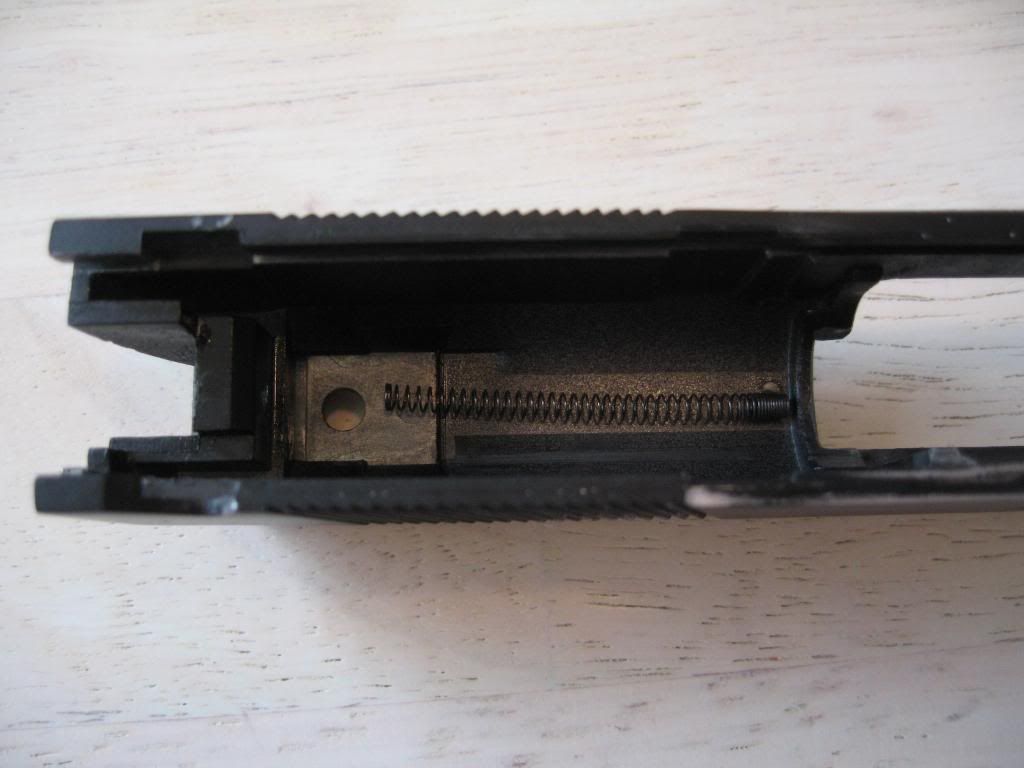
Parts Pile #3:

That is your final parts pile for the rear slide assembly takedown. You are now ready to re-assemble the rear portion.
Slide Re-Assembly Instructions:
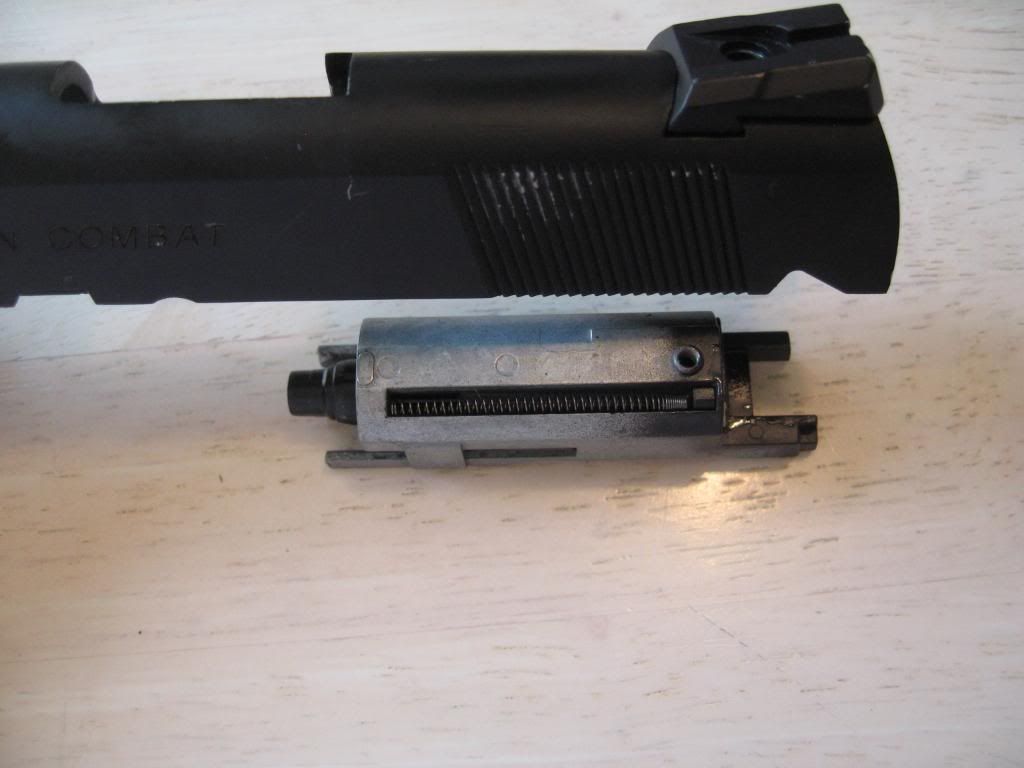
1) Grab your rear assembly and place it next to your slide making sure they face the same direction, and the rear assembly is positioned correctly near the back of the slide.
2) Drop the spring back into the rear assembly as shown.

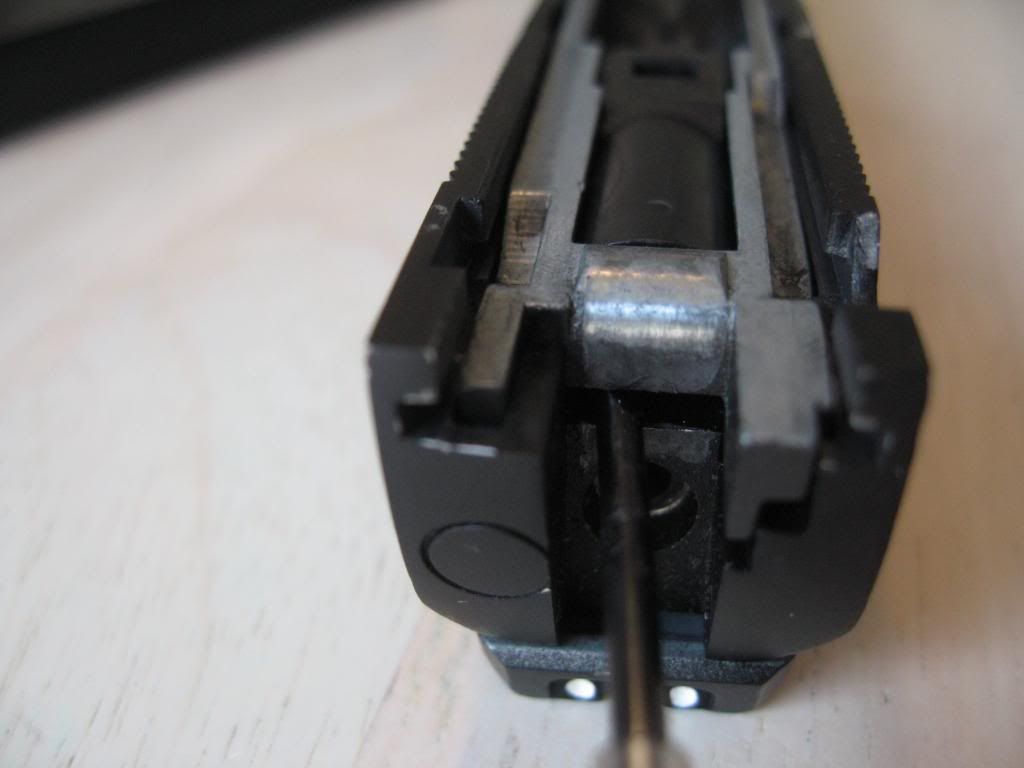
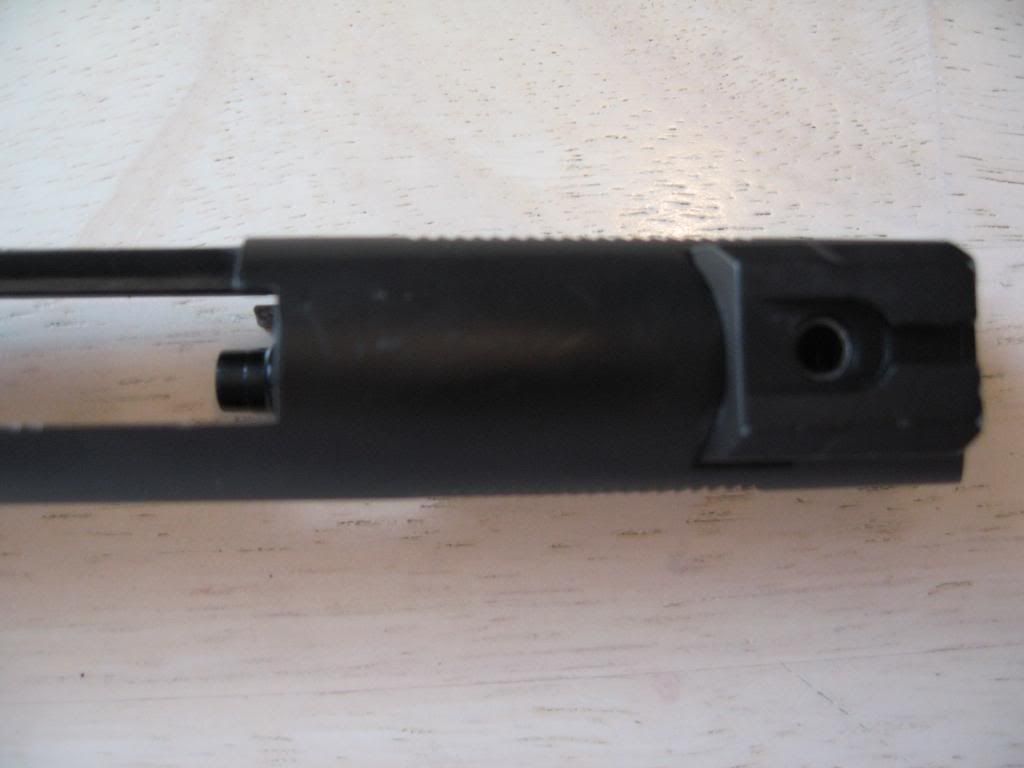
3) Lift up your 1911 slide and place it over the rear assembly. Be careful not to press too hard or else you could break something.
The easiest way I found was to try and line up the hole in the rear sight with the hole in the rear slide assembly.
Slide being lined up:
Holes Lined Up:
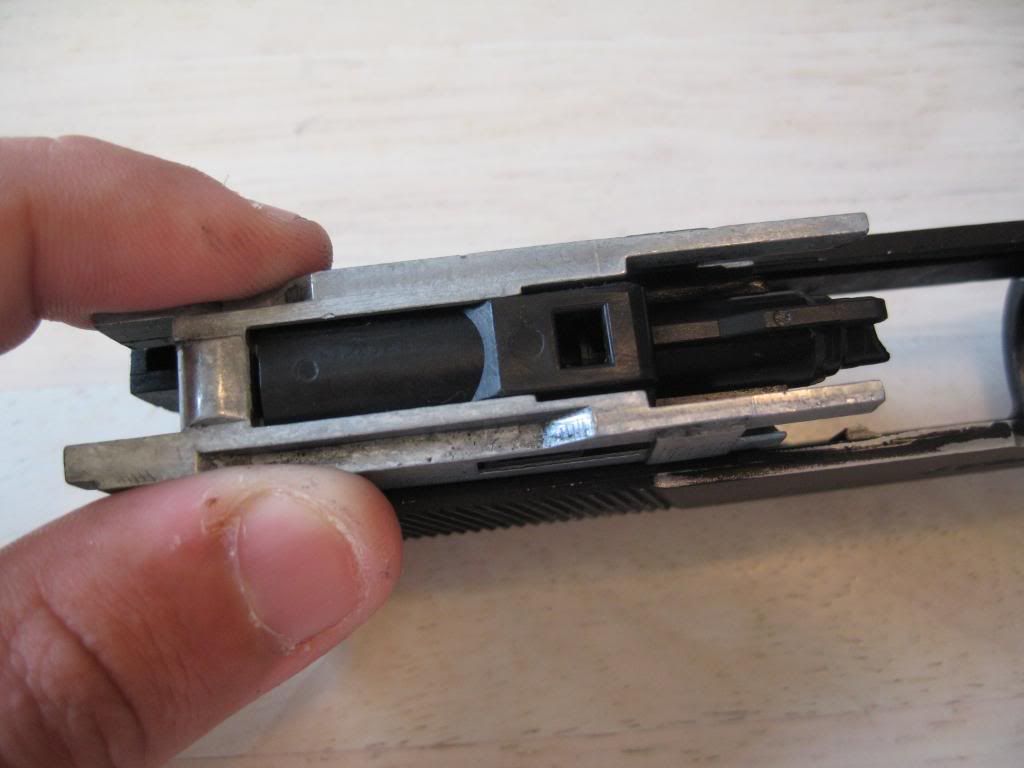
4) Once you have the slide fitted over the rear assembly, put your hand under the entire slide to keep the rear assembly from lowering and the spring from falling out.
The easiest way I found was to slide the front off your work surface (A Table) and place your hand under the slide.
Slide off the table:
Hand Securing assembly:
5) Now with the rear assembly in place, you can put the allen screw back in at the rear of the slide.
6) Screw your rear sight screw back in.

Your rear slide assembly is now in place, time for the Front/Barrel portion of the slide.
7) Place your outer barrel back in the front of the slide. Once inserted, rotate the barrel towards you. (Counterclockwise)
Barrel in slide:
Rotated:
8) Slide your outer barrel back into the rear assembly. Now, insert the inner barrel using the opposite method you took it out with. Tilt the brass barrel into the end of the outer barrel and insert it in.
Outer barrel slid back:
Inner barrel inserting:
Inner barrel fully inserted:
9) Now secure your inner barrel using the small set screw and small Black back-plate.
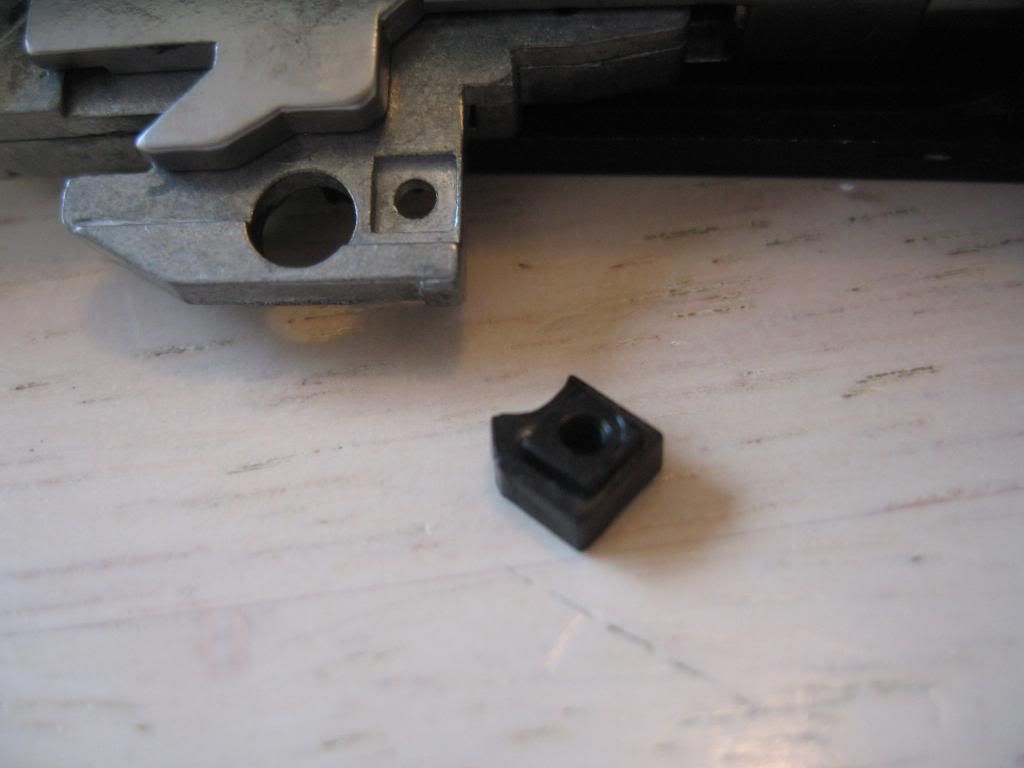
Insert the square side of the back-plate in the small indentation on the Hop-Up chamber
Indentation:
10) To get the screw in easier, I magnetized my screwdriver by sticking it to my PTW motor. If you don't have a magnet to hold your screw, this step may a little bit difficulty if you don't have a buddy to help you.
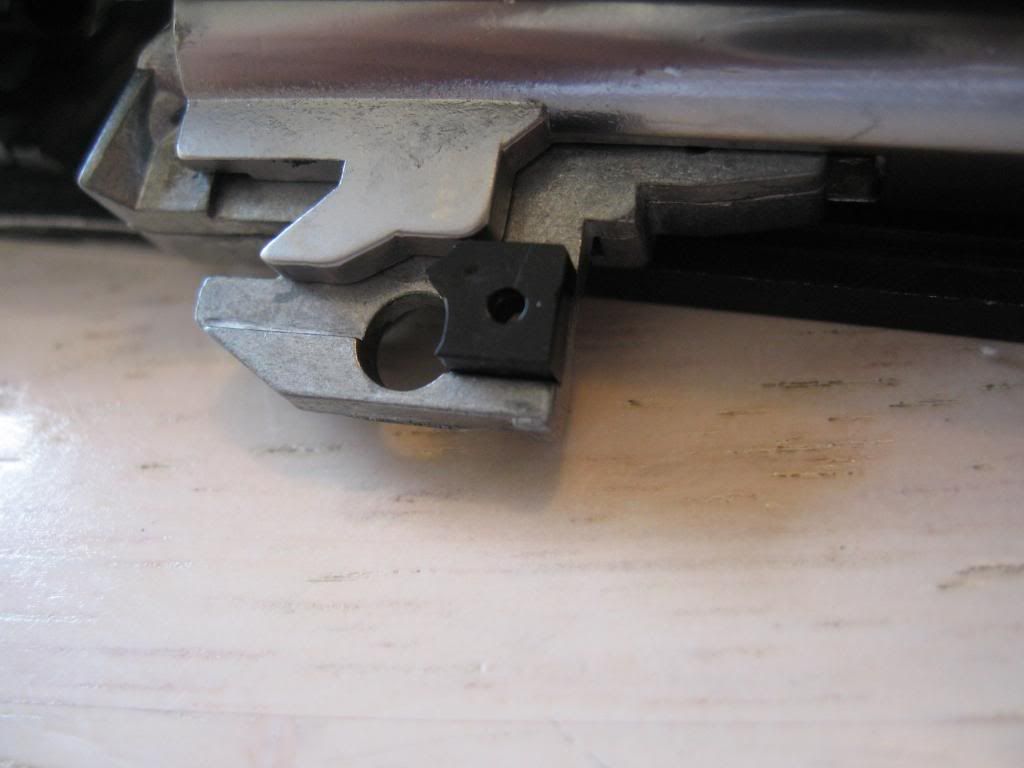
Once you have the back-plate in the indentation, tilt the Hop-Up unit so the back-plate is resting against the wall of the slide.
Resting against wall:
11) Now install the screw through the plate.

12) Re-install the barrel bushing, by inserting it and rotating it approximately 90 degrees clockwise.
Inserted:
Rotated:
13) Insert your spring guide bushing/housing.
Placing it in:
Inserted:
14) Re-insert your spring guide assembly.
15) Cock back the hammer of the slide if you did not leave it cocked while removing the slide during the first few steps.
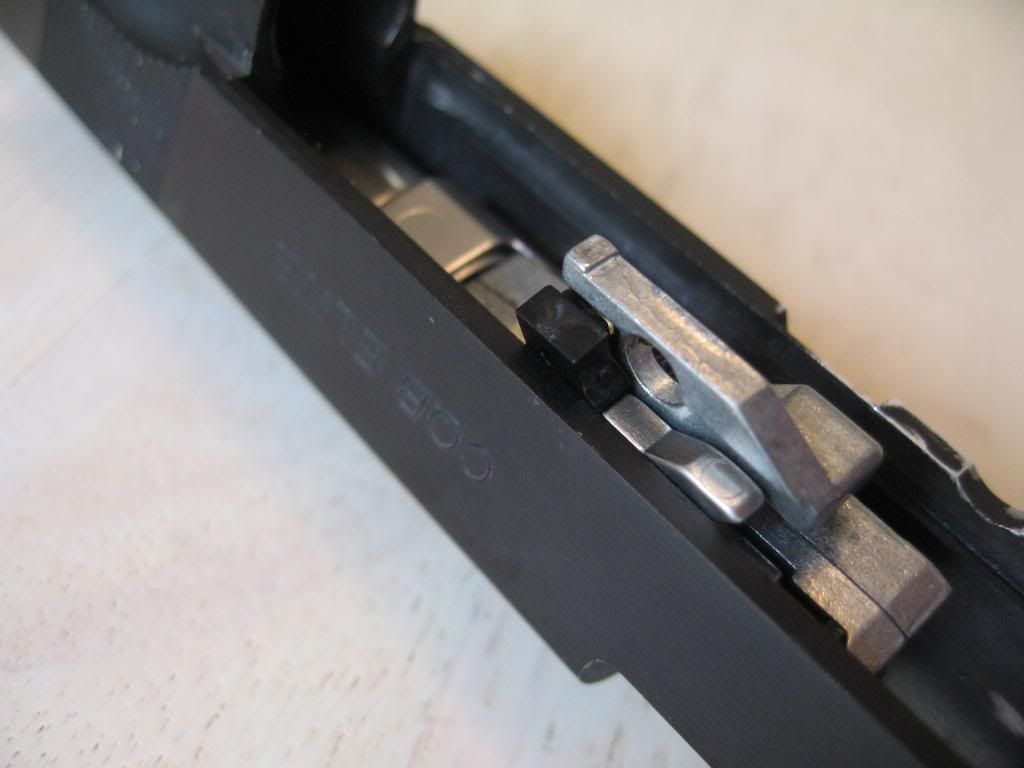
16) Put the slide back on the lower frame by matching up the rails with the grooves on the slide as shown.

17) Pull back your slide to this position one more time.
18) Insert your slide lock back in, and let the slide go forward to lock it back in.
Your Done!!!!!
This guide is done with a fully functioning 1911, if yours is broken or damaged, you may have to take it apart using a different method or by skipping certain steps of the process. Please make sure that you know what you are doing before attempting this since no one likes to break their own gun.

I took some pictures of what your "Parts Pile" should look like throughout the process to make sure you didn't remove the wrong part, and to assist in keeping everything organized.
============================================================================================
Model: 08' WE Wilson Combat 1911 Tactical
1911 Slide Dissasembly Guide:
1) Remove your magazine from the gun.
2) Rack back your slide to this position then release the slide lock.
3) Pull your slide back once more until you have it in this position.
4) While holding your slide in place with your hand as shown, turn the gun over to the opposit side and push out the slide lock.
5) Once pushed out, you will have something like this, or the lock will just fall out depending on how tightly it is held in place.
6) Now gently remove the slide from the lower frame.
7) Grab your recoil spring assembly and pull it up away from the barrel in order to remove it.
Grab it:
Removed:
Parts Pile #1:
8) Next, remove your spring guide bushing/housing. (Part name?)
Parts Pile #2:
9) Now remove the barrel bushing. Twist it Counter clockwise approximately 90 degrees to remove it from the front of the slide.
Bushing Location:
Rotated:
Parts Pile #3:
10) Remove the Inner Barrel and Hop-Up unit by unscrewing this small screw on the hop up unit and small Black back-plate.
Keep pressure on the back-plate to avoid from stripping the plastic piece and to get the screw out in less time.
Parts Pile #4:
11) Now remove the Inner Barrel by sliding it out from the Outer Barrel unit. You need to tilt the Inner Barrel up slightly to remove it a bit easier.
Parts Pile #5:
12) Now remove the Outer Barrel by rotating it towards you (Or Clockwise) slightly.
Part Location:
Rotated:
Parts Pile #6:
That is what your final pile should look like once you are done taking apart the Front/Barrel portion of the slide.
You are now done with the front portion of the slide. Enjoy an ice cold Pepsi Cola (Yes, Pepsi has paid for this advertising) and move onto the back portion.
Rear Portion Dissasembly
1) Remove your rear sight set screw.
2) Locate the allen screw on the back of the slide. (Area where the hammer strikes to make the gun shoot) Remove the allen screw.
Parts Pile #1:
3) Now you are able to remove the entire rear slide assembly. You can use one of your flat head screwdrivers to GENTLY push up the tabs on the slide walls.
Stick the screwdriver through the ejection port and place it against the slide wall to push up the rear assembly.
Screwdriver pointing to tabs:
Against tab:
Tab has been moved slightly:
4) Once you have pushed up the tabs a few millimeters, you can move to the back of the slide again, and use that gap to remove the assembly further.
Back Gap:
5) You can now remove the assembly.
Parts Pile #2:
6) Once you remove the assembly, your slide will probably look like this, with a small spring still in the slide. Do not fear, this spring is VERY easy to put back in the assembly.
Parts Pile #3:
That is your final parts pile for the rear slide assembly takedown. You are now ready to re-assemble the rear portion.
Slide Re-Assembly Instructions:
1) Grab your rear assembly and place it next to your slide making sure they face the same direction, and the rear assembly is positioned correctly near the back of the slide.
2) Drop the spring back into the rear assembly as shown.
3) Lift up your 1911 slide and place it over the rear assembly. Be careful not to press too hard or else you could break something.
The easiest way I found was to try and line up the hole in the rear sight with the hole in the rear slide assembly.
Slide being lined up:
Holes Lined Up:
4) Once you have the slide fitted over the rear assembly, put your hand under the entire slide to keep the rear assembly from lowering and the spring from falling out.
The easiest way I found was to slide the front off your work surface (A Table) and place your hand under the slide.
Slide off the table:
Hand Securing assembly:
5) Now with the rear assembly in place, you can put the allen screw back in at the rear of the slide.
6) Screw your rear sight screw back in.
Your rear slide assembly is now in place, time for the Front/Barrel portion of the slide.
7) Place your outer barrel back in the front of the slide. Once inserted, rotate the barrel towards you. (Counterclockwise)
Barrel in slide:
Rotated:
8) Slide your outer barrel back into the rear assembly. Now, insert the inner barrel using the opposite method you took it out with. Tilt the brass barrel into the end of the outer barrel and insert it in.
Outer barrel slid back:
Inner barrel inserting:
Inner barrel fully inserted:
9) Now secure your inner barrel using the small set screw and small Black back-plate.
Insert the square side of the back-plate in the small indentation on the Hop-Up chamber
Indentation:
10) To get the screw in easier, I magnetized my screwdriver by sticking it to my PTW motor. If you don't have a magnet to hold your screw, this step may a little bit difficulty if you don't have a buddy to help you.
Once you have the back-plate in the indentation, tilt the Hop-Up unit so the back-plate is resting against the wall of the slide.
Resting against wall:
11) Now install the screw through the plate.
12) Re-install the barrel bushing, by inserting it and rotating it approximately 90 degrees clockwise.
Inserted:
Rotated:
13) Insert your spring guide bushing/housing.
Placing it in:
Inserted:
14) Re-insert your spring guide assembly.
15) Cock back the hammer of the slide if you did not leave it cocked while removing the slide during the first few steps.
16) Put the slide back on the lower frame by matching up the rails with the grooves on the slide as shown.
17) Pull back your slide to this position one more time.
18) Insert your slide lock back in, and let the slide go forward to lock it back in.
Your Done!!!!!